20 Behind the Ear Butterfly Tattoos For Women
Nervous about picking behind the ear butterfly tattoos you might regret in five years? That’s a fair worry, and it’s exactly why I put this guide together the way I did.
I’ve spent enough time around tattoo studios, watching consultations and healed pieces come back for touch-ups years later, to know what actually holds up behind the ear versus what just looks good in a single filtered photo. This isn’t a recycled list of pretty pictures — it’s built around real technique knowledge, placement geometry, and what the skin behind your ear actually does to fine detail over time.
So what makes a great behind the ear butterfly tattoo? Fine-line or small blackwork designs under two inches tend to work best here, since the skin is thin, curved, and tight on space. Simple linework heals cleanly and stays crisp for years, while heavy shading or dense color can blur or fade unevenly on this particular spot.
Stick around, because below I’m covering 20 specific design directions, plus the placement tradeoffs, realistic pain level, cost range, and aftercare details that most design roundups skip entirely.
Why Behind The Ear Butterfly Tattoos Work So Well As A Design Category
Butterflies already carry a lot of built-in symbolism — transformation, freedom, softness — but the reason they specifically suit the behind-the-ear spot comes down to shape and scale. A butterfly’s silhouette is naturally symmetrical and compact, which maps well onto a small, curved canvas. You don’t need a lot of surface area to make the wing shapes read clearly, unlike a portrait or a large floral piece that needs room to breathe. It’s also a placement that lets you control visibility easily — hair down hides it, hair up shows it off. For a first tattoo, or for anyone who wants something meaningful without it dominating their look, this combination of small scale, symbolic weight, and flexible visibility is hard to beat.
Fine-Line Single Butterfly
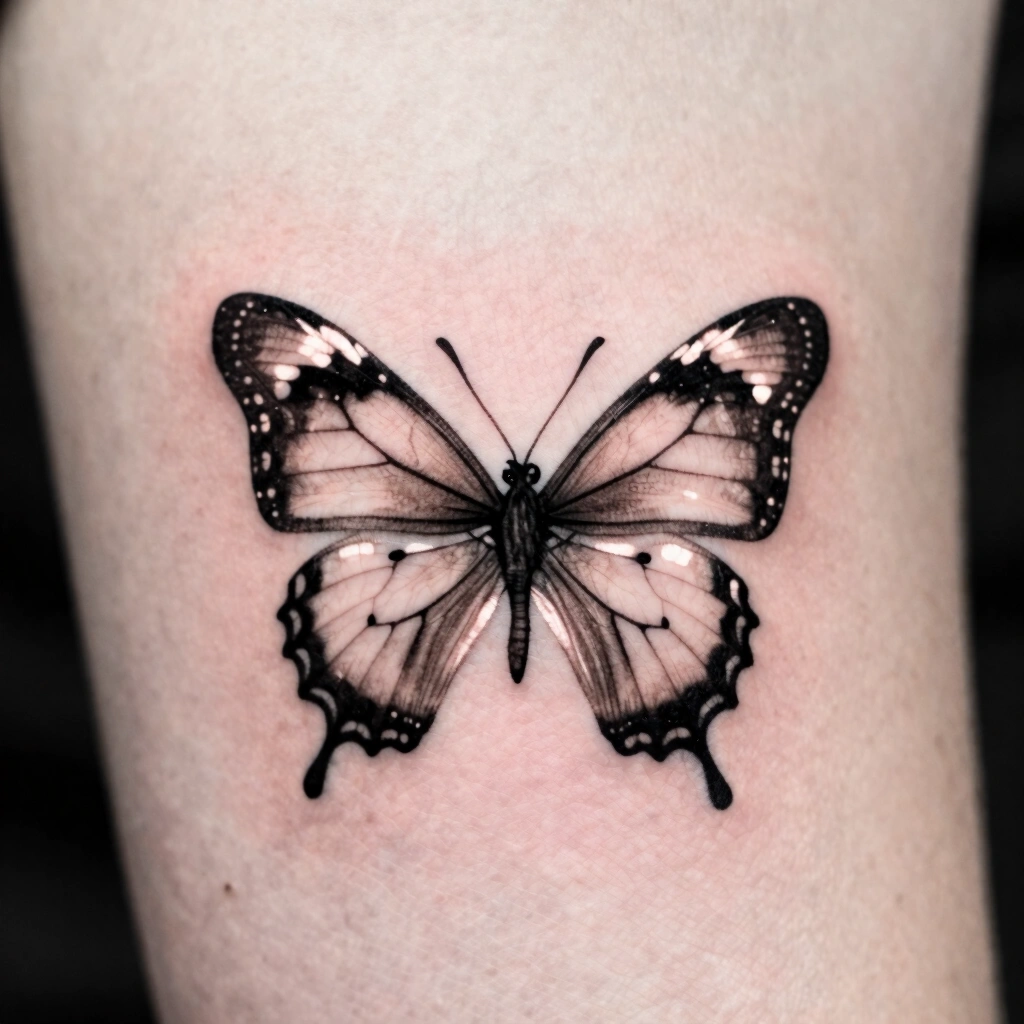
This is the design most people picture when they think of a discreet ear tattoo. It uses a single continuous outline, usually done with a fine-line technique that relies on a thin needle configuration (often a single needle or a small round liner) to keep the strokes delicate and even. There’s no shading, no fill — just clean linework tracing the wing shapes and antennae. Best kept under an inch and a half, positioned just behind the upper ear where the skin is flatter. Bring a reference image with simple, uncluttered wing lines so your artist can adapt it to fit the curve without distorting proportions. Pain here is generally mild to moderate since it’s close to cartilage, though individual tolerance varies.
It’s an easy first-tattoo choice and stays sharp for years since there’s minimal ink density to blur. From here, let’s look at how far you can push that simplicity.
Micro Minimalist Butterfly

Take the fine-line idea and shrink it further — we’re talking half an inch or smaller. This works because a butterfly’s shape is recognizable even at a tiny scale, as long as the artist simplifies the wing details rather than trying to cram in texture. Single-needle work is essential here; anything heavier will bleed the lines together as it heals. Placement right behind the earlobe, almost tucked into the crease, keeps it nearly invisible unless someone’s looking closely. One practical tip: ask your artist to draw the stencil at actual size before you commit, since what looks fine on paper can lose clarity once shrunk onto skin.
This size is popular for matching tattoos among friends or sisters, since it’s low-commitment and budget-friendly. The tradeoff is that touch-ups may be needed sooner than with larger linework.
Blackwork Bold Butterfly
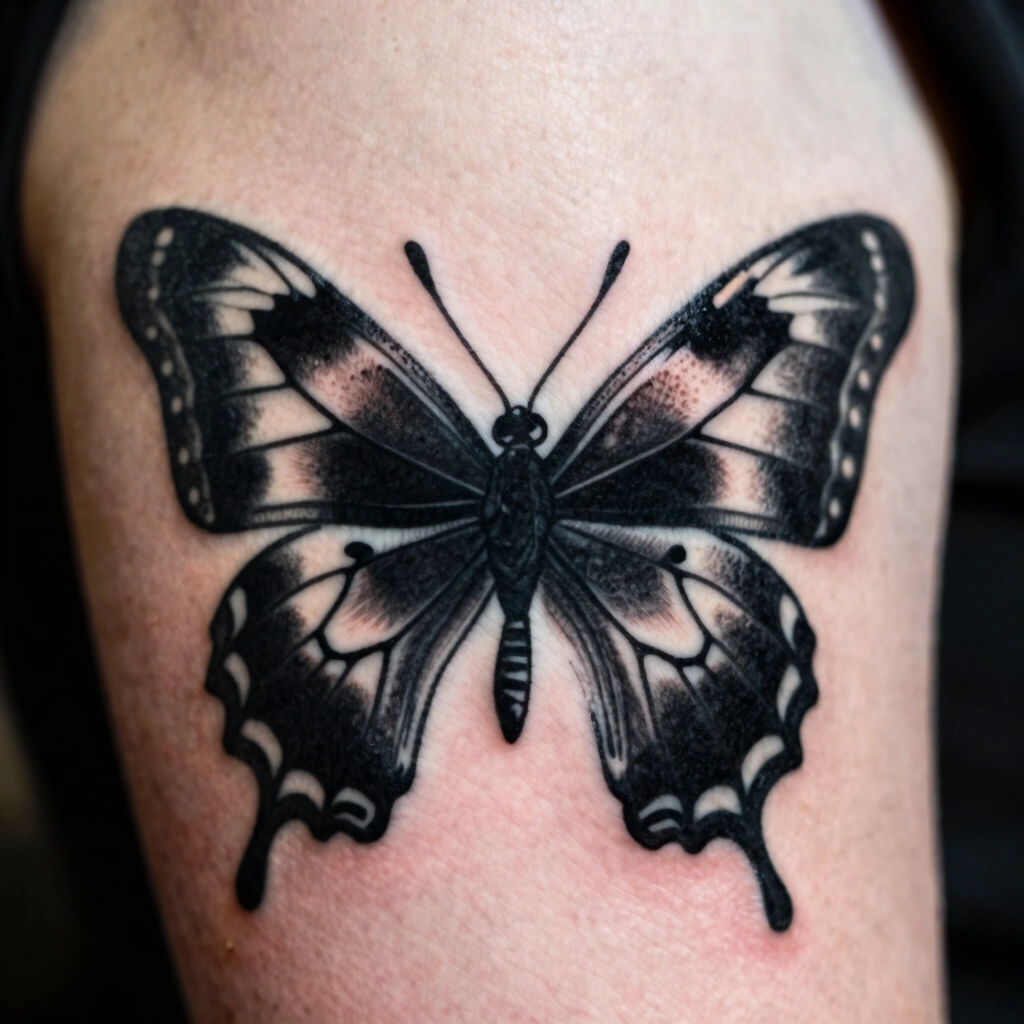
If subtlety isn’t the goal, blackwork flips the approach entirely. This technique uses solid black fill and thicker, confident line weight to create high contrast against the skin. Instead of a delicate outline, you get a graphic, almost silhouette-style wing shape with sharp geometric edges. It reads well from a distance and holds up better over decades than fine line, since solid black ink resists the “fuzzy fading” that thin lines can experience. Best placed slightly lower, near the mastoid bone behind the ear, where there’s a touch more flat surface for the fill work. Expect a bit more discomfort than fine line, since solid saturation means more passes over the same skin.
This is a strong option for anyone who’s had a small tattoo before and wants something with more visual weight for their next piece.
Dotwork Shaded Butterfly

Dotwork builds shading and texture out of thousands of tiny individual dots instead of solid fill or line strokes. Applied to a butterfly design, this creates a soft gradient across the wings — darker at the edges, fading toward the center — without ever using a heavy black fill. It’s a slower, more technical process, so expect a longer session than a comparable fine-line piece. Because the technique depends on precise dot spacing, ask to see healed (not just fresh) portfolio photos before booking, since dotwork can look different once it settles into the skin over a few weeks.
Keep the design around one to two inches so the dot gradient has room to actually show its transition. This style tends to age gracefully on lighter skin tones
where the contrast stays visible longer.
Watercolor-Style Butterfly

Watercolor tattoos use diluted ink and soft color blending to mimic the look of a paint wash, often without a hard black outline holding the shape together. On a butterfly, this usually means pastel or jewel-toned wings that bleed softly into each other. It’s visually striking, but I’ll be honest about the tradeoff: colored ink, especially without solid outlines, is more prone to noticeable fading over the years, and touch-ups happen more often than with blackwork or fine line. If you love the look, ask your artist about adding a thin fine-line outline for structure — it helps the design hold its shape as color settles.
This works best on a slightly larger scale, around two inches, since tiny watercolor work loses its blending effect fast.
Negative Space Butterfly

Negative space design flips the usual approach — instead of ink forming the butterfly, the untouched skin forms parts of the wings while black ink fills in the surrounding shape. It creates a layered, almost 3D look using contrast rather than pure linework. This is a more advanced technique, so you’ll want an artist experienced specifically in negative space work, not just general blackwork. Ask to see multiple healed examples, since this style depends heavily on precise placement of the ink boundary.
Keep it to about an inch and a half; too small and the negative space detail disappears. It suits people who already have some ink experience and
want something more distinctive than a standard outline butterfly.
Butterfly With Script Or Name

Pairing a small butterfly with a name, date, or short word adds personal meaning without turning the tattoo into a large piece. The script is usually done in fine-line cursive, positioned either curving beneath the wings or trailing off one antenna. The main challenge here is legibility at small scale — cursive script under an inch can blur into illegibility within a few years as fine lines soften slightly.
Ask your artist to slightly increase the letter stroke weight if you’re going smaller than an inch and a half total. This combination works well for memorial pieces or milestone tattoos, and it reads as more personal than a butterfly alone.
Matching Butterfly Duo Behind Both Ears

Instead of one design, this splits a single butterfly concept across both ears — sometimes literally splitting one butterfly into two mirrored half-wings, or placing two small complementary butterflies on each side. It’s a fun option for matching tattoos with a sister, best friend, or partner, since each person can have their own visible half of a shared symbol. Keep each side simple — fine line or light blackwork — so the mirrored effect reads clearly.
Book both sides in the same session if pain tolerance allows, since matching healing time makes the design settle more evenly.
Butterfly And Flower Combo

Adding a small flower, like a daisy or wildflower cluster, next to the butterfly gives the design more narrative and fills the space more intentionally. This usually stays in fine-line or light dotwork territory to keep both elements readable at small scale. The key technical challenge is balance — too much detail in both elements at once will compete for attention. Ask your artist to designate one element (usually the butterfly) as the visual focal point and simplify the other. This combo works nicely as a nature-themed tattoo and gives you flexibility to add more botanical elements later if you want to expand the piece.
Geometric Butterfly

This design translates the butterfly’s wings into angular, faceted shapes — think triangles, straight lines, or a low-poly style — instead of soft, organic curves. It relies on precise, deliberate linework, so line weight needs to stay consistent across every angle for the geometry to look intentional rather than sloppy. This style photographs well and holds up over time since sharp lines age more predictably than delicate curved detail. Best kept around an inch and a half so the geometric facets stay distinct. It’s a solid option if you want something symbolic but modern rather than classically decorative.
Solid Silhouette Butterfly

A pure black silhouette skips outlines and detail entirely, filling the entire wing shape with flat black ink. It’s bold, graphic, and reads instantly even from a distance, which makes it a strong choice if you actually want the tattoo to be noticeable when your hair’s up. Since there’s no fine detail to lose, this design ages exceptionally well compared to detailed linework. The main consideration is saturation — solid fill on the sensitive skin behind the ear can take a bit longer to heal than lighter linework, so budget extra downtime before swimming or heavy hair product use.
Realistic Shaded Butterfly

This approach uses fine shading gradients and detailed vein work on the wings to mimic an actual photographed butterfly, often based on a specific species like a monarch or swallowtail. It’s technically demanding and requires a longer session, since realism depends on smooth shading transitions that are hard to rush. Because of the detail level, this design needs more space than most other entries here — closer to two inches minimum. Bring a clear, well-lit reference photo of the exact species you want, since realistic work depends entirely on accurate source material.
Butterfly Trail Up The Neck

Instead of one butterfly, this uses two or three small butterflies of decreasing size, trailing from behind the ear down toward the nape of the neck as if in flight. It’s a great way to add movement and storytelling to a small tattoo without adding a lot of visual weight in any one spot. Keep the smallest butterfly under half an inch, since detail gets harder to maintain as scale shrinks. This works well for people who want a tattoo that flows with the body’s natural lines rather than sitting as a static single image.
Ornamental Mandala Butterfly
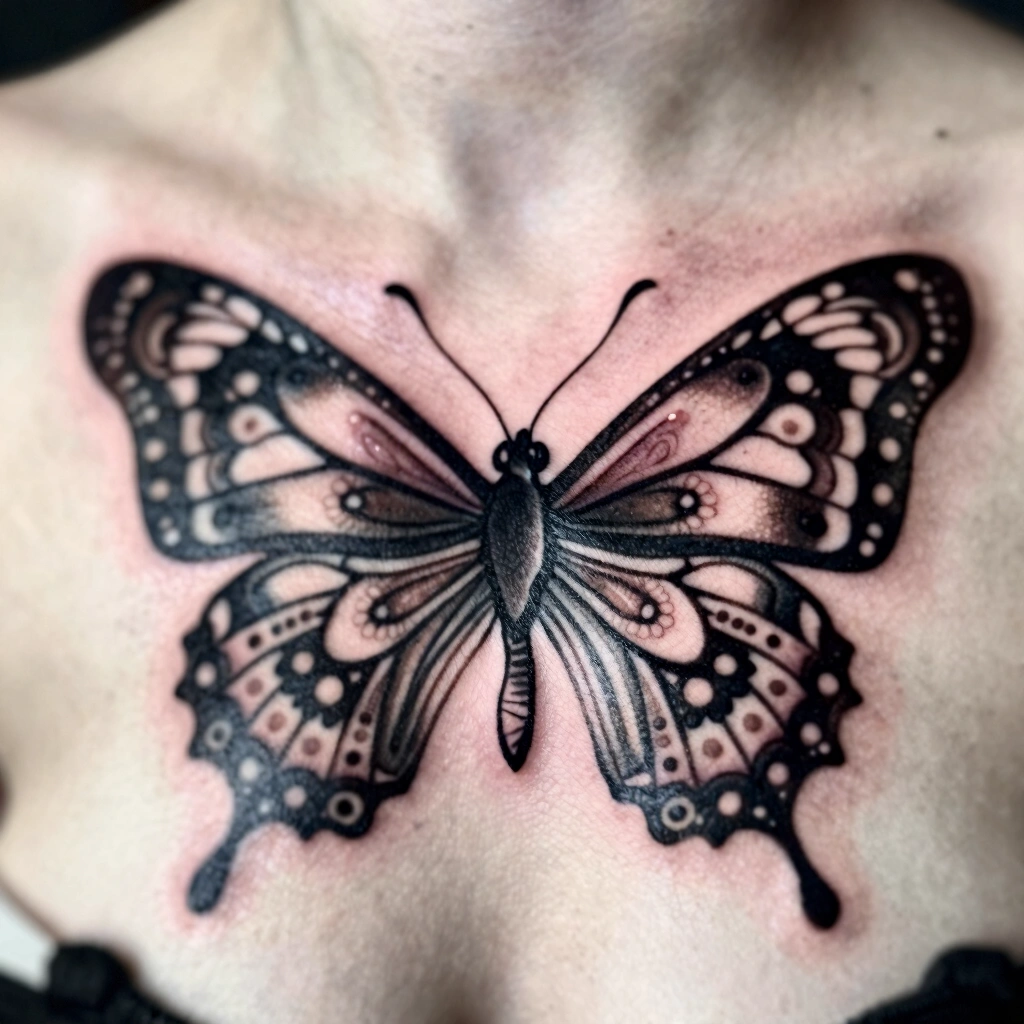
This design incorporates mandala-style patterning — symmetrical dots, swirls, or geometric details — directly into the butterfly’s wings, blending two aesthetics into one. It’s intricate, so it needs more space than a simple outline butterfly, ideally two inches or more, and often combines fine line with light dotwork for the patterned sections. Because of the complexity, ask your artist about a custom design session rather than picking a generic flash sheet image, since ornamental detail needs to be adjusted to fit your specific ear curvature.
Colored Monarch Butterfly
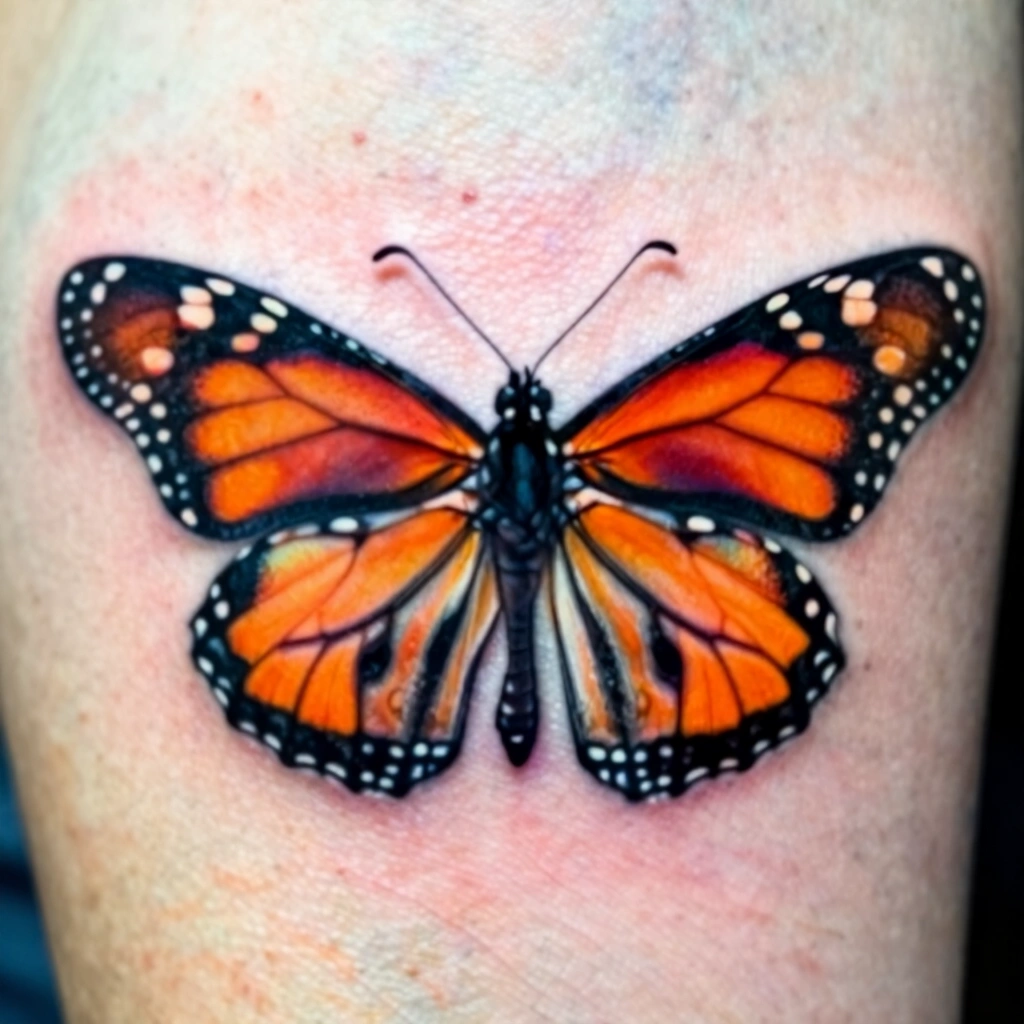
A classic monarch pattern — orange, black, and white segments — done in solid color rather than watercolor wash. This uses more saturated, defined color blocking instead of blending, which actually holds up better over time than softer watercolor techniques. Skin tone matters here: brighter oranges show more contrast on lighter skin, while an experienced colorist can adjust saturation and shading to keep contrast strong on deeper skin tones too. It’s worth asking your artist directly how they’d adjust the palette for your skin before booking.
Butterfly With Constellation Detail

Small dot-based stars or a simple constellation line connect near the butterfly, usually trailing from an antenna or wingtip. This combines dotwork (for the stars) with fine line (for the butterfly), so it’s technically a mixed-technique piece — worth confirming your artist is comfortable with both styles. It adds a celestial, symbolic layer for anyone drawn to astrology or star-sign meaning without overcrowding the main image.
Abstract Single-Line Butterfly

This design is drawn as one unbroken continuous line, never lifting the needle, creating an abstract, almost sketch-like butterfly shape. It’s a minimalist, artistic take that trades realism for elegance. Because there’s no shading or fill to hide small line irregularities, this style demands a genuinely steady-handed fine-line specialist — check portfolio work specifically for single-line pieces, not just general fine-line tattoos.
Butterfly With Initials

Similar to the script pairing, but using small block or cursive initials instead of a full name, tucked beside or beneath one wing. It’s subtle enough to keep private meaning without others necessarily reading it as text from a distance. Keep initials small and simple — ornate lettering under an inch tends to blur together as fine lines soften slightly with age.
Tiny Butterfly Cluster

Three or four very small butterflies, varying slightly in size and angle, clustered just behind the ear like they’re mid-flight. This uses the same single-needle approach as the micro minimalist design but repeats it in a scattered composition. It’s a favorite for people who want texture and movement in a small space. Ask your artist to sketch the cluster placement directly on your skin before tattooing, since spacing between multiple tiny elements is hard to judge from a flat stencil alone.
Half-Wing Asymmetric Butterfly

Rather than a full symmetrical butterfly, this design shows just one wing, or an intentionally asymmetric take, often in fine line with a slightly unfinished, sketch-like quality. It’s a distinctive choice for someone who wants something artistic rather than literal. This works especially well when paired with the matching-duo idea, where each ear holds one wing of a shared design.
Best Placement Ideas Behind The Ear
Placement within the behind-the-ear region actually varies more than people expect, and each spot comes with its own tradeoffs:
- Upper area near the hairline — most easily hidden by hair, flatter skin surface, generally more comfortable for detailed linework
- Directly behind the earlobe crease — very discreet, good for micro designs, but tighter space limits detail
- Lower, near the mastoid bone — more visible when hair is up, slightly more surface area for bolder blackwork or shading
- Trailing toward the nape — best for multi-element designs like a butterfly trail, offers the most room to work with
- Upper cartilage-adjacent zone — tends to be more sensitive, so expect a stronger reaction during the session
Tips For Success
Booking the right artist matters more than picking the perfect reference photo. Look specifically for a fine-line specialist or an experienced blackwork artist depending on which style you’re drawn to, and study their healed work, not just fresh photos, since that’s what tells you how the ink actually settles over months. Bring two or three reference images instead of one, and be upfront about wanting a custom adjustment rather than an exact copy — a good artist will tweak proportions to fit your ear’s specific curve. Ask directly what needle configuration they plan to use and why, since that conversation alone tends to separate a rushed walk-in appointment from a thoughtful custom booking.
Common Mistakes And How To Avoid Them
- Going too small for detailed designs — intricate shading or dotwork needs enough space to actually read clearly; simplify the design instead of just shrinking it
- Ignoring the ear’s curve — a design drawn flat on paper can distort once wrapped around cartilage; ask for a stencil fitting before the needle touches skin
- Skipping aftercare instructions — this area is harder to keep clean than a flat area like a forearm, so extra attention matters
- Copying a design exactly from a photo — personalizing size, angle, or a small added detail keeps it yours and avoids an identical piece to thousands of others online
- Choosing price over portfolio quality — a cheaper walk-in session on a detailed design often shows in the healed result years later
Similar Variations To Explore
Nearly every idea above can be resized or recombined. A fine-line single butterfly can shrink into the micro minimalist version, or scale up into a realistic shaded piece. Blackwork silhouettes can be split into a matching duo across both ears. Colored monarch designs can drop the color entirely and become dotwork-shaded pieces instead. Think of these 20 ideas less as fixed templates and more as a technique toolbox you and your artist can mix.
Aftercare Basics
General dermatological consensus supports keeping a new tattoo clean, moisturized with a fragrance-free product, and protected from direct sun and unwashed hair contact during the first two to three weeks. Because this area sits close to hair and often gets brushed by hair ties, hoods, or phone calls, extra care avoiding friction is worth mentioning to your artist. Always follow the specific aftercare sheet your artist provides, since products and timelines can vary by studio, and consult a licensed professional or dermatologist if you notice unusual redness or irritation beyond normal healing.
Quick FAQ
How much does a behind-the-ear butterfly tattoo cost?
Small fine-line or blackwork designs often fall in the range of shop minimums up to around $150, depending on region and artist experience, while larger or more detailed pieces like realistic shading or ornamental designs cost more due to added session time.
Does it hurt more than other placements?
Many people describe this area as moderately sensitive due to thin skin and nearby cartilage, though pain tolerance varies widely by individual — it’s generally comparable to or slightly more sensitive than the wrist.
How long does healing take?
Surface healing typically takes around two to three weeks, though full settling of the ink can take a bit longer; always check with your artist or a dermatologist if healing seems unusually slow.
Will it fade over time?
Fine, detailed lines and colored ink tend to soften or fade faster than bold blackwork or solid silhouettes, so touch-ups every several years are common for detailed designs in this location.
Choosing among behind the ear butterfly tattoos really comes down to matching the technique to how much detail, visibility, and long-term upkeep you actually want. A tiny fine-line outline and a bold blackwork silhouette solve very different needs, even though they share the same basic subject. Take the time to talk through placement, size, and technique with a licensed professional before booking, since that conversation is what turns a nice reference photo into a tattoo that still looks good on your skin ten years from now.