15 Upper Arm Tattoo Men Half Sleeves Ideas
Nervous about picking a design you’ll regret in five years? You’re not alone. Half sleeves are a big commitment — more skin, more time in the chair, more money — so getting the idea right before you book matters more than scrolling Pinterest for an hour.
So what are the best upper arm tattoo men half sleeves ideas? Bold blackwork, Japanese-inspired traditional, fine-line botanical, and neo-traditional animal designs top the list because they balance visibility, detail retention, and how well the linework holds up over 10+ years on skin. Geometric and dotwork pieces also age well since they rely on solid contrast rather than fine gradients.
Stick around, because I’m also going to walk you through placement tradeoffs, realistic pain levels, what a half sleeve actually costs, and how to brief an artist so you don’t end up with a design that looked great on paper but falls apart on your arm.
Why the Upper Arm Works So Well for Half Sleeve Tattoos
The upper arm — from shoulder to elbow — is honestly one of the best canvases on the body for a half sleeve. There’s more muscle mass and less bone close to the surface compared to the forearm, which generally means a steadier tattooing experience. It’s also a curved, cylindrical surface, which gives artists room to wrap designs around the arm for a 360-degree effect instead of a flat, front-facing image. And because you can cover it with a sleeve or show it off with a t-shirt, it gives you control over visibility that a hand or neck tattoo never will.
Bold Traditional Japanese Half Sleeve

This style pulls from Irezumi, the centuries-old Japanese tattooing tradition, and it’s built around thick, confident outlines paired with smooth color gradients — usually deep blacks, reds, and blues. Think koi fish, dragons, or cherry blossoms wrapped around the arm with wind bars or clouds filling the negative space (the untattooed skin used deliberately as part of the design). The linework here is heavy, often 3-5 shading passes deep, which is why these pieces read clearly from across a room and still look sharp decades later.
Best placement is wrapping fully around the upper arm rather than a flat front panel — it uses the arm’s natural curve to create movement. Expect four to six sessions for a full color piece this size. Skin with more visible texture or scarring may need extra passes to keep colors even.
Bring reference images of traditional Japanese motifs (not just “a dragon”) so your artist understands the composition style you want. Pain-wise, the outer bicep is fairly tolerable; expect more sensitivity near the inner arm and elbow crease.
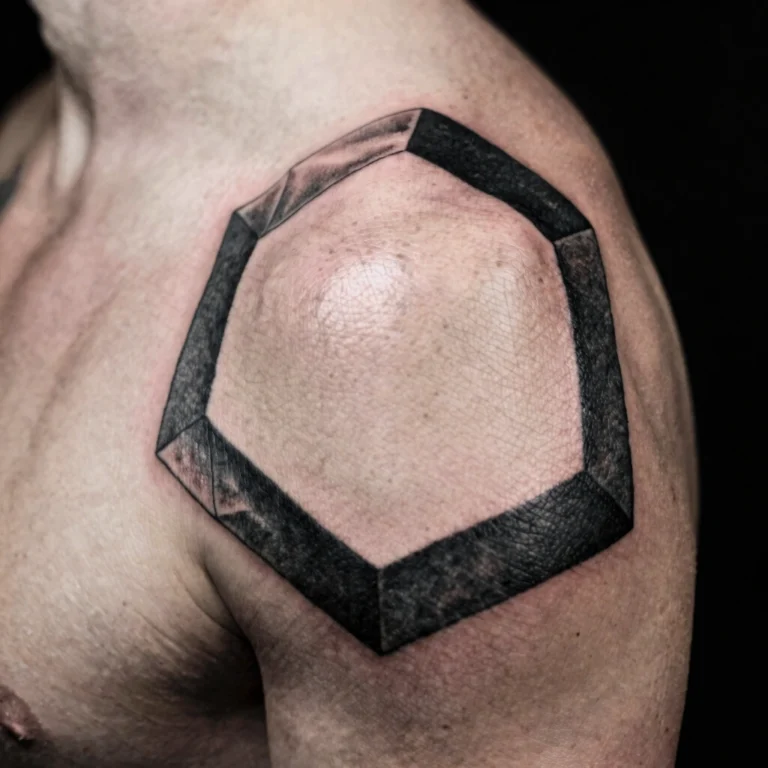
Blackwork Geometric Half Sleeve

Blackwork uses solid black ink with no color, relying on shape, pattern, and negative space for visual impact. Geometric blackwork half sleeves typically combine straight lines, triangles, and mandalas into a cohesive wraparound pattern. Line weight is usually consistent throughout — no thick-to-thin variation — which gives the design a clean, almost architectural look. This is one of the styles that ages the best, since solid black holds its saturation far longer than thin colored linework.
Place this so the geometric lines follow the arm’s natural muscle lines for a more flattering fit. A good size for a half sleeve is 5-7 inches covering shoulder to mid-bicep. Ask your artist about symmetry planning — geometric work is unforgiving if lines drift even slightly.
Healing typically runs two to three weeks before the design settles fully. This style suits guys who want something bold but not literal — no animals, no portraits, just pattern.
Fine-Line Botanical Half Sleeve
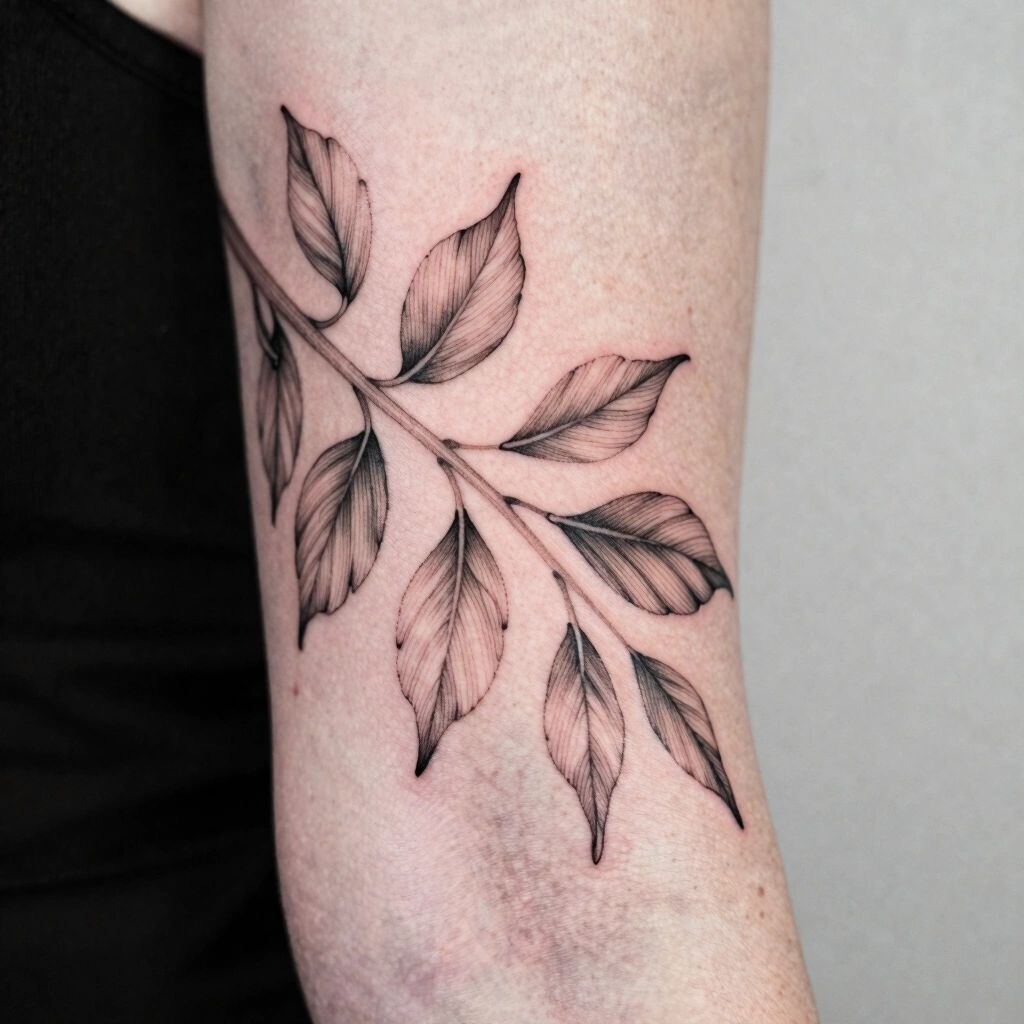
Fine-line work uses a thinner needle configuration to create delicate, almost pen-drawn linework — think single needle or small round liners instead of the thicker needles used in bold traditional work. A botanical half sleeve built this way might feature ferns, wildflowers, or branches trailing from the shoulder down the arm with minimal shading, just clean outlines and maybe some light stippling (small dots for subtle texture).
This style works best on the outer upper arm where skin is flatter and the fine detail won’t distort with movement. Because the lines are thin, they can blur faster over time than bold work, so realistic expectations matter — touch-ups every 5-8 years aren’t unusual.
Bring high-resolution botanical reference photos, and ask specifically for “fine line, low saturation” so the artist doesn’t default to heavier shading. Pain is moderate; thinner needles still pass over the same nerve-dense areas.
Dotwork Mandala Half Sleeve

Dotwork builds an image entirely from small dots rather than continuous lines, creating a stippled, almost textured shading effect. Mandala dotwork half sleeves usually center a large circular pattern on the shoulder or upper arm, radiating outward with progressively smaller dot clusters to create depth without any solid black fill. It’s slower to tattoo than linework — sometimes twice as long — because every shaded area is built dot by dot.
Center placement on the deltoid (shoulder muscle) works well since the circular mandala shape matches the rounded muscle contour. Keep the design at least 6 inches in diameter; smaller dotwork tends to look muddy once healed.
Ask to see healed dotwork photos in your artist’s portfolio specifically, not just fresh work — dot spacing that looks fine on day one can blur together after healing if it’s too tight. Expect moderate to high discomfort since dotwork often covers larger shaded areas continuously.
Realistic Portrait Half Sleeve

Portrait work — faces, animals, or objects rendered with photographic detail — relies on soft shading gradients, tiny linework for texture (hair, fur, wrinkles), and careful contrast control. This is the most technically demanding style on this list. A poorly executed portrait ages badly; a well-executed one, done by someone with genuine portrait experience, can look remarkably lifelike for years.
Place portraits on flatter sections of the upper arm — the outer bicep gives the most stable, undistorted surface. Size shouldn’t go below 4-5 inches for a face; smaller than that and fine details compress into mush. This is the one category where portfolio research really matters — look specifically for healed portrait photos, not just fresh ones, since realism tattoos show fading and blur first.
Sessions run long, often 3-5 hours each, and pain accumulates with sitting time more than needle sensation alone.
Neo-Traditional Animal Half Sleeve

Neo-traditional blends old-school bold outlines with more illustrative detail and richer color palettes than classic American traditional. An animal-themed half sleeve — wolves, lions, owls — in this style usually features thick outer linework, decorative elements (flowers, banners, geometric shapes) woven around the subject, and saturated color fills with subtle gradient shading for depth.
This works great wrapping the upper arm since the decorative border elements can flow with the arm’s shape. A good half sleeve size here runs 6-8 inches tall. Because color saturation is high, expect a touch-up around year 3-5 to keep colors vibrant, especially on the outer arm where sun exposure is more direct.
Tell your artist if you want “neo-traditional, not full realism” — the terms get confused often, and the compositions are genuinely different.
Biomechanical Half Sleeve

Biomechanical designs create an illusion of machinery or exposed mechanical parts under the skin, using heavy shading, sharp metallic highlights, and often 3D-style shadow work to create depth. This style demands an artist experienced specifically in biomechanical work — it’s not a generic “cover the arm in gears” job; good ones use the arm’s actual muscle contours to make the illusion convincing.
Placement should follow major muscle groups — bicep curve, tricep line — since the whole point is making the design look like it’s part of the arm’s structure. This isn’t a great first-tattoo choice given the shading complexity and session length required.
Expect longer healing due to dense shading, generally three to four weeks before the skin fully settles. Pain tends to run higher because of extended shading passes over the same areas.
Tribal-Inspired Blackwork Half Sleeve
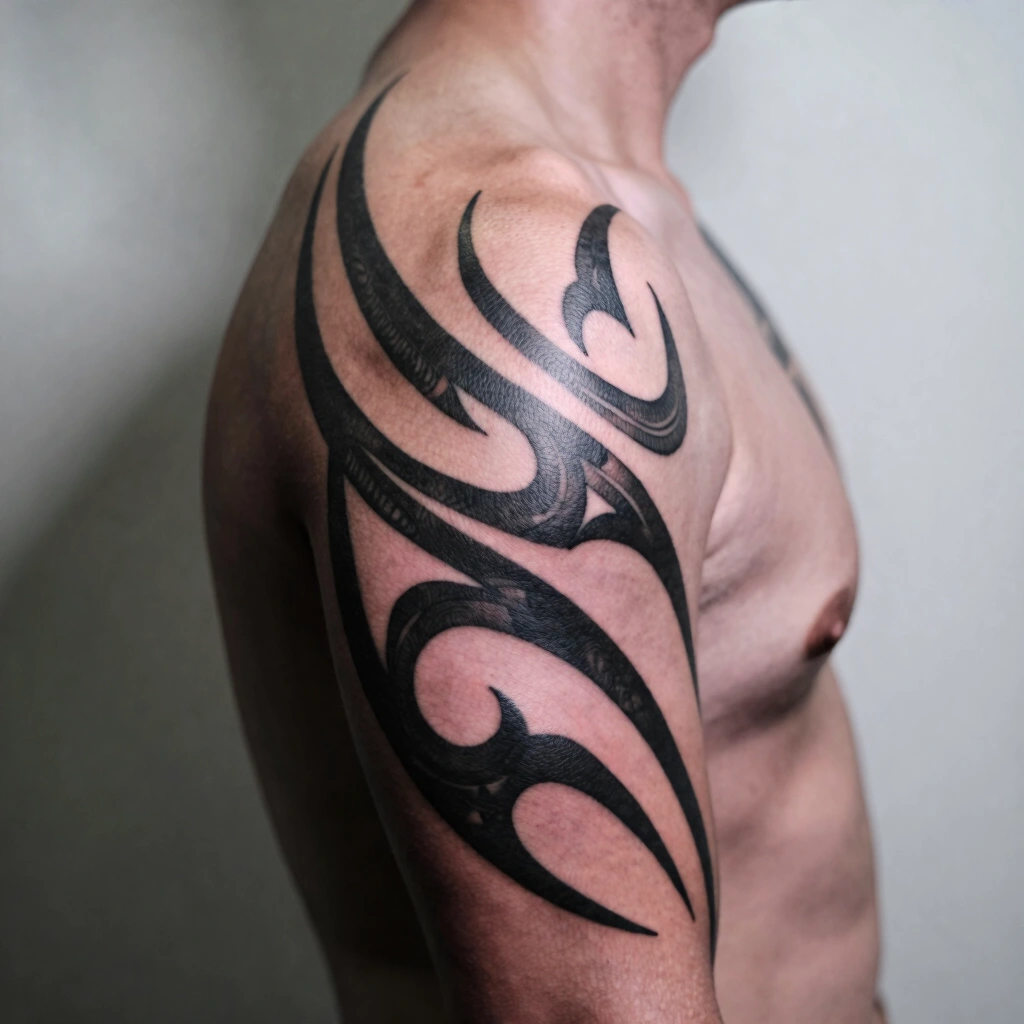
Modern tribal-inspired blackwork moves away from copying specific cultural tribal patterns and instead uses bold, flowing black shapes with sharp points and smooth curves, inspired by that visual language but designed as an original pattern. Line weight is thick and confident, usually with zero shading — just solid black against skin.
This is one of the most visible, high-contrast options on the list, which makes it a strong pick if you want a design that reads instantly even from a distance. Wrap it around the upper arm following muscle definition for maximum flow.
A word of caution: ask your artist to design something original rather than tracing directly from another culture’s traditional patterns, since that carries real cultural sensitivity concerns. Healing is generally straightforward since it’s solid black with no fine gradient work to protect.
Negative Space Half Sleeve

Negative space tattoos use the untattooed skin itself as a design element — instead of filling every inch with ink, the pattern is created by what’s left blank. A half sleeve using this approach might have a solid black background with a light-colored shape (an animal, a geometric form) left as bare skin, or vice versa.
This style photographs beautifully but requires precise planning, since the “empty” areas need to stay perfectly clean-edged. Best on flatter sections of the upper arm where the contrast reads clearly. Ask to see the exact stencil (the outline transferred onto skin before tattooing begins) before your session starts — with negative space work, once the black goes in, there’s little room for adjustment.
Pain level tracks with solid blackwork generally, moderate to high depending on coverage area.
Watercolor-Style Half Sleeve

Watercolor tattoos mimic the soft, bleeding look of watercolor paint — loose color splashes, minimal or no black outline, and soft edges instead of crisp lines. It’s a striking, artistic look, but it’s worth knowing upfront that this style fades and blurs faster than linework-based styles since there’s no bold outline anchoring the color.
If you want this look, ask your artist about adding subtle fine-line detailing underneath the color splashes — this helps the design hold its shape longer as it ages. Best placement is areas with minimal flexing, like the outer upper arm, to reduce distortion over time.
Expect a touch-up within 3-5 years to refresh color saturation. This isn’t the top pick for guys wanting a decades-long crisp design, but it’s a great option if you like a painterly, less rigid aesthetic.
Sacred Geometry and Religious Half Sleeve

This category blends religious iconography — crosses, praying hands, scripture — with geometric patterning like sacred geometry (mandalas, the flower of life pattern) for a design that’s personal and visually structured at once. Linework tends to be a mix: bold outlines for the central image, finer geometric detailing surrounding it.
Because meaning matters here, spend real time briefing your artist on the specific symbolism you want represented — vague requests like “something religious” produce generic results. Place the focal image (cross, hands) centered on the upper arm with geometric elements flowing outward toward the elbow or shoulder. This is a solid first-tattoo option if kept moderate in size, since the bold central linework holds up well even at 4-5 inches.
Nature and Landscape Half Sleeve

Landscape half sleeves — mountains, forests, ocean waves — use layered shading to create depth, often combining fine-line detail for foreground elements (trees, rocks) with softer gradient shading for backgrounds (sky, water). It’s a quieter, more contemplative design choice compared to bold traditional work.
The upper arm’s curve actually helps landscape pieces since a horizon line can wrap naturally around the arm for a more immersive feel. Keep the design at least 6 inches tall to preserve the layered depth — smaller sizes flatten the shading gradients. Bring specific reference photos of the actual location if it’s personal to you (a mountain range you climbed, a coastline from home) rather than generic stock images. Healing runs standard, two to three weeks, though shaded backgrounds may need slightly longer to fully settle.
American Traditional Sailor Jerry Style Half Sleeve
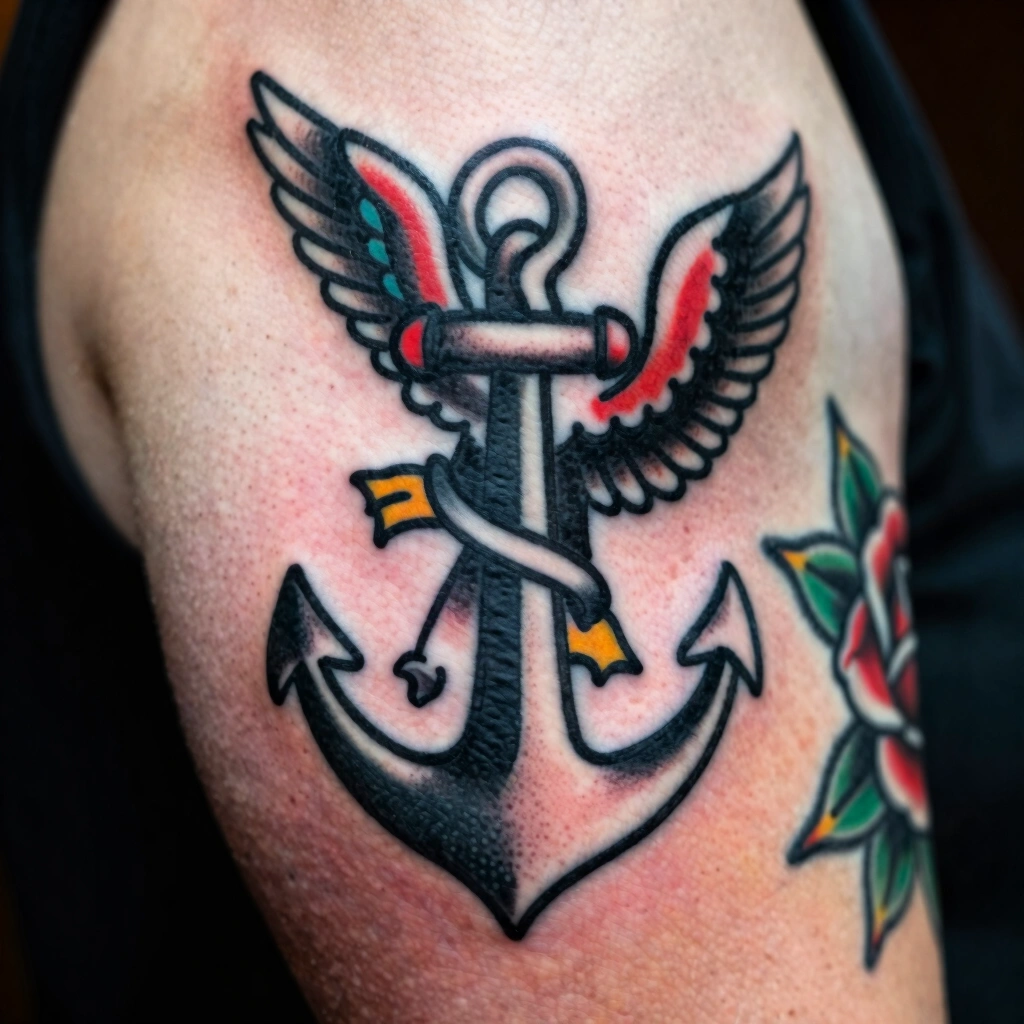
Classic American traditional — anchors, eagles, roses, pin-ups — uses thick black outlines, minimal shading, and a limited, bold color palette (usually red, yellow, green, black). It’s one of the oldest tattoo styles still in wide use, largely because the simplicity of thick lines and flat color holds up exceptionally well over decades.
This is a genuinely good first half-sleeve choice for guys who want something classic and low-maintenance in terms of aging. Place bold focal images (an eagle, a rose cluster) at the shoulder and bicep with smaller filler elements toward the elbow. Ask your artist about “flash” designs (pre-drawn, ready-to-tattoo designs) versus fully custom composition — flash pieces in this style are often faster and cheaper to book. Pain is moderate and fairly consistent given the style’s straightforward linework.
Script and Imagery Combined Half Sleeve

Combining lettering — a quote, a name, a date — with supporting imagery (flowers, animals, symbols) creates a half sleeve that’s both personal and visually layered. Script can be done fine-line for a delicate look or bold blackletter for more visual weight, depending on the tone you want.
Keep script placement away from areas with heavy flexing, like directly over the inner elbow, since stretching can distort lettering legibility over time. A practical tip: ask your artist to mock up the lettering in the actual style you want (cursive, block, gothic) before the session — fonts translate very differently onto curved skin than they do on paper. This combination style suits guys wanting a design with clear personal meaning rather than pure aesthetics.
Skull and Dark Art Half Sleeve

Dark art half sleeves featuring skulls, reapers, or gothic imagery typically use heavy blackwork shading combined with sharp linework for contrast — deep shadows with bright, almost stark highlights. It’s a visually intense style that leans on strong value contrast (light versus dark) rather than color.
Because the shading is dense, this style holds up well long-term, similar to blackwork geometric pieces. Center the main image on the bicep with shading extending toward the shoulder and elbow for full coverage. This isn’t the most workplace-neutral option if you’re in a conservative field, so think honestly about visibility before committing to full-arm coverage. Pain runs moderate to high given the extensive shading time required per session.
Best Placement Ideas
- Outer bicep — high visibility, moderate pain, easiest for artists to work flat detail
- Inner upper arm — lower visibility (easy to cover), generally more sensitive
- Shoulder cap (deltoid) — great for circular or radiating designs like mandalas
- Wrapping the full upper arm — best for traditional and blackwork styles that benefit from 360-degree flow
- Near the elbow crease — most sensitive area on the upper arm, best reserved for smaller filler details, not focal points
Tips for Success
Choosing the right artist matters more than choosing the “perfect” design off the internet. Look through a potential artist’s portfolio for healed photos, not just fresh ink — healed work tells you how their linework and shading actually hold up. Ask about their experience with the specific style you want; a portrait specialist and a blackwork specialist are not interchangeable. Bring reference images, but also bring context — your skin tone, your pain tolerance concerns, and how visible you want the final piece to be at work or in daily life. A good consultation should feel like a two-way conversation, not just you handing over a picture and waiting.
Common Mistakes and How to Avoid Them
- Going too small for detailed styles. Fine shading and portrait work need real size to hold up over years — cramming detail into 3 inches usually looks blurred within a few years.
- Ignoring how the design wraps the arm’s curve. A flat rectangular design on a cylindrical arm often looks distorted once healed.
- Skipping aftercare instructions. Even minor neglect during healing can affect how crisp the final result looks.
- Copying a design exactly from a photo. Personalizing proportions, colors, or small details helps the piece feel like yours and avoids an identical match to someone else’s tattoo.
- Not asking about touch-up timelines upfront. Color and fine-line work especially benefit from a planned refresh down the line.
Similar Variations
Almost every design above can be resized down for a smaller commitment, converted from color to blackwork for lower maintenance, or combined with a second style — like pairing fine-line botanical accents around a bold traditional centerpiece. Geometric patterns can be layered behind almost any focal image for added visual structure without changing the core idea.
Aftercare Basics
General dermatological consensus supports keeping a fresh tattoo clean, moisturized with a fragrance-free product, and protected from direct sun exposure during healing. Avoid soaking the area (pools, baths) until fully healed, and don’t pick at any peeling skin. Always follow the specific aftercare sheet your artist provides, since products and timelines can vary slightly by studio. If you notice unusual redness, swelling, or discharge, consult a licensed dermatologist or your artist promptly.
Quick FAQ
How much does a half sleeve cost?
Costs vary widely by region and artist experience, but expect anywhere from $500 to $2,500+ depending on detail level, color use, and number of sessions required.
How painful is a half sleeve tattoo?
Pain tolerance varies by individual, but generally the outer upper arm is considered more tolerable than bony or inner-arm areas. Longer sessions can increase discomfort simply due to time spent under the needle.
How long does a half sleeve take to heal?
Surface healing typically takes two to three weeks, though full settling of color and texture can take a couple of months. Individual healing time varies, so consult your artist’s specific timeline guidance.
Will my half sleeve fade over time?
All tattoos fade somewhat with age and sun exposure. Bold linework and solid blackwork tend to hold their shape longer than fine-line or watercolor styles, which may need touch-ups sooner.
Finding the right upper arm tattoo men half sleeves idea really comes down to matching the style to how you live — your job, your pain tolerance, your patience for touch-ups down the road. Take your time, talk to a real licensed artist about what you’re picturing, and build something that still feels like you a decade from now.