20 Fine Line Hummingbird Tattoo Ideas Worth Bringing to Your Next Consultation
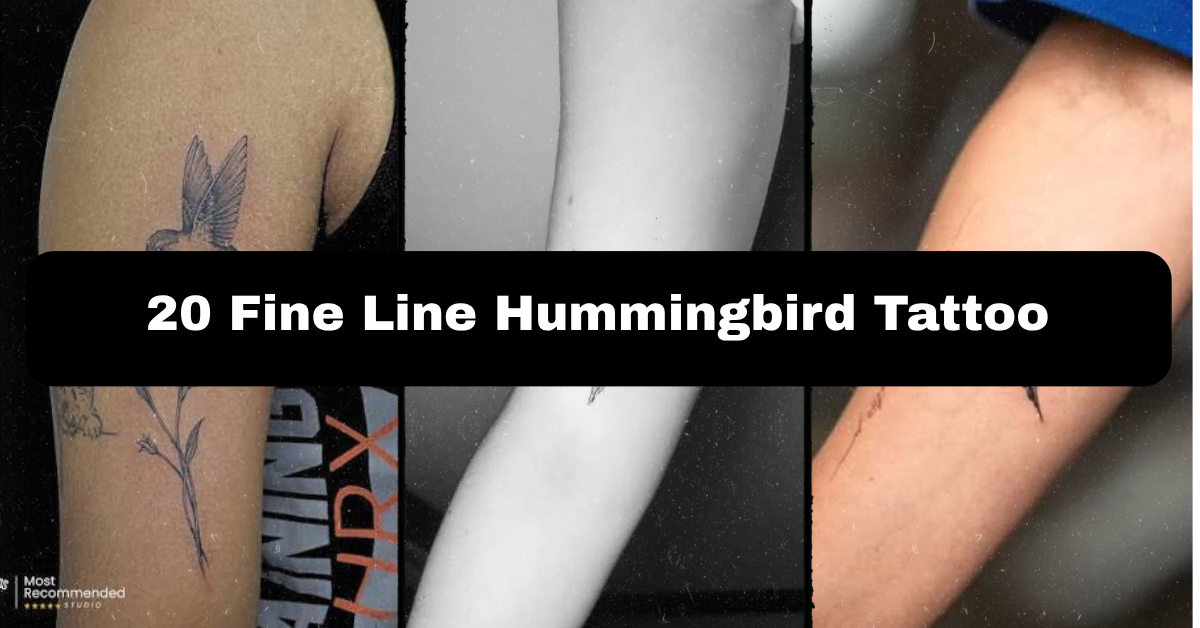
Fine line hummingbird tattoos have become one of the most requested designs in studios that specialize in delicate, single-needle work, and this guide is built to give you the real information competitor lists tend to skip — placement advice, pain expectations, healing timelines, and how to actually brief your artist so the final piece looks like the reference photo, not a rough guess at it.
So what makes a fine line hummingbird tattoo work? It’s a small, detailed bird rendered with thin, consistent linework (usually done with a single needle instead of a grouped needle configuration), often paired with a flower, branch, or script, placed somewhere the skin is relatively flat so the fine lines don’t blur as they heal. Because the design relies on delicate detail rather than heavy black fill, placement and needle choice matter more than they would with bold traditional work.
Stick around, because I’m going to walk you through 20 specific design directions, plus the practical stuff most articles leave out — realistic pain levels by placement, what a fair price range looks like, how designs age on skin over the years, and the exact questions to ask before you sit in the chair.
Why Fine Line Hummingbird Designs Work So Well
Hummingbirds are small, fast, and detailed birds, so they naturally suit a tattoo style built around precision rather than bulk. Fine line technique uses a single needle (sometimes labeled 1-3RL or similar on a stencil sheet) to create thin, uniform strokes instead of the thicker, saturated lines you’d see in traditional American tattoo work. This lets an artist capture the curve of a wing feather or the needle-thin beak without the design turning into a dark blob after a few years. The tradeoff is that fine line work is more sensitive to sun exposure and skin stretching over time, so placement and aftercare matter more here than with bold blackwork.
1. Single-Line Continuous Hummingbird
This design uses one unbroken line to form the entire bird — no lifted pen, no breaks. It’s a technique borrowed from continuous-line illustration, and it reads as clean and almost calligraphic on skin. Best placed on the forearm, ankle, or inner bicep where there’s enough flat space for the line to flow without distortion. Keep it at least 2.5 inches long; going smaller risks the line overlapping itself and blurring into an unreadable smudge after healing. Ask your artist whether they’ve done continuous-line work before — it’s a specific skill, not every fine line artist does it well. Pain is moderate on the ankle (bony, thin skin) and lower on the forearm (more muscle padding). This style ages gracefully since there’s no shading to fade unevenly.
2. Fine-Line Hummingbird With Floral Branch
Pairing the bird with a botanical branch — think eucalyptus, lavender, or a single rose stem — adds visual balance and gives the composition a natural sense of movement. The branch is typically rendered with slightly thinner lines than the bird’s body to create depth without adding actual shading. This works beautifully along the ribs, spine, or outer forearm, sized around 4 to 6 inches to keep the botanical detail from turning into a smudge. Bring a clear photo of the specific flower you want — “a rose” and “a David Austin rose” produce very different stencils. Rib placement is one of the more painful spots due to thin skin over bone, so budget extra healing patience if you choose it.
3. Minimalist Hummingbird Silhouette
Strip away the feather detail and you get a clean, solid-shape silhouette — essentially a small blackwork outline filled with flat black or left as an unfilled line drawing. It’s the lowest-commitment option on this list, ideal for a first tattoo or for someone who wants something recognizable at a glance rather than intricate. Wrist, behind the ear, or the side of the ankle all work well at a small 1 to 2 inch size. Because there’s no fine detail to preserve, this design tolerates smaller sizing better than the others on this list. Ask for a “solid fill silhouette, no interior linework” so the artist doesn’t default to adding texture you didn’t want.
4. Dotwork-Shaded Hummingbird
Dotwork is a technique that builds shading and texture using thousands of small dots instead of solid black fill or smooth shading gradients. Applied to a hummingbird, it gives the wing and tail feathers a soft, almost stippled texture that reads as more dimensional than pure line art. This takes longer in the chair than a basic line design, so expect a higher price and a longer single sitting. Best on flatter areas like the upper arm, shoulder blade, or thigh where the skin doesn’t move much during aftercare healing. Dotwork can blur faster than pure line work if placed over a joint that bends often, so avoid the inner elbow or wrist crease for this specific style.
5. Geometric Hummingbird Overlay
Here the bird’s outline is layered with straight geometric lines — triangles, a hexagon, or a simple line grid — cutting across the body for a modern, structured look. This design leans on negative space (areas intentionally left untouched by ink) to let the geometric shapes and the bird’s form interact rather than compete. It suits the forearm or upper back where there’s enough room for both elements to read clearly at a glance. Size shouldn’t go below 3 inches, or the geometric lines start crowding the bird’s detail. When briefing your artist, specify whether you want the geometry behind or in front of the bird — it changes the whole composition.
6. Hummingbird and Lavender Sprig
A softer, more botanical pairing than the branch design above, this one focuses on a single sprig of lavender tucked near the bird’s tail or beak, rendered in the same thin, consistent line weight throughout. It’s a popular choice for wrist or collarbone placement because the composition stays narrow and elongated, fitting naturally along the body’s lines. Keep it under 4 inches for these placements. Collarbone skin is thin and close to bone, so this spot tends to rank higher on the pain scale — worth knowing before you commit to a longer session.
7. Fine Line Hummingbird With Soft Color Wash
Not every fine line tattoo has to stay strictly black and grey. Some artists incorporate a light, desaturated color wash — usually a muted pink, teal, or soft orange restricted to small sections like the throat feathers — while keeping the outline in fine black line. This is different from full watercolor tattooing, which relies on color bleeding without solid line borders; here the structure stays intact and color is just an accent. Best on the outer forearm or shoulder where sun exposure can be more easily managed with clothing, since color saturation fades faster than black line under UV exposure. Ask specifically for “line work with color accent, not a color wash bleed” to avoid a miscommunication with your artist.
8. Negative Space Hummingbird
This design flips the usual approach: instead of drawing the bird in black line, the artist tattoos the background or surrounding shape and lets the hummingbird’s form emerge as untouched skin. It’s a more advanced technique that requires precise planning, since mistakes can’t be easily corrected by adding more ink to fix gaps. This works well as a small accent piece behind the ear or on the side of the finger, but it’s not the best pick for a first tattoo since the skill ceiling for artists is higher. Look specifically for a portfolio with negative space healed photos, not just fresh work — this style can look different once fully healed.
9. Matching Hummingbird Tattoos for Friends or Sisters
A shared hummingbird design, either identical or mirrored, is a common choice for sisters, best friends, or couples who want a subtle symbol of connection without matching text. Keep the linework simple — a basic outline or single-line style translates most consistently across different skin tones and body shapes, so both tattoos age similarly. Wrist, ankle, or behind-the-ear placements are popular because they’re easy to compare side by side. A useful tip: get both tattoos done in the same session with the same artist and needle setup, so the line weight matches instead of one looking noticeably thicker than the other years later.
10. Hummingbird With Name or Script
Adding a name, date, or short word beneath or beside the bird turns this into a memorial or milestone piece. Script should be kept in the same fine line weight as the bird to avoid one element visually overpowering the other — a common mistake is using a bold script font with an otherwise delicate bird outline. Forearm, ribs, or upper back give enough vertical space for both elements. Bring your exact spelling and preferred font style (cursive, print, or hand-lettered) to the consultation; script tattoos are notoriously hard to fix once they’ve healed, since touch-ups on small lettering often just re-blur the line.
11. Tiny Hummingbird Behind the Ear
This is one of the most subtle placements on the list — a design under an inch, tucked behind the ear where hair can cover it for work settings. Because the skin here is thin and the space is tight, the design needs to be simple: a basic outline or a very minimal single-line bird, nothing with fine feather texture, since detail this small tends to blur together within a few years. This spot ranks on the higher end of the pain scale due to thin skin and cartilage proximity. It’s a solid pick for a first tattoo if you want something meaningful but easy to keep private.
12. Hummingbird in Flight With Motion Lines
Short, swept linework trailing behind the wingtips gives the impression of movement, similar to a motion blur in photography. This works especially well on longer canvases like the forearm or calf, where the trailing lines have room to taper naturally instead of getting cut off. Keep the motion lines thinner than the bird’s main outline — this contrast is what sells the sense of speed. It’s a nice option for someone who wants a slightly more dynamic composition without adding color or heavy shading.
13. Realistic Fine Line Hummingbird Portrait
This is the most technically demanding option on the list — a semi-realistic rendering using varied fine line weights and light shading (usually soft grey-wash rather than solid black) to suggest feather texture and dimension. It requires a genuinely experienced fine line artist, since realism at a small scale is where inexperienced hands tend to lose detail during healing. Best suited to larger placements — outer arm, thigh, or upper back — at a minimum of 4 to 5 inches so the detail has room to hold up over time. Expect a longer sitting and a higher price point given the skill and time required.
14. Hummingbird and Sun or Mandala Combo
Placing the bird in front of or beside a small sun burst or mandala pattern (a circular, symmetrical geometric design) creates a striking focal composition, often chosen for its symbolic weight — light, life, renewal. The mandala’s fine radiating lines should be spaced evenly; this is a spot where a shaky or rushed hand shows immediately. Shoulder, upper back, or sternum placements give the circular geometry room to stay proportional. This is a piece worth taking your time picking an artist for, since symmetry errors are hard to disguise once healed.
15. Blackwork Hummingbird With Fine Line Detail
Combining a solid blackwork body (heavier, saturated black fill) with fine line wing and tail detail creates strong visual contrast — bold where it counts, delicate where it matters. This hybrid approach tends to age better than an all-fine-line piece since the solid black sections resist fading longer than thin single-needle lines. Good for the upper arm, calf, or shoulder blade. If you like the idea of a fine line hummingbird but worry about long-term fading, this hybrid style is worth specifically requesting.
16. Hummingbird Wrist Tattoo
The wrist is one of the most requested — and most visible — spots for this design. Because the skin is thin and close to bone, pain tends to run moderate-to-high here, and healing can take a little longer since the wrist bends constantly during daily activity. Keep the design under 2 inches and stick to simple linework; anything more detailed tends to blur faster at this joint. This placement is highly visible, so consider your workplace dress code before booking if visible tattoos are a concern.
17. Hummingbird Rib Cage Tattoo
Ribs offer a larger, flatter canvas for bigger compositions — a hummingbird with a full floral branch or trailing script fits nicely here. It’s also one of the more painful placements on this entire list, due to thin skin directly over bone and minimal muscle padding. Healing takes longer too, partly because clothing friction can irritate the area during the first two weeks. This spot is great for a design you want to keep private, since it’s easily covered.
18. Two Hummingbirds Mirrored Design
A pair of hummingbirds facing each other, often framing a flower or heart shape between them, works well as a symmetrical chest, sternum, or upper back piece. Symmetry is the technical challenge here — ask your artist to show you a stencil placement preview on your actual skin before they start, since mirrored designs shift more noticeably than single-subject ones if the stencil is off-center even slightly.
19. Hummingbird With Heartbeat Line
A single EKG-style heartbeat line flowing into or out of the bird’s flight path is a popular way to add personal meaning — often chosen to honor a loved one or a health milestone. Keep the heartbeat line thin and let it taper into the bird’s tail feathers so it reads as one continuous idea rather than two separate elements awkwardly placed together. Forearm and ankle placements suit this design’s linear shape well.
20. Constellation or Star-Accented Hummingbird
Small dotwork stars or a simple constellation line scattered around the bird adds a celestial feel without introducing color or heavy shading. This pairs naturally with the dotwork technique mentioned earlier, since the same stippling method used for feather shading can double as star detail. Shoulder, collarbone, or upper back give enough negative space around the bird for the stars to breathe without looking cluttered.
Best Placement Ideas
- Wrist — highly visible, moderate-to-high pain, shorter healing patience needed since it bends often
- Behind the ear — easy to hide, higher pain due to thin skin, best for very small and simple designs
- Forearm — low-to-moderate pain, great visibility control (covered by sleeves), holds detail well long-term
- Ribs — higher pain, longer healing due to clothing friction, good for larger private pieces
- Ankle — moderate pain, higher fading risk from sock and shoe friction over the years
- Shoulder blade/upper back — lower pain, excellent for larger or symmetrical compositions
- Collarbone — higher pain due to bone proximity, best for narrow, elongated designs
Tips for Success
Choosing the right artist matters more for fine line work than almost any other style, because thin lines have zero room for a shaky hand. Look through an artist’s portfolio for healed photos, not just fresh ink — fine lines can look crisp on day one and blur within a year if the artist used too thick a needle grouping or went too deep. Bring at least two or three reference images, and be specific about line weight (“keep it as thin as possible” vs. “medium fine line for durability”). Ask directly whether the piece will be a custom design or adapted from flash (pre-drawn designs available for walk-in booking) — custom work costs more but avoids you seeing your exact tattoo on someone else.
Common Mistakes and How to Avoid Them
- Going too small for the detail level — feather texture and script need enough surface area to stay legible after healing
- Picking a painful, high-friction placement without knowing it — ribs and ankles are gorgeous but need real aftercare commitment
- Skipping aftercare instructions — fine lines are more prone to visible blurring if aftercare is inconsistent
- Copying a design exactly from social media — personalize at least one element (a flower type, a color accent, an added line) so it’s genuinely yours
- Choosing the cheapest quote over portfolio quality — fine line work is unforgiving of inexperience; this is not the category to shop purely on price
Similar Variations
Nearly every design above can be resized down for a minimalist version or scaled up and combined with botanical or geometric elements for a larger back or thigh piece. A black-and-grey fine line hummingbird can later have a small color accent added during a touch-up session, though this should always be planned with your artist rather than added elsewhere. Matching designs can be mirrored for couples or kept identical for friend groups, and dotwork shading can be dialed up or down depending on how much texture you want in the final piece.
Aftercare Basics
General dermatological consensus recommends keeping a new tattoo clean, moisturized with a fragrance-free product, and protected from direct sun exposure during the healing window, which typically runs two to four weeks depending on placement and individual skin. Avoid soaking the area in pools, baths, or open water, and don’t pick at any peeling skin. Every studio provides its own specific aftercare sheet — always follow that over generic advice found online, and reach out to your artist or a licensed dermatologist if you notice unusual redness, swelling, or discharge beyond normal healing.
Quick FAQ
How much does a fine line hummingbird tattoo cost?
Small, simple designs often start around $80 to $200 depending on your region and the artist’s experience, while larger custom pieces with dotwork shading or added elements can run $300 to $600 or more. Always ask for a quote during consultation rather than assuming a flat rate.
Does it hurt more than other tattoo styles?
Pain depends more on placement than style, though fine line needles are generally lighter than traditional heavy-saturation needles. Bony areas like the wrist, ribs, and collarbone tend to be more sensitive, while fleshier areas like the outer arm or thigh are typically more comfortable.
How long does healing take?
Most fine line tattoos heal on the surface within two to three weeks, though full skin healing underneath can take up to a couple months. Individual healing time varies based on placement, aftercare consistency, and personal skin type.
Will a fine line hummingbird fade faster than other styles?
Thin lines can soften or spread slightly more over the years compared to bold blackwork, especially with sun exposure, so a touch-up every several years is common and worth planning for rather than being surprised by.
Fine Line vs. Other Techniques: Know the Difference
- Fine line — thin, single-needle strokes with minimal shading, prioritizes clean detail over boldness
- Bold traditional — thick outlines, heavy black fill, and limited color palette designed for maximum longevity
- Blackwork — solid black shapes and fill, often with strong contrast and minimal fine detail
- Dotwork — shading and texture built from small dots instead of solid fill or smooth gradients
- Negative space — design formed by the untouched skin around inked areas rather than by ink itself
A fine line hummingbird tattoo rewards patience — patience in finding the right artist, patience during the healing weeks, and patience with the idea that it may need a touch-up down the road as thin lines naturally soften over time. What matters most is walking into your consultation with a clear reference, honest questions about pain and pricing, and realistic expectations about how the design will look in five years, not just on day one. Get those pieces right, and a fine line hummingbird tattoo can end up being one of the most personal, well-aging pieces on your skin.