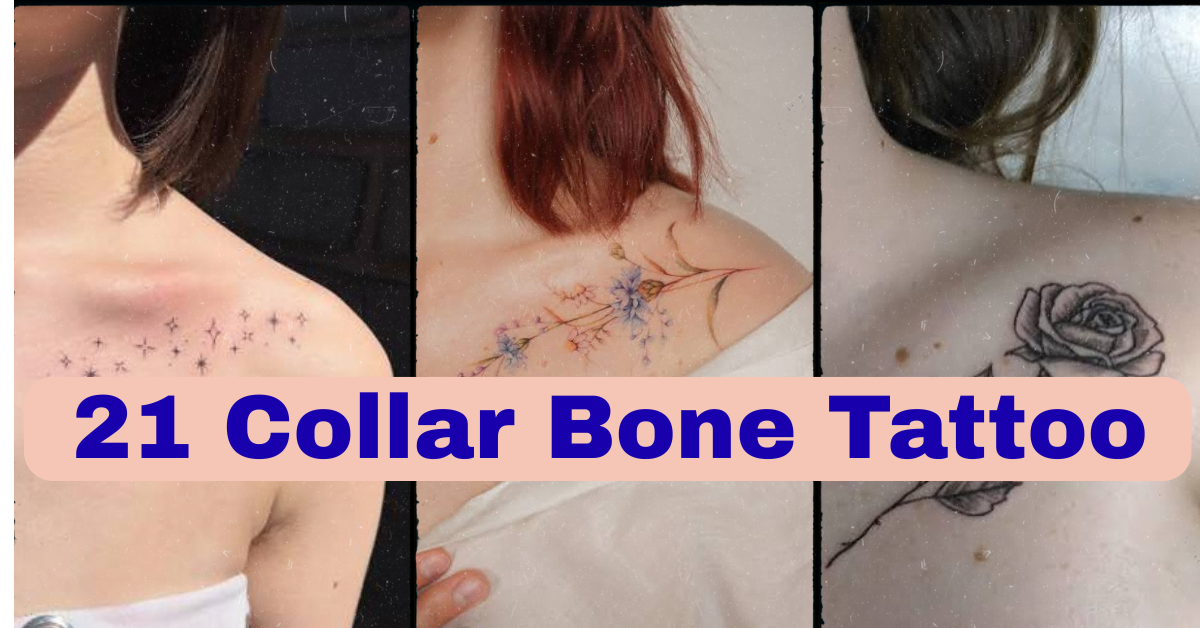
21 Collar Bone Tattoo Ideas That Age Well and Actually Fit the Placement
Nervous about picking a collar bone tattoo you’ll regret in five years? That’s actually a smart worry to have before you book, because this spot is a little trickier than people expect. I’ve spent enough time around studios watching collar bone consultations happen to know that this placement rewards specific, well-planned designs and punishes anything too big, too detailed, or too casually chosen.
So what are the best collar bone tattoo ideas? Fine-line scripts, small single-needle symbols, and delicate florals under 4 inches work best here, since the collar bone’s thin skin and bony curve hold simple linework more reliably than heavy shading or large-scale pieces. Designs that follow the bone’s natural line, rather than fighting against it, also tend to age more evenly.
Keep going, because I’m covering 21 specific designs, plus honest pain expectations, real cost ranges, placement tradeoffs across the collar bone area, and exactly how to brief an artist so the final piece matches what you actually pictured.
Why the Collar Bone Is a Tricky but Rewarding Placement
The collar bone gets requested constantly because it’s elegant and visible in the right outfits, but it’s also one of the more demanding placements on the body to get right. The skin here is thin, sits close to bone, and moves more than people expect when you shrug, reach, or turn your shoulder, which means designs need to be planned with that movement in mind rather than treated like a flat canvas. That’s exactly why simple, well-proportioned linework tends to outperform ambitious, heavily shaded pieces in this spot. The upside is real, though. A well-placed collar bone tattoo reads as deliberate and elegant, and it’s one of the easiest spots on the body to show off or cover up depending on your neckline that day.
1. Fine-Line Script Along the Collar Bone
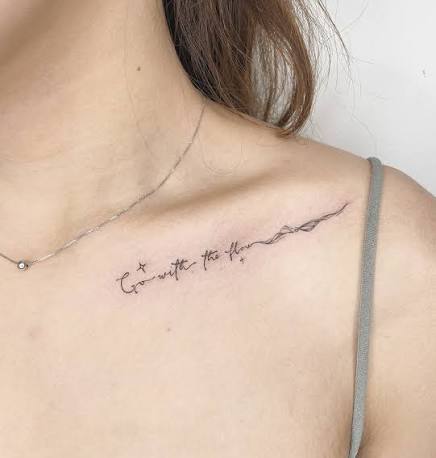
Following the natural line of the collar bone with a short word or phrase in fine, thin script is one of the most requested designs for this placement, and it works because the bone itself acts as a built-in guide for the lettering to follow. Fine line means the artist uses a single, thin, consistent needle line with no shading, which keeps small script legible instead of blurring into a smudge. Best kept to one word or a very short phrase, around 3 to 5 inches, directly along the bone’s curve. Pain here runs moderate to higher since the collar bone is close to the surface with little padding. Tip: ask your artist to slightly increase line thickness on the script specifically, thin lettering fades and blurs faster than thin illustration does. This is workplace-friendly under most necklines and a common first-tattoo choice, though it does require some upkeep over the years. Let’s look at a symbol-based alternative next.
2. Single-Needle Star Cluster Tattoo
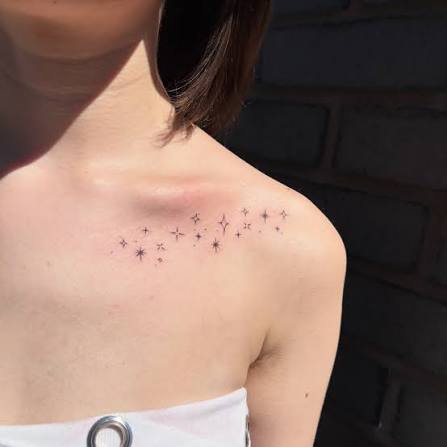
Single-needle work uses the finest needle configuration available, producing extremely delicate, thin lines that suit tiny designs particularly well. A loose scattering of small stars, varying slightly in size, along or just below the collar bone gives a soft, whimsical feel without needing any shading or color. Best kept under 3 inches total, placed slightly off the bone itself to reduce direct pressure on the more sensitive ridge. Pain is comparable to fine line in this area, noticeable but generally tolerable for most people. Tip: ask your artist to vary the star sizes and spacing rather than lining them up symmetrically, uneven spacing reads as more natural. This is one of the easier first-tattoo picks for this placement and works well as a subtle, private piece. It’s also a solid matching design option since it’s low-cost and quick to complete. Now, a floral option that follows the same bone-hugging logic.
3. Delicate Wildflower Sprig Tattoo
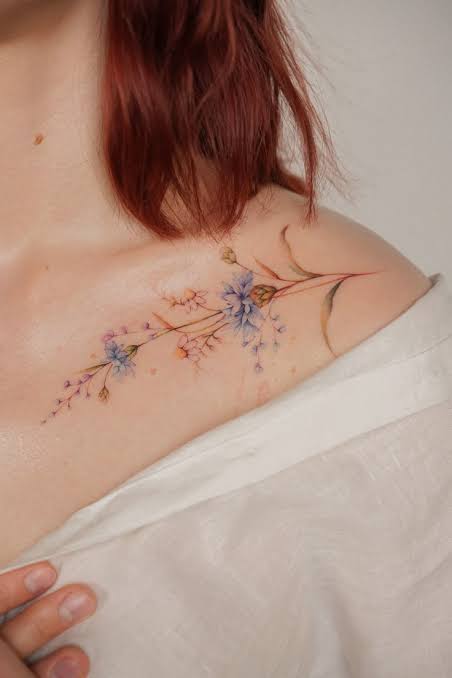
A small sprig of wildflowers, illustrated in fine line with light single-needle shading on just a few petals, works well along the collar bone because the stem naturally follows the bone’s curve while the flowers branch slightly upward toward the shoulder. Best sized 3 to 5 inches, kept toward the outer portion of the collar bone where there’s a bit more soft tissue. Pain runs moderate here, similar to most fine-detail work on this placement. Tip: tell your artist which specific flower matters to you, a birth flower, something tied to a memory, rather than just saying “flowers,” since that detail changes the composition they’ll sketch. This design is workplace-appropriate and ages well since the shading is minimal and mostly linework-driven. It’s a strong first-tattoo option for someone who wants something personal but not heavily symbolic. Let’s move to a bolder, more graphic design next.
4. Blackwork Crescent Moon and Star Tattoo
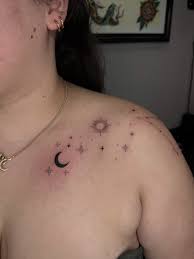
Blackwork uses solid, saturated black ink fills rather than thin outlines, and a small crescent moon paired with a single star is a compact way to bring that bolder technique into a collar bone piece without overwhelming the placement. Best kept small, around 2 to 3 inches, positioned just off-center from the bone itself to avoid too much solid black sitting directly over the ridge. Pain tends to run a bit higher here given the black saturation involved. Tip: ask your artist how they plan to keep the solid black areas from spreading slightly as the tattoo heals, since black ink can blur more noticeably than thin linework if it’s packed too densely in a small space. This design is workplace-friendly when covered and holds up well over time since solid black tends to retain saturation better than fine shading. Next, a symmetrical option that plays with the two collar bones as a pair.
5. Matching Dot Line Between Both Collar Bones
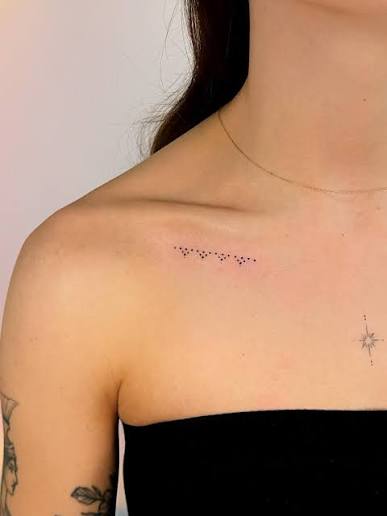
Rather than treating each collar bone separately, this design places a simple line of small, evenly spaced dots along each side, creating a subtle symmetrical pattern when viewed from the front. Dotwork here means each mark is placed individually rather than connected into a solid line, giving a soft, understated texture. Best kept minimal, a few inches per side, positioned close to the bone. Pain is generally lower for this style given the light touch involved, though the area itself is still fairly sensitive. Tip: ask your artist to slightly space the dots wider near your sternum and tighter near your shoulder, uniform spacing across a curved area can look stiff once healed. This is a low-commitment, private design that works well as a first tattoo and pairs nicely as a shared design between two people, even if each person chooses a slightly different dot count. Now let’s look at a heavier symbolic piece.
6. Fine-Line Snake Wrapped Along the Bone
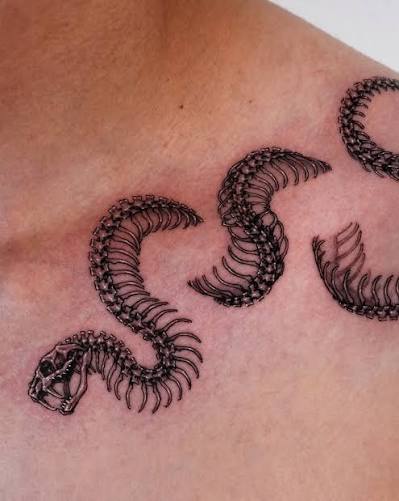
A slim snake illustrated in fine line, its body following the exact curve of the collar bone rather than coiling into a separate shape, is a design that uses the bone’s natural geometry as the backbone of the composition itself. Best sized 4 to 6 inches to let the snake’s full length read clearly along the bone. Pain runs moderate to higher given the placement directly over bone. Tip: bring a reference photo of an actual snake species you like rather than a generic cartoon version, scale pattern and head shape vary a lot and specificity helps your artist nail the proportions. This design carries transformation and renewal symbolism for a lot of people, and it’s a striking, visible piece once healed, so think through workplace coverage before booking. Let’s shift toward a more architectural, geometric design next.
7. Geometric Line Triangle Collar Bone Tattoo
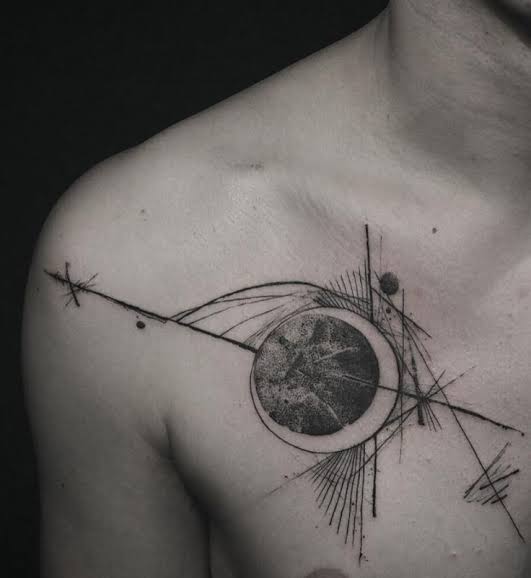
A simple geometric shape, most often a triangle or a row of small, connected triangles, done in clean fine line, gives the collar bone a minimal, modern look without leaning on any specific symbolic meaning. Precision matters a lot here since a slightly crooked geometric line is much more noticeable than an imperfect organic one. Best kept small, 2 to 4 inches, positioned along or just below the bone. Pain is standard for fine line work in this area. Tip: ask if your artist uses a straightedge or ruler-guided stencil for the geometric lines rather than freehanding them, precision tools genuinely matter for this style holding up over time. This design ages very well since there’s no shading to soften, just clean lines. It’s an easy first-tattoo choice and works well as a matching design since it’s simple to replicate consistently. Next, a nature-inspired piece with more delicate detail.
8. Single-Needle Feather Tattoo
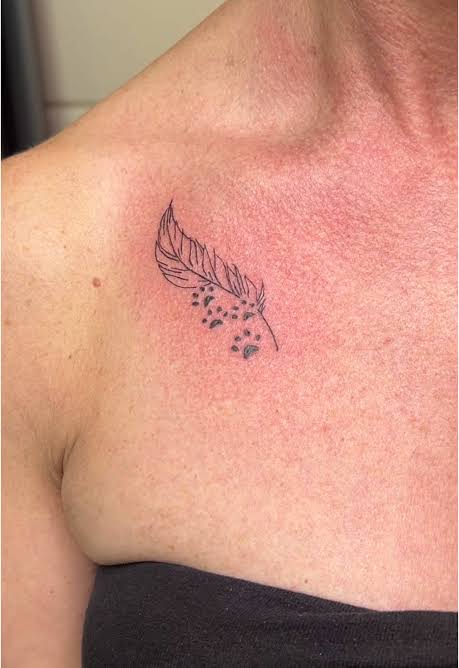
A small feather, illustrated with thin, wispy linework rather than heavy shading, works well positioned diagonally across the outer portion of the collar bone, following the natural slope of the shoulder. Single-needle technique keeps the feather’s fine barb details crisp instead of blending into a solid shape. Best sized 3 to 5 inches. Pain runs moderate in this outer area, generally a bit more tolerable than directly over the center of the bone. Tip: ask your artist to leave small gaps of untouched skin between the feather’s barbs rather than connecting every line solidly, this negative space, meaning the bare skin left intentionally blank, is what keeps the feather looking light and airy instead of like a solid shape. This design is workplace-appropriate and suits a first tattoo well given its manageable size and simple technique. Now, let’s look at a bolder floral alternative.
9. Blackwork Rose Silhouette Tattoo
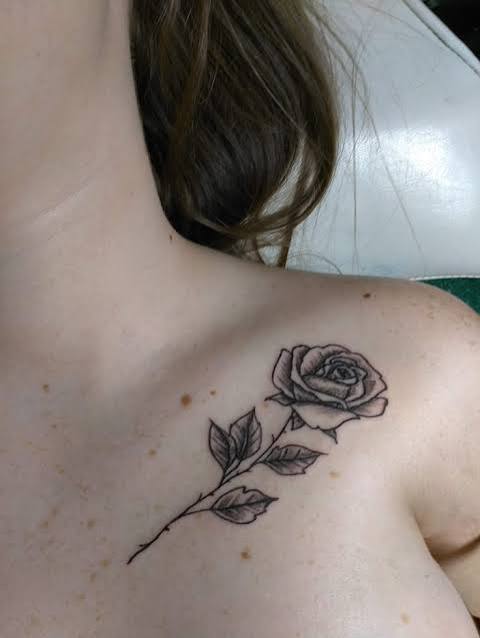
A rose rendered as a solid black silhouette, with just a few negative-space lines to suggest petal folds, brings a bolder, more graphic take on floral collar bone designs. This differs from the delicate wildflower option earlier since it relies on shape and contrast rather than detailed linework. Best kept to 2 to 4 inches given how much visual weight solid black holds even at a small size. Pain runs a bit higher here given the black saturation. Tip: ask your artist to keep the silhouette simplified rather than trying to cram in full petal detail, an overly detailed silhouette at small scale often blurs together within a few years. This design is bold but compact, workplace-friendly when covered, and holds its shape well over time since there’s minimal fine detail to lose. Let’s move into a design pulling from celestial themes again, this time with more detail.
10. Dotwork Sun and Moon Tattoo
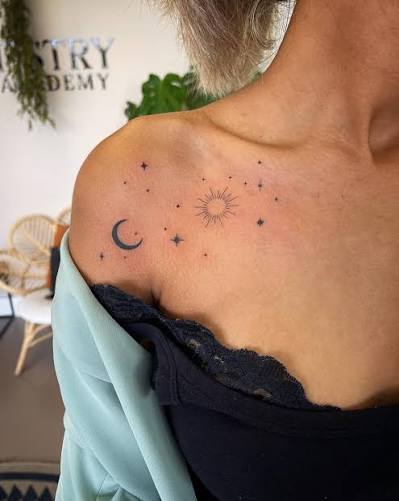
Placing a small sun on one collar bone and a small moon on the other creates a paired design that plays off natural symmetry, done in dotwork for a soft, textured gradient rather than flat shading. Each piece stays compact, around 2 to 3 inches, positioned similarly on each side for visual balance. Pain is comparable to other fine detail work in this area. Tip: ask to see healed dotwork specifically in your artist’s portfolio, since dot spacing that looks fine fresh can blur together if it’s packed too tightly for the design’s small scale. This pairing works well as a personal symbolic choice or as a coordinated, not identical, matching design with someone else. It’s a solid first-tattoo option given the manageable size on each side. Next, a script-adjacent design using roman numerals instead of words.
11. Fine-Line Roman Numeral Date Tattoo
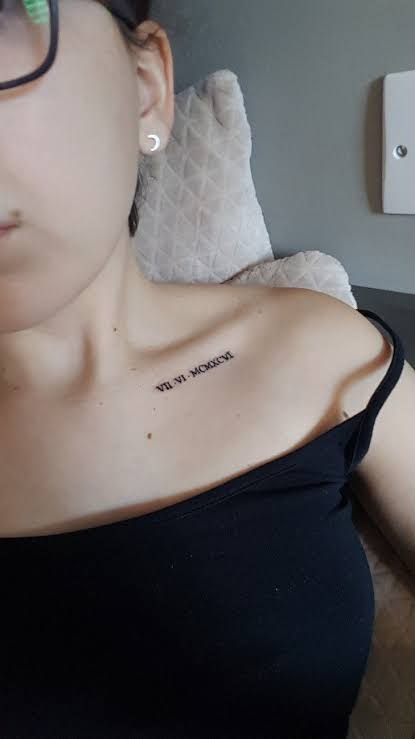
A meaningful date, rendered in roman numerals along the collar bone in fine line, gives a specific, personal detail without the legibility risk that comes with long script phrases. Best kept compact, 2 to 4 inches, following the bone’s natural curve. Pain runs moderate to higher given the placement directly over the bone in most cases. Tip: ask your artist to slightly increase spacing between each numeral character, roman numerals rely on distinct vertical lines and tight spacing can cause them to blur into an unreadable block over time. This design is private and meaningful, workplace-friendly under most necklines, and a solid first-tattoo pick for someone who wants something specific rather than purely decorative. Let’s look at an insect-based design next.
12. Fine-Line Bee Tattoo
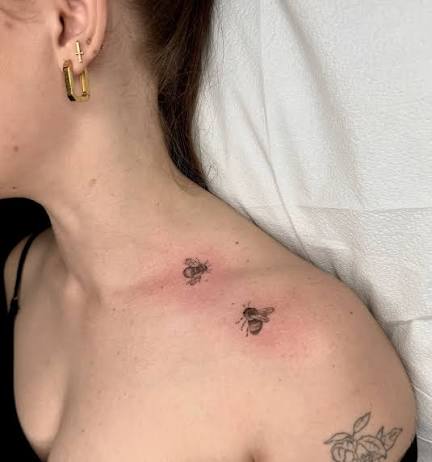
A small bee, illustrated with delicate wing linework and light single-needle shading on the body stripes, is a popular collar bone choice that reads as both decorative and quietly symbolic depending on personal meaning. Best sized 2 to 4 inches, positioned toward the outer collar bone. Pain is moderate, standard for fine detail work in this spot. Tip: ask your artist to keep the wing linework thin and slightly separated from the body rather than solidly attached, this creates the negative space that makes the wings look translucent rather than solid and heavy. This design is workplace-appropriate, a strong first-tattoo option, and works well as a matching design among a small group given how quick and low-cost it typically is. Now, let’s look at a bolder traditional-style option.
13. Bold Traditional Swallow Tattoo
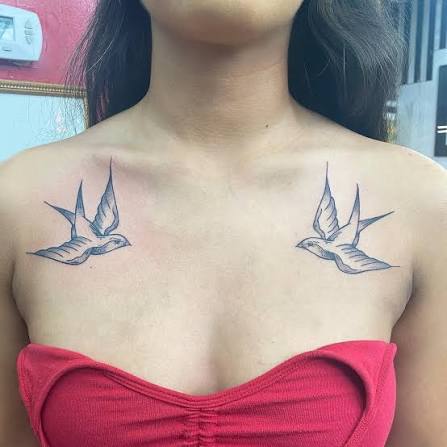
American traditional style uses thick outlines and a limited, saturated color palette, prioritizing longevity over fine detail. A small swallow in this style, wings spread, trades photorealism for graphic punch and holds up notably well over decades. Best sized 3 to 5 inches along the outer collar bone where the bold lines have room to stay distinct. Pain runs moderate to higher given the outline weight and any color fill involved. Tip: trust your traditional artist’s proportion suggestions over your own reference photo, thick linework at small scale needs specific spacing to avoid blending together as it heals. This is a strong choice for someone who wants a design that ages reliably rather than one that needs frequent touch-ups, and it reads as intentional and classic in most workplace settings. Let’s shift to something with almost no linework at all.
14. Minimalist Line Wave Tattoo
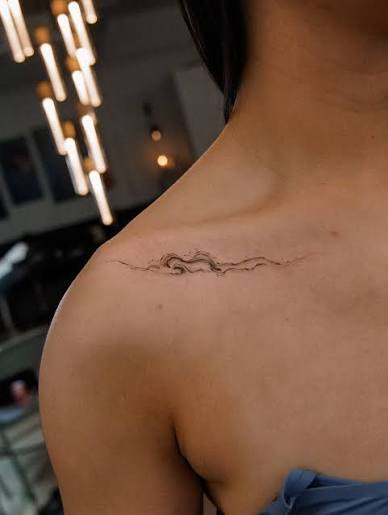
A simple, single flowing line meant to evoke a wave or a gentle current, done in fine line with a slight variation in curve, is one of the most understated designs on this list. It relies entirely on the smoothness of that single line, so precision matters more than it might seem for something this simple. Best kept small, 2 to 4 inches, following just below the collar bone’s curve. Pain is on the lower end for detailed work in this area given the minimal needlework involved. Tip: ask your artist to sketch a few line variations before settling on one, small changes in curve angle change the entire feel of a design this minimal. This is one of the easiest first-tattoo picks on this list and works especially well as a subtle, private piece. Next, let’s look at a design built around negative space instead of solid linework.
15. Negative Space Crescent Tattoo
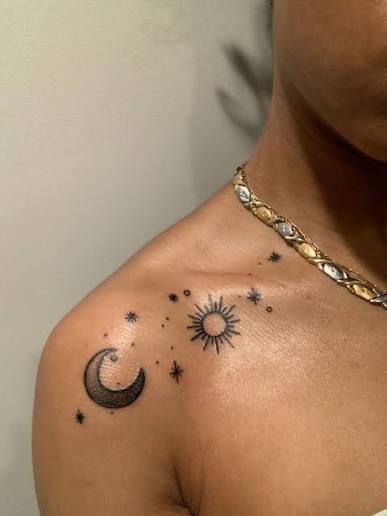
Negative space tattooing uses untouched skin as part of the image itself, here meaning a small solid black shape with a thin crescent moon left bare in the center rather than inked. It’s a striking technique but a genuinely harder one to execute cleanly at small scale, so portfolio-checking matters more for this design than most others on this list. Best kept to about 1.5 to 3 inches given how much visual weight solid black holds. Pain runs moderate to higher given the black fill involved. Tip: ask specifically how your artist plans to keep the untouched crescent shape crisp through the swelling of the first week, thin negative space channels are the most at risk of blurring during healing. This design is bold in a compact space and works well for someone who already has some ink experience. Now, back to something naturalistic and low-key.
16. Fine-Line Vine Trail Tattoo
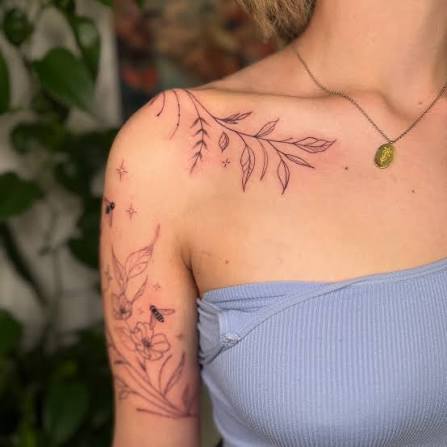
A slim, leafy vine that trails just below the collar bone rather than sitting directly on it can be a good option for people whose bone sits especially close to the surface, since it shifts the design slightly off the most sensitive spot. Done in fine line with a few small single-needle leaves along the length. Best sized 4 to 6 inches. Pain here tends to run a bit lower than designs placed directly on the bone itself. Tip: ask your artist to vary leaf size and spacing along the vine rather than repeating an identical leaf shape, uniform repetition tends to look more like a printed border than an illustrated piece. This design is workplace-friendly, a solid first-tattoo option, and ages well given the minimal shading involved. Let’s look at a design incorporating birds in flight next.
17. Fine-Line Birds in Flight Tattoo
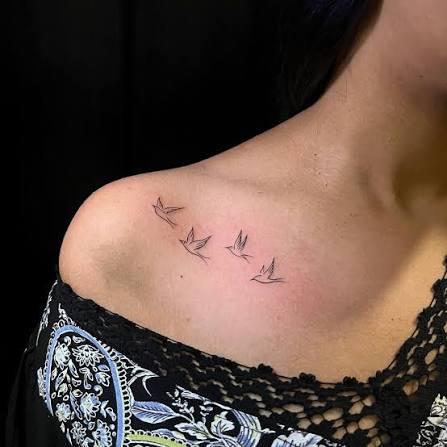
A small trio of birds, rendered as simple, thin, v-shaped linework rather than detailed feathered bodies, is a classic, understated collar bone design that reads clearly even at a small scale. Best kept to 3 to 5 inches, arranged in a loose diagonal line following the collar bone’s slope. Pain is standard for fine line work directly over the bone. Tip: ask your artist to vary the size of each bird slightly rather than making them identical, size variation suggests distance and movement, which keeps the design from looking static. This is one of the more universally flattering designs on this list, workplace-appropriate, a strong first-tattoo pick, and a popular matching option since it’s easy to adapt slightly for each person. Next, a heavier symbolic design for contrast.
18. Blackwork Compass Rose Tattoo
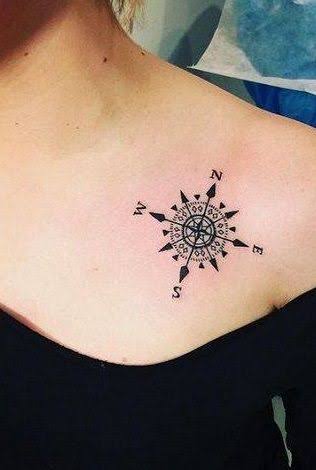
A simplified compass rose, rendered in bold blackwork with clean geometric lines radiating from a central point, brings a more structured, symbolic design into this placement. Best kept compact, 2 to 4 inches, centered slightly off the bone to reduce direct pressure during the session. Pain runs moderate to higher given the black saturation and geometric precision required. Tip: ask your artist whether they’ll use a compass tool or ruler-guided stencil for the radiating lines, since freehanded geometric lines at small scale are more prone to looking uneven once healed. This design carries meaning around direction, guidance, or travel for a lot of people, and it’s workplace-friendly when covered while still reading as bold and intentional when visible. Let’s move to a very small, minimal option next.
19. Tiny Single-Needle Heart Outline Tattoo
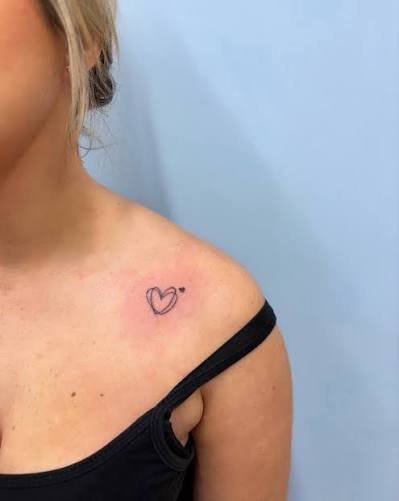
A small, simple heart outline, done entirely in single-needle linework with no shading or fill, is about as low-commitment as this placement gets. Best kept under 1.5 inches, positioned toward the center or slightly off to one side of the collar bone. Pain is on the lower end given the small size and short session time. Tip: keep the heart shape slightly imperfect and hand-drawn looking rather than asking for a perfectly symmetrical, computer-generated outline, a touch of asymmetry tends to look more intentional and less like clip art at this scale. This is an excellent first-tattoo option and a common matching design between close friends or family members given its low cost and quick healing time. Now, a design combining two smaller elements into one composition.
20. Fine-Line Sun and Cloud Tattoo
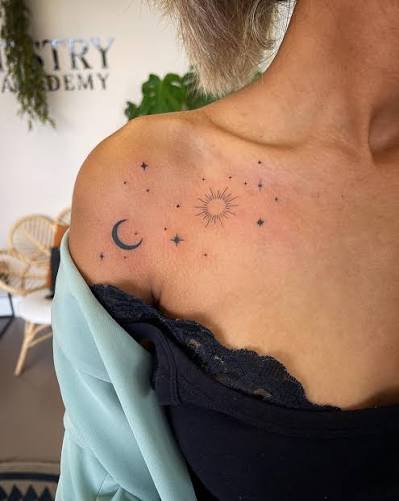
Pairing a small sun with a simple cloud outline, both done in fine line with minimal shading, creates a light, whimsical design that suits the collar bone’s horizontal space well. Best sized 3 to 5 inches, positioned along the natural curve of the bone. Pain is standard for fine line work in this spot. Tip: ask your artist to keep the sun rays uneven in length rather than perfectly symmetrical, slight variation in ray length tends to look more hand-illustrated and less rigid. This design is workplace-friendly, a solid first-tattoo pick, and holds up well over time given the minimal shading and simple linework involved. Last on the list, let’s close with a design built entirely around symmetry between both sides.
21. Matching Fine-Line Arrows Across Both Collar Bones
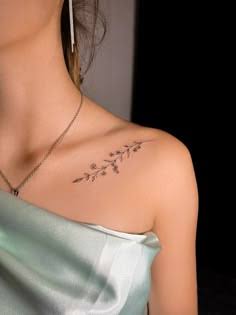
Closing out the list with a paired design: a small arrow on each collar bone, angled slightly toward or away from each other, done in fine line with a simple arrowhead and fletching detail. Best kept small, 2 to 3 inches per side, positioned symmetrically for visual balance. Pain is standard for fine line work across this area. Tip: decide with your artist in advance whether you want the arrows angled toward each other, meaning something like connection, or away from each other, meaning independence or moving forward, since that single directional choice changes the entire meaning of the piece. This is a strong first-tattoo option and one of the more popular matching designs for this specific placement given how well it works as a mirrored pair.
Best Placement Ideas
- Directly on the bone — the most classic collar bone placement; suits fine line and script well, though it tends to be more sensitive given the lack of padding.
- Just below the bone — slightly less sensitive, good for slightly larger or bolder designs like blackwork pieces.
- Outer edge near the shoulder — good for feather, bird, or bee designs that benefit from a diagonal orientation.
- Centered between both collar bones — best for small, symmetrical, or paired designs like a sun and moon or matching arrows.
- Extending slightly toward the sternum — an option for longer script or vine designs that need more horizontal space than one collar bone alone provides.
Tips for Success
Choosing the right artist matters more than choosing the “perfect” reference image, especially for a placement this detail-sensitive. Start by looking through portfolios specifically for fine-line or single-needle work if that’s your direction, since these techniques require real precision at small scale that not every artist specializes in. Look for healed photos, not just fresh ink, since collar bone tattoos in particular can shift slightly in appearance once the initial swelling goes down. Bring a clear reference photo and be upfront about sizing, since this placement punishes overly ambitious detail more than almost anywhere else on the body. And ask direct questions in your consultation: what needle configuration will they use for fine detail, how do they typically handle placement directly over bone, and what’s their approach to touch-ups if the linework softens over the following year.
Common Mistakes and How to Avoid Them
- Going too big or too detailed for the space. The collar bone doesn’t offer much flat surface area, so intricate shading or large-scale pieces often blur together within a few years.
- Ignoring the bone’s natural curve. Designs that follow the bone’s line tend to age and sit more naturally than ones that try to force a straight or unrelated shape across it.
- Skipping the aftercare instructions your specific artist gives you. This is a high-movement area, and generic aftercare advice found online doesn’t always account for that.
- Copying a reference design exactly without personalizing it. Small adjustments, a resized element, a personal date, a specific flower, make the piece genuinely yours instead of a direct copy of someone else’s tattoo.
Similar Variations
Most of these designs can be adjusted to fit your comfort level. A bolder blackwork piece can be simplified into a fine-line outline version for lower commitment and less pain. A single design, like the sun and moon or the matching arrows, can be mirrored across both collar bones for a paired look, or kept to just one side for something more understated. Script pieces can be shortened to a single initial or symbol if a full word feels like too much commitment. And smaller designs from this list, a star, a small heart, a tiny arrow, can be combined into a cluster if you want more visual interest without going bigger on any single element.
Aftercare Basics
Aftercare depends on your specific ink type, technique, and individual skin, so always follow the exact sheet your artist provides rather than generic internet advice. In general, expect to keep the area clean and moisturized, avoid direct sun exposure and swimming during the initial healing period, and avoid tight clothing or bag straps rubbing directly against the area while it heals. Healing timelines and reactions vary from person to person, so if anything seems unusual, it’s worth checking in with your artist or a licensed dermatologist rather than guessing.
Quick FAQ
How much does a collar bone tattoo cost? Cost depends heavily on size, technique, and your artist’s experience level, but expect a wide range, roughly $80 for a tiny single-needle piece up to $400 or more for a larger, more detailed design. Always get a direct quote during your consultation.
Does a collar bone tattoo hurt a lot? Pain tolerance varies a lot by individual, but the collar bone is generally considered one of the more sensitive placements on the body since the skin sits close to bone with minimal padding, similar to other bony areas like the wrist or ankle.
How long does a collar bone tattoo take to heal? Surface healing typically takes a couple of weeks, though full healing underneath the skin can take longer, and movement in this area can extend that timeline slightly. Follow your artist’s specific aftercare guidance closely.
Do collar bone tattoos fade faster than other placements? Fine, thin linework in this area can soften a bit faster than bolder blackwork designs, partly due to the amount of movement and sun exposure this placement tends to get. Some people schedule an occasional touch-up session for delicate collar bone pieces after several years.
Final Thoughts
Whichever direction you choose, delicate script, a small symbolic pairing, or a bolder blackwork piece, the collar bone works best when the design respects the bone’s natural curve and stays proportional to the space available.
Take your time choosing both the design and the artist, ask the questions covered here, and don’t be afraid to personalize any of these 21 collar bone tattoo ideas until it genuinely feels like yours. This is a visible, detail-sensitive placement, so it’s worth getting right the first time.
This article is for inspiration and general informational purposes only. Pain tolerance, healing time, and individual results vary. Always consult a licensed, professional tattoo artist, and a dermatologist if you have any skin concerns, before booking.