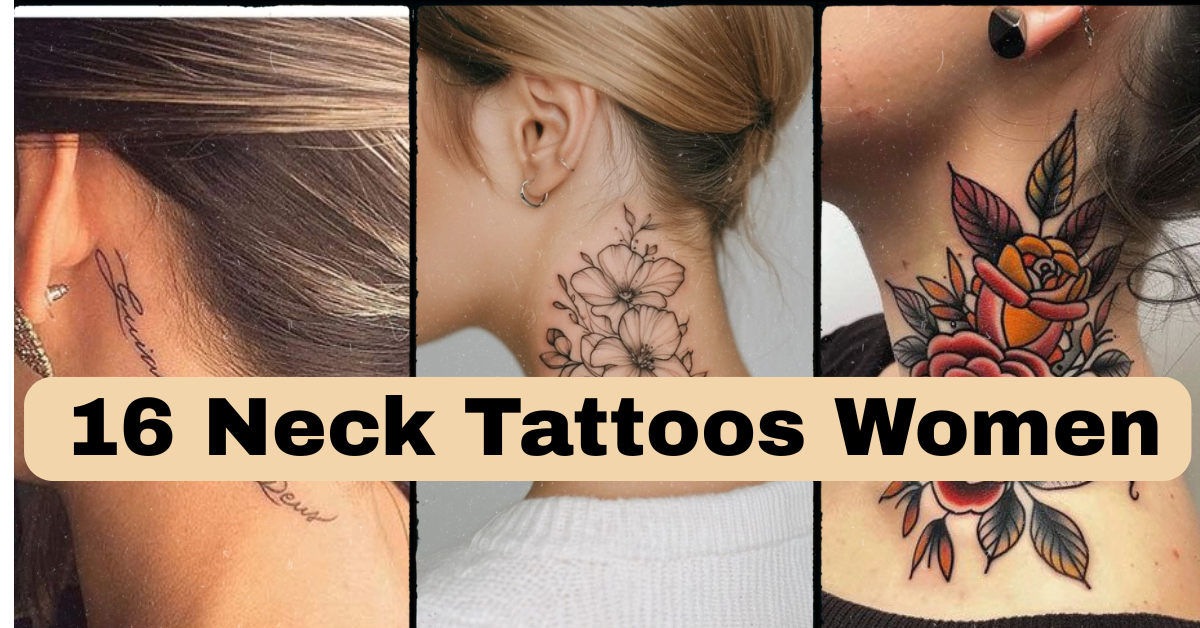
16 Neck Tattoos Women Are Choosing Right Now (And What You Need to Know Before Booking One)
Nervous about picking a neck design you might regret down the road? You’re not alone — the neck is one of the most visible, most talked-about placements in tattooing, and it deserves more research than a five-minute Pinterest scroll. This guide pulls from real studio conversations and technique breakdowns, not just pretty pictures, so you walk into your consultation actually informed.
So what are the best neck tattoos for women? Fine-line script, small blackwork symbols, delicate florals, and dotwork accents behind the ear or along the nape tend to work best, since thinner linework ages more gracefully on this thin-skinned area and stays legible for years. Bold traditional pieces can also work but need more space and planning.
Below, you’ll get specific placement advice, honest pain and healing notes, cost context, aftercare basics, and the exact questions to ask your artist — plus 16 design ideas broken down by technique, not just vibe.
Why the Neck Works So Well for Certain Tattoo Styles
The neck isn’t one placement — it’s several. The nape (back of the neck), the side neck, behind the ear, and the hairline all behave differently on skin, heal differently, and suit different line weights. Thin-skinned areas like behind the ear hold fine, delicate linework beautifully but can blur bold shading over time. Side neck placements have more surface area and muscle support, which makes them better candidates for bolder blackwork or lettering. Understanding this before you pick a design saves you from choosing something gorgeous in a photo that won’t actually translate well to your specific spot.
Fine-Line Script Behind the Ear
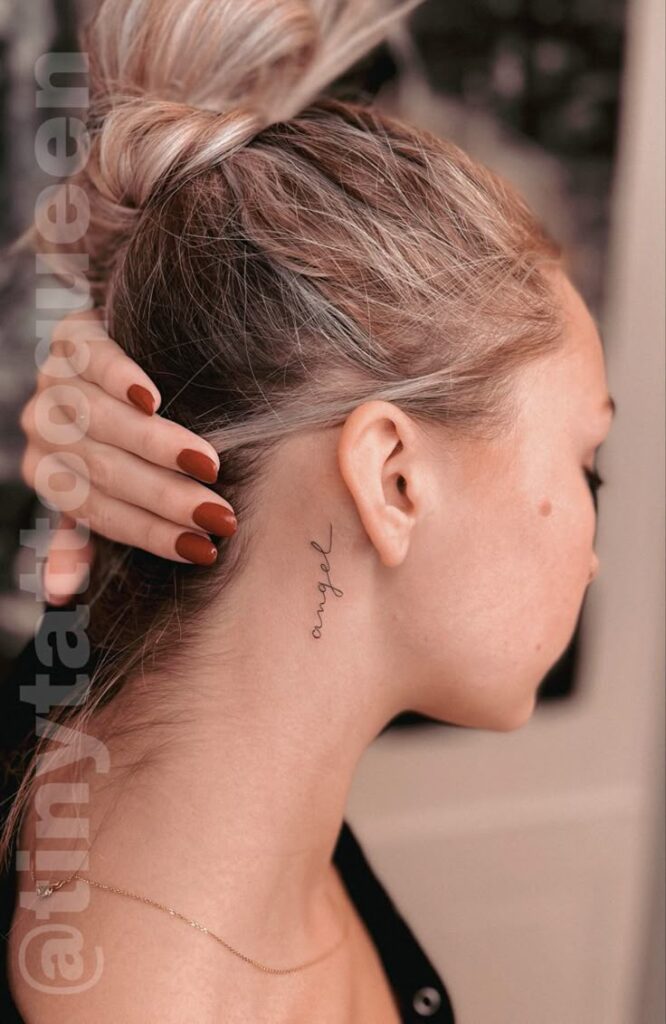
Fine-line work uses a single, thin needle to create delicate, low-saturation lines — think of it as the tattoo equivalent of handwriting versus block print. A short word, initial, or quote tucked behind the ear reads as personal and subtle, often invisible unless hair is pulled back. Keep it under two inches; anything longer risks warping as skin shifts with head movement. This area has thin skin over cartilage, so expect a sharper, more noticeable sensation during the session, though it’s typically short-lived given the small size. Healing generally runs 10–14 days for surface peeling. Bring a printed reference of the exact font — cursive scripts vary wildly between artists. This is a strong first-tattoo option because it’s easy to conceal for work and low-commitment in scale.
Small Blackwork Symbol on the Nape
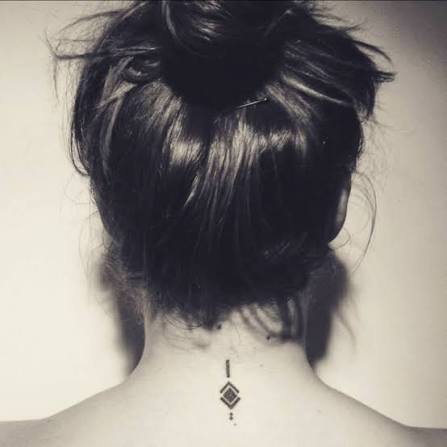
Blackwork means solid, saturated black ink with no shading gradient — clean, bold, and high-contrast. A small symbol (an arrow, moon phase, or geometric shape) on the nape sits just below the hairline, easy to hide with hair down and easy to show off with hair up. Aim for one to two inches for clarity; solid black shapes smaller than that can lose crispness after healing. The nape has moderate sensitivity — not as sharp as bony spots, but not painless either. Ask your artist about line thickness before the stencil goes on; thicker outlines hold up better long-term than hairline-thin blackwork in this spot. This works well for matching tattoos among friends since the symbol reads clearly at a glance.
Delicate Floral Vine Along the Side Neck
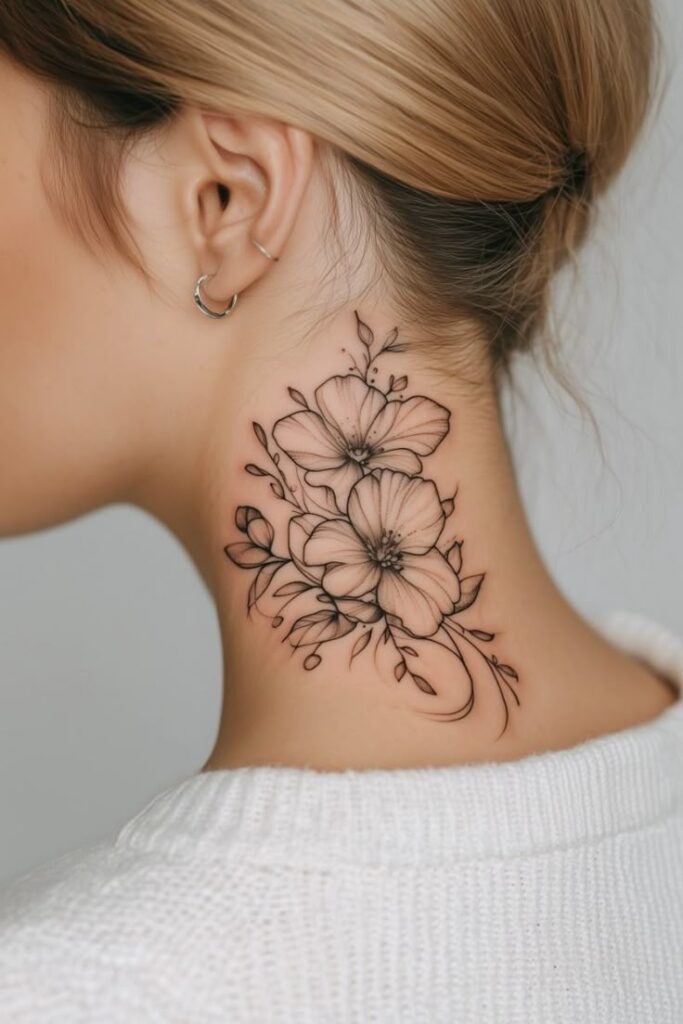
A floral vine running from behind the ear down the side of the neck uses fine-line botanical work — thin stems, small leaf clusters, and minimal shading to suggest petal texture without heavy black fill. This placement follows the natural curve of the neck, so the design should be drawn to flow with your specific anatomy, not copied flat from a reference photo. Expect a three-to-five-inch piece for enough detail to read clearly. Side neck skin is more forgiving than bony areas, though proximity to the throat can still feel sensitive for some people. Healing typically takes two to three weeks with normal light peeling. Ask your artist to sketch directly on your skin before tattooing so the vine’s curve matches your neck’s shape.
Single-Needle Star Cluster
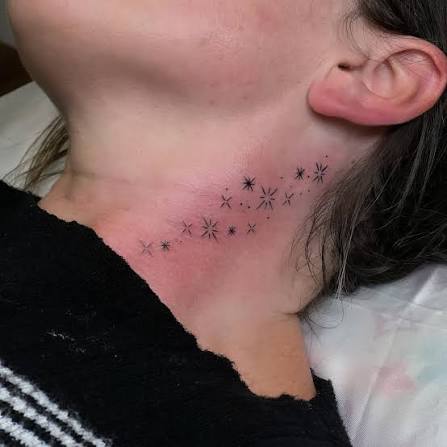
Single-needle tattoos use the thinnest possible needle configuration, producing hairline-width dots and strokes — ideal for tiny, scattered designs like a star cluster near the collarbone-adjacent side neck. This style prioritizes subtlety over boldness; saturation is intentionally low. Keep the cluster within a two-inch radius to avoid visual clutter. Because the lines are so fine, touch-ups are more likely needed within a few years as skin cells turn over. Pain here is generally mild to moderate depending on exact placement. A useful tip: ask specifically for a single-needle specialist, since not every artist works comfortably at this scale. This design suits people who want something meaningful but nearly invisible day-to-day.
Minimalist Geometric Shape on the Nape
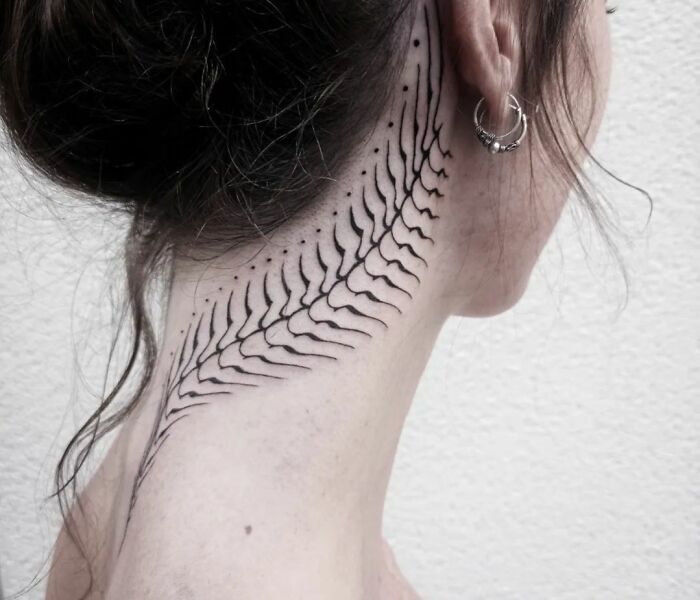
Simple geometric shapes — a triangle, hexagon, or single line forming an abstract form — rely on clean, even linework rather than shading or color. On the nape, a two-inch geometric design reads crisply against skin and ages well because there’s no fine detail to blur over time. This is one of the more forgiving neck placements pain-wise, sitting in a moderately sensitive zone rather than directly over bone. Request a stencil preview and check the symmetry before it’s applied — geometric designs show any unevenness more obviously than organic shapes. Great for a first tattoo since it’s quick, low-cost, and easy to build on later with additional small pieces.
Dotwork Mandala Behind the Ear
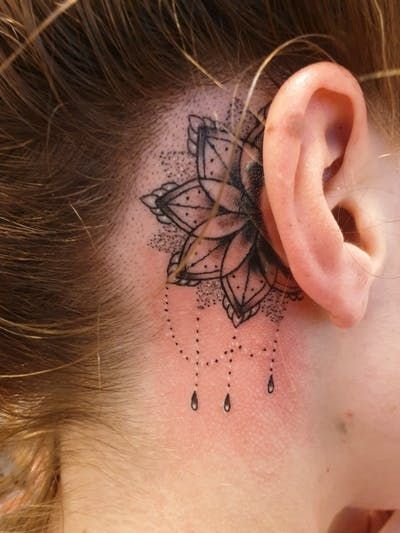
Dotwork builds an image entirely from small individual dots rather than continuous lines, creating a textured, almost stippled look — commonly used for mandalas and intricate patterns. A mini mandala behind the ear needs to stay compact, usually under 1.5 inches, since dotwork loses definition if packed too tightly into a small space. This technique takes longer per square inch than linework, so expect a longer session even for a small design. Sensitivity here tends to run moderate to high due to thin skin and cartilage underneath. Ask your artist for a zoomed-in stencil test to confirm the dots won’t blur together once healed. This suits someone wanting intricate detail without full visibility.
Bold Traditional Snake on the Side Neck
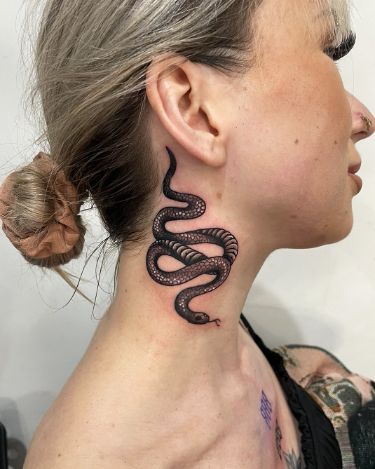
Traditional tattooing uses thick, bold outlines with solid color or black fill and minimal fine detail — built to stay legible for decades. A snake winding along the side neck is a classic choice in this style, using the neck’s length to show the full curve of the body. This needs real space, typically four to six inches, and works best on side neck rather than nape due to the elongated shape. Bold traditional pieces hold up better long-term than fine-line work because thicker lines resist fading and blurring. Expect moderate-to-higher discomfort given the size and session length. Bring reference images showing line weight you like, not just the subject — traditional artists vary the boldness significantly.
Negative Space Crescent Moon

Negative space design uses the untattooed skin itself as part of the image — a solid black shape with a moon-shaped gap left bare, so the “moon” is defined by what’s not inked rather than what is. This works well as a small nape or behind-ear accent, usually under an inch and a half, since the contrast needs tight, clean edges to read properly. Skin tone affects visibility here more than with most styles — deeper skin tones may want the artist adjust black saturation for stronger contrast. Ask to see healed photos of negative space work specifically, not just fresh ink, since this technique changes noticeably as it settles.
Fine-Line Butterfly Trail
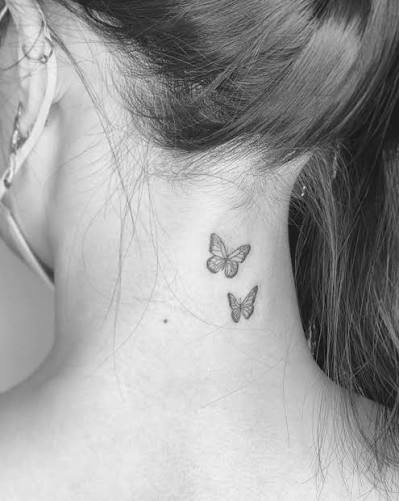
A trail of two or three small butterflies in fine-line style, sized in descending order, works nicely trailing from behind the ear down toward the nape. Each butterfly uses thin, single-needle outlines with little to no shading, keeping the overall look airy rather than heavy. Total span should stay under four inches to maintain the delicate feel. This placement crosses both thin-skin and moderate-skin zones, so pain may shift slightly as the artist moves down the trail. Healing runs about two weeks. A solid tip: ask for slightly varied wing shapes rather than identical copies, so the trail looks intentional rather than stamped. Popular for those wanting movement and femininity without bold visual weight.
Small Matching Symbols for Friends
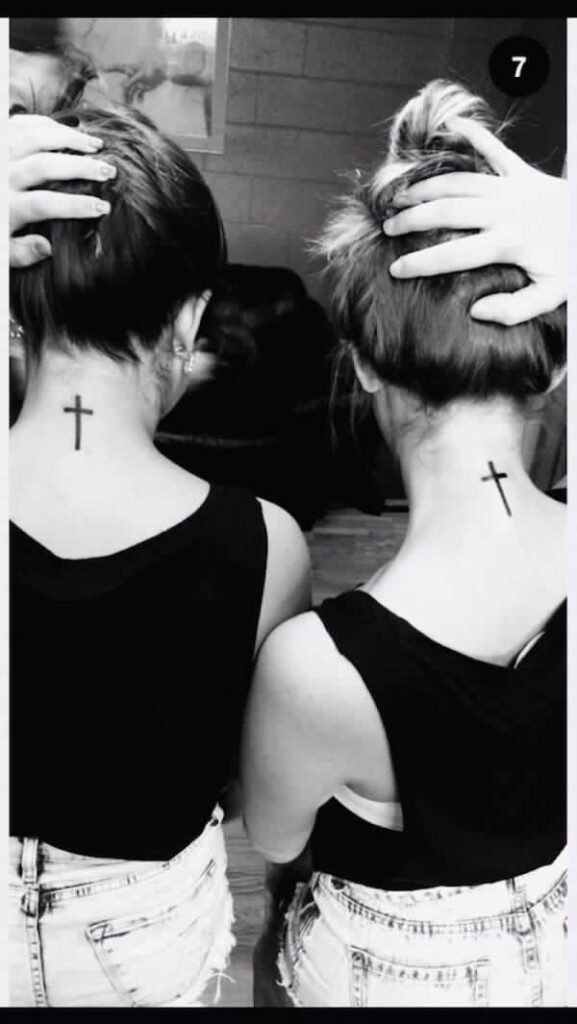
Matching tattoos work best when kept simple — a small heart, initial, or shared symbol under an inch, placed identically (or mirrored) on the nape or behind the ear for each person. Simple line work like this ages more predictably than detailed designs, since there’s little fine detail to lose over years. Discuss placement consistency with your artist ahead of time if getting tattooed separately, so sizing and angle match reasonably well. Pain and healing mirror other small nape or behind-ear designs — generally short sessions, short healing windows. This category solves a specific desire: shared meaning without a loud, attention-grabbing design.
Script Quote Along the Hairline
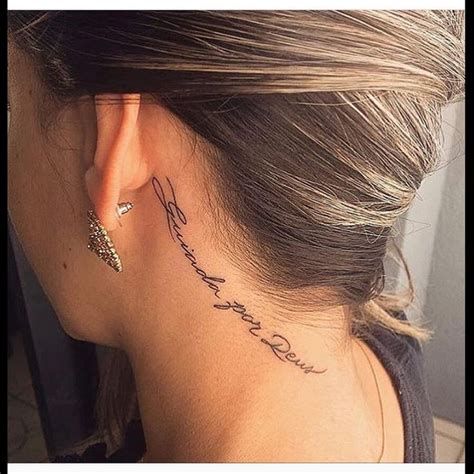
A short phrase in fine-line script following the hairline curve reads elegantly but requires precise lettering spacing — ask your artist to draft the exact wording digitally first, since hand-lettered scripts can shift proportion once transferred to curved skin. Keep phrases short; long quotes lose legibility at small sizes and require more linear space than most people want visible near the hairline. This area shares sensitivity with behind-the-ear placement. Expect some fading of fine serifs over five-plus years, which is normal for thin-line lettering anywhere on the body. Request a font sample tattooed on paper-thin practice skin if your artist offers it, so you can judge line thickness before committing.
Blackwork Vine Wrap
A thicker, more solid vine — using blackwork’s flat saturation rather than fine-line’s thin strokes — wrapping partway around the side neck creates a bolder, more graphic look than the floral vine option above. Leaf shapes are simplified into solid black wedges rather than detailed outlines. This suits a three-to-five-inch span and holds up well long-term because of the solid ink saturation. Side neck placement means moderate sensitivity, generally more tolerable than spots directly behind the ear. Ask your artist about consistent black saturation across the whole piece — uneven fill is one of the more common regret points people mention after healing.
Tiny Constellation Dots

Using dotwork’s stippled technique at a very small scale, a scattered constellation pattern with thin connecting lines suits the nape or a small side-neck patch. Keep dot spacing consistent — ask to see the stencil from a few feet away, since constellation patterns that look fine up close can appear cluttered at social distance. Size should stay under two inches for readability. This is a low-to-moderate pain placement depending on exact spot and one of the more universally flattering minimalist choices, since it works on any skin tone without needing heavy contrast.
Watercolor-Style Floral Accent
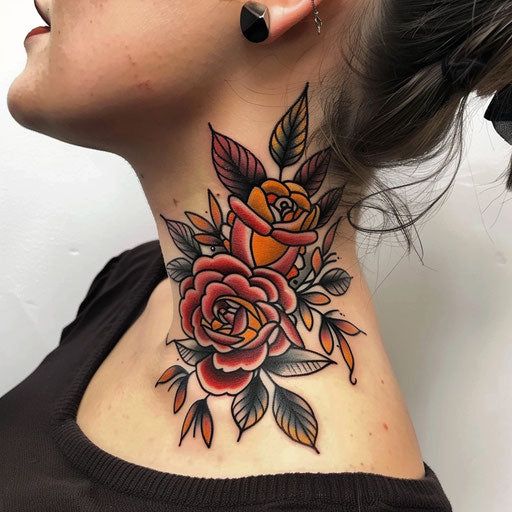
Watercolor tattooing blends color with soft, unbordered edges to mimic paint bleeding on paper — no hard outlines, just color gradients. A small floral accent in this style near the side neck can look striking, but it’s worth knowing upfront that watercolor pieces tend to fade faster and may need touch-ups sooner than solid blackwork or fine-line designs, based on general consensus among professional artists. Keep it to two or three inches. Ask your artist about color longevity expectations for your specific skin tone before booking, since pigment visibility varies. This suits someone comfortable with more maintenance in exchange for a softer, painterly look.
Bold Lettering Nameplate on Side Neck
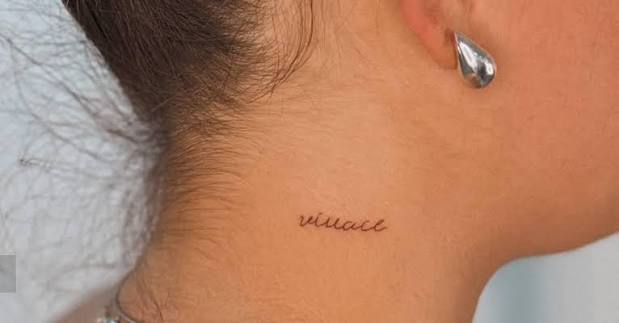
A bold, block-style name or word placed horizontally along the side neck uses thicker linework than script, prioritizing legibility over delicacy. This needs real commitment — both in visibility and size, usually three to five inches — so it’s worth sitting with the decision for a few weeks before booking. Pain tends to run moderate to higher given the size and session length involved. This is a poor choice for most workplace visibility needs, so factor that in honestly rather than after the fact. Ask for multiple font mockups projected onto your actual neck before finalizing.
Delicate Chain or Jewelry-Style Linework
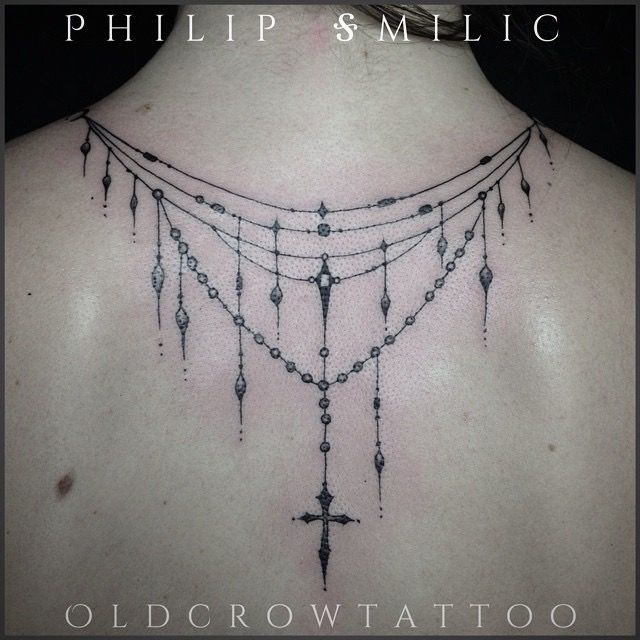
Fine-line work styled to resemble a delicate necklace or chain, following the collarbone-adjacent neck line, creates the illusion of jewelry using thin, single-needle strokes with tiny gaps to mimic links or charms. This needs careful spacing so it doesn’t read as a solid line once healed and slightly settled. Keep individual “links” distinct in the stencil stage. Sensitivity here is generally moderate. This design ages best when kept fairly simple — overly intricate chain patterns can blur together after several years, based on how fine-line work typically settles over time.
Best Placement Ideas
- Behind the ear — highly concealable, thin skin means sharper sensation, best for small fine-line or dotwork pieces.
- Nape (back of neck) — easy to hide with hair down, moderate pain, versatile for blackwork, geometric, or script.
- Side neck — more visible, larger surface area, better suited to bolder blackwork, traditional, or lettering pieces.
- Hairline — good for short script or small accents, moderate sensitivity, partially concealable.
- Front/throat-adjacent neck — highest visibility, generally higher sensitivity, recommend discussing thoroughly with your artist before committing given the commitment level.
Tips for Success
Look for an artist whose portfolio shows multiple healed photos in the specific technique you want, not just fresh ink — healed work tells you how lines actually hold up. Bring reference images that show line weight and saturation you like, not just subject matter. Ask direct questions: what needle configuration will they use, how many sessions they expect, and what their touch-up policy looks like. A confident, experienced artist will welcome these questions rather than brush them off. Whether you go with a walk-in flash design or a fully custom piece, get a stencil placed on your actual skin and look at it in a mirror before agreeing to start.
Common Mistakes and How to Avoid Them
- Sizing too small for detail — intricate designs need enough space to stay legible after healing; ask your artist if your chosen size can actually support the level of detail you want.
- Choosing a placement that fights the design’s linework — a design meant to flow with a curve looks off if forced onto a flat reference without adjustment.
- Skipping aftercare instructions — every artist’s aftercare sheet varies slightly; follow theirs specifically rather than generic internet advice.
- Copying a design exactly — small personal tweaks (spacing, added element, adjusted angle) keep a popular design from looking mass-produced.
- Booking based on price alone — the cheapest quote isn’t a bargain if the linework doesn’t hold up over time.
Similar Variations
Most of these designs can be resized smaller for a more discreet look or slightly enlarged if you want more visual presence. Fine-line pieces can be converted to blackwork for a bolder, longer-lasting effect, while blackwork designs can be softened with dotwork shading for texture. Several single designs — like the star cluster or constellation dots — can be combined into a small connected series across the nape and behind the ear for a cohesive theme.
Aftercare Basics
General aftercare typically includes keeping the area clean, avoiding direct sun exposure while healing, avoiding tight clothing or hair accessories that rub the area, and not picking at any surface peeling. Always follow the specific aftercare sheet your artist provides, since products and timing recommendations can vary by studio. If you notice anything that concerns you during healing, consult a licensed professional or dermatologist rather than relying on general internet advice.
Quick FAQ
How much do neck tattoos typically cost?
Small fine-line or minimalist designs often start in the range of a shop’s minimum fee, while larger blackwork or traditional side-neck pieces cost more due to time and detail. Always ask for a personalized quote during consultation.
Do neck tattoos hurt more than other placements?
Pain tolerance varies by individual, but areas near bone or cartilage — like behind the ear — are generally reported as more sensitive than the side neck or nape.
How long does healing take?
Small designs typically show surface healing within two to three weeks, though full settling under the skin can take longer. Individual healing time varies.
Do neck tattoos fade faster than other placements?
Fading depends more on technique and sun exposure than placement alone — fine, thin lines generally show wear sooner than bold, saturated blackwork.
Techniques at a Glance
- Fine line — thin, single-needle strokes with low saturation, best for delicate, detailed small designs.
- Blackwork — solid, saturated black ink with sharp edges, holds up well long-term.
- Dotwork — images built from individual dots, creating texture, requires more session time per inch.
- Negative space — uses bare skin as part of the design, relying on strong black-and-skin contrast.
- Traditional — bold outlines with solid fill, designed for long-term legibility over fine detail.
Choosing among these 16 neck tattoos for women really comes down to matching technique to placement, being honest about visibility and pain tolerance, and finding an artist whose healed work actually backs up their portfolio promises. Take your time, ask the uncomfortable questions upfront, and remember that a good tattoo is one that still makes sense to you — and still looks clean — five years from now.