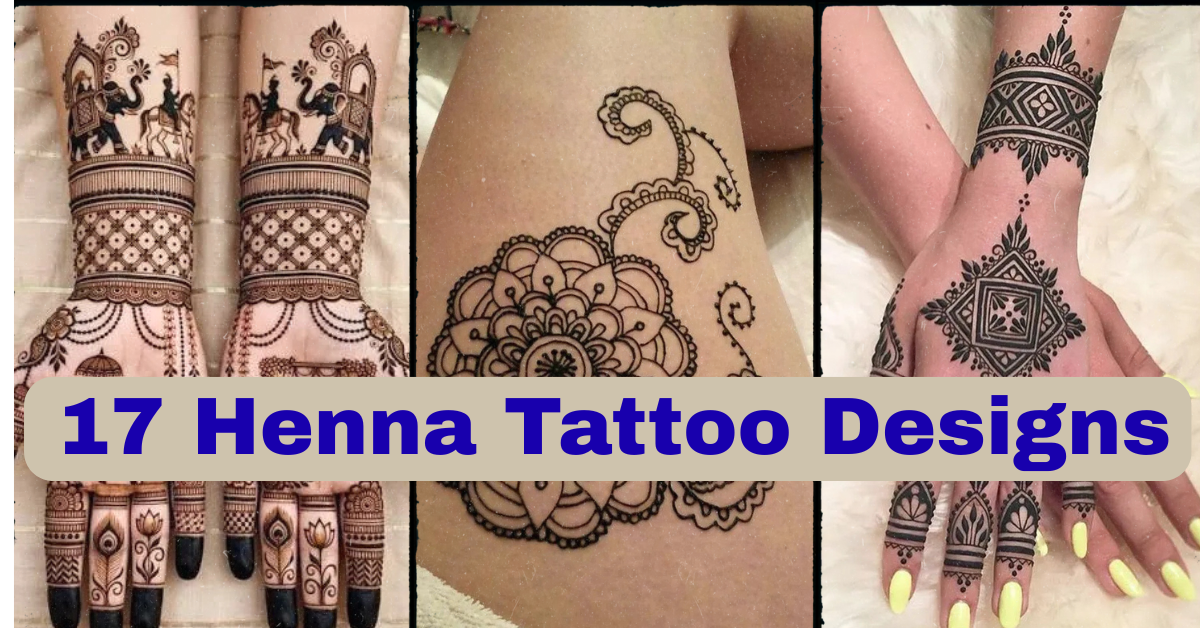
17 Henna Tattoo Designs Worth Booking (And What Nobody Tells You Before You Sit Down)
Nervous about picking a henna tattoo design you’ll regret in a week, or worse, one that stains uneven and blotchy because nobody warned you about aftercare? I’ve spent enough time around henna artists and bridal mehndi setups to know that the difference between a design you love and one you’re disappointed by usually comes down to details nobody bothers explaining — placement, paste consistency, skin type, and how long you actually need to sit still.
So what are the best henna tattoo designs to try? Fine-line florals, geometric mandalas, and minimalist wrist bands top the list because they balance detail with realistic fade times, while bold traditional bridal patterns work best for hands and feet where thicker skin holds stain longer. The right choice depends on your skin, your event, and how much detail you actually want to maintain.
Stick around, because I’m going to walk you through placement tradeoffs, how long each style realistically lasts, what to ask your artist before the cone even touches your skin, and the safety detail most articles skip entirely — the difference between natural henna and the “black henna” you should probably avoid.
Why Henna Designs Work So Well as Body Art
Henna gives you something permanent tattoos can’t: a genuine test drive. You get to see how a design sits on your skin, how it ages over days instead of years, and whether you’d actually want it forever — all without needles, without commitment, and without a five-figure laser removal bill if you change your mind. The paste is made from crushed henna leaves mixed into a smooth consistency, applied through a cone or fine metal-tipped applicator, and left to dry before it stains the top layer of skin a reddish-brown. That staining process is exactly why placement and skin prep matter so much, which we’ll get into as we go through each design.
Fine-Line Mandala Henna Design
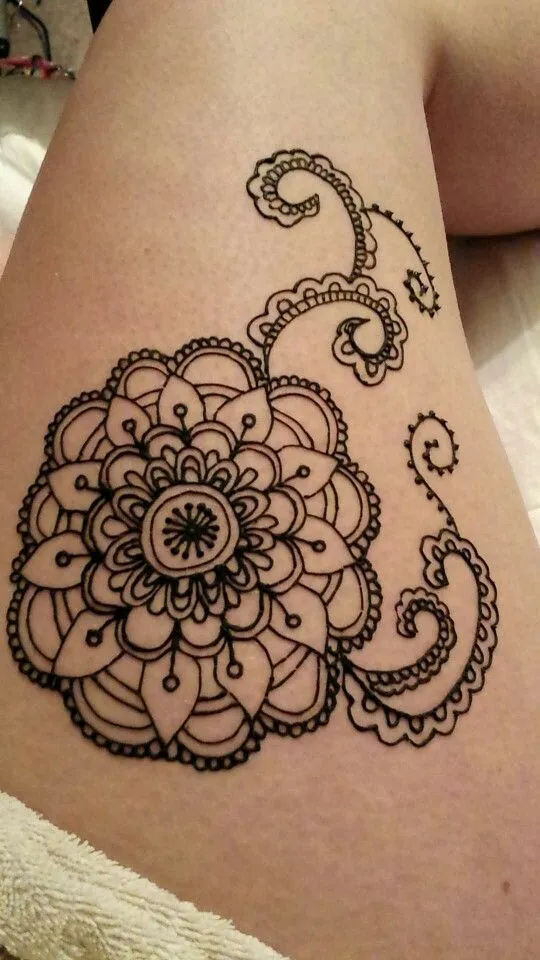
A mandala is a circular, symmetrical pattern built from repeating petals, dots, and geometric segments radiating out from a center point. Artists usually work with a fine metal-tipped applicator for this one since it lets them keep line weight thin and consistent, which is what gives mandalas their crisp, almost lace-like look. This design shines on the inner forearm or the top of the hand, where flat skin gives the artist room to keep circles even. Aim for a 2 to 4 inch diameter if it’s your first time — bigger designs on curved areas like the wrist tend to distort. There’s no needle involved, so discomfort is minimal; the main challenge is sitting still while the paste dries, which takes 20 to 40 minutes depending on size. Bring a clear reference photo and ask your artist to adjust the petal count to fit your skin’s curve rather than copying a flat image exactly. From here, let’s look at a design that leans traditional instead of geometric.
Traditional Rajasthani Bridal Henna

This is the dense, full-coverage style you’ve probably seen in wedding photos — intricate paisleys, peacocks, and floral vines covering the entire hand and sometimes up to the elbow. The linework is thicker than fine-line styles and layered with shading created by filling in sections solidly rather than leaving open space. Because it covers so much surface area, sessions can run 2 to 4 hours, and the paste needs to stay on for 6 to 8 hours for the deepest stain. Hands and feet are the traditional placement because thicker skin there holds color longer than thinner areas like the forearm. If you’re booking this for a wedding, schedule it 1 to 2 days before the event, not the morning of, since stain darkens over 24 to 48 hours. Ask to see full-hand portfolio photos, not just close-ups, so you know the artist can handle composition across a large space. Next, let’s shrink things down to a style built on negative space instead of density.
Moroccan Geometric Henna Patterns
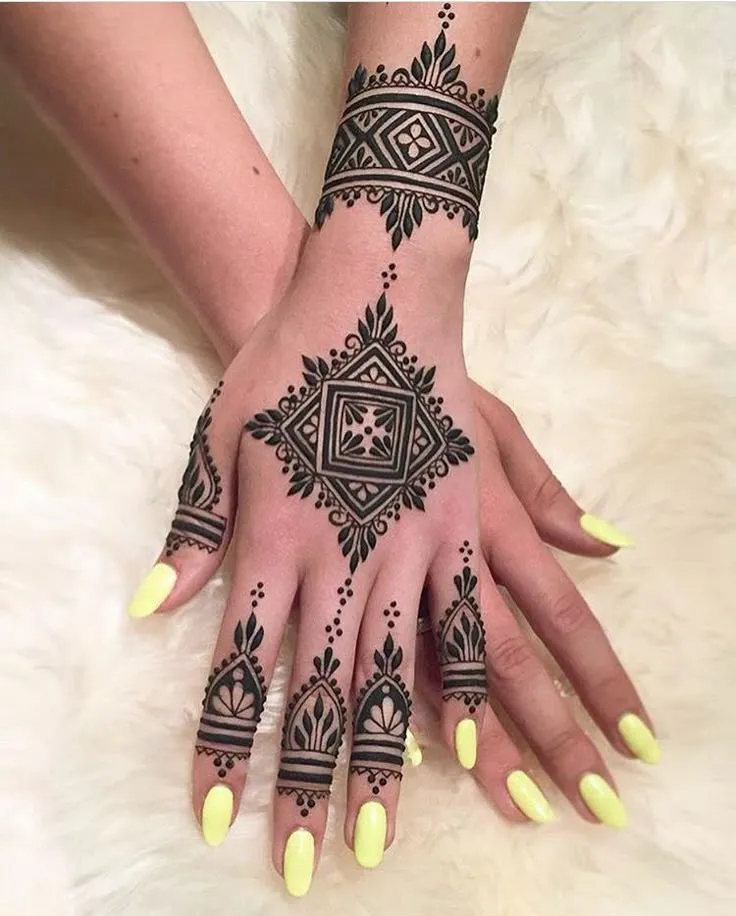
Moroccan-style henna trades floral curves for straight lines, triangles, and diamond grids, often left more open than Indian bridal styles. The technique relies on precise, ruler-straight linework, which is honestly harder to freehand than curved florals — a shaky line stands out immediately in a geometric grid. This style looks sharp on the ankle, forearm, or shoulder blade, and it photographs especially well because the contrast between filled shapes and bare skin reads clearly even in low light. Sizing between 3 and 6 inches keeps the geometry legible without overwhelming the area. Skin with visible texture or scarring can slightly distort straight lines, so mention any texture concerns during booking. There’s no pain since it’s topical paste, but expect some tackiness while it dries — avoid tight clothing brushing against it. This design suits workplaces fine since it fades within two weeks. Now let’s talk about something that works well for a first-timer nervous about commitment.
Minimalist Floral Vine Henna

A single continuous vine with small leaves and buds branching off is one of the most forgiving henna designs for beginners, both for the wearer and the artist. The line weight stays thin and even throughout, with no heavy fill sections, which keeps the design light and quick to apply — usually under 15 minutes. It works beautifully along the collarbone, ankle, or wrist, tracing the natural line of the body instead of fighting it. Because it’s so simple, this is a smart first henna design if you’re unsure about bigger commitments. Ask your artist to trace the vine along your specific bone structure rather than using a flat stencil, since a hand-adjusted line always looks more natural. Skin oiliness can affect how crisp the stain turns out, so come in with clean, product-free skin. This design fades gracefully too, without leaving harsh patchy spots, which brings us to a bolder floral option.
Arabic-Style Floral Henna
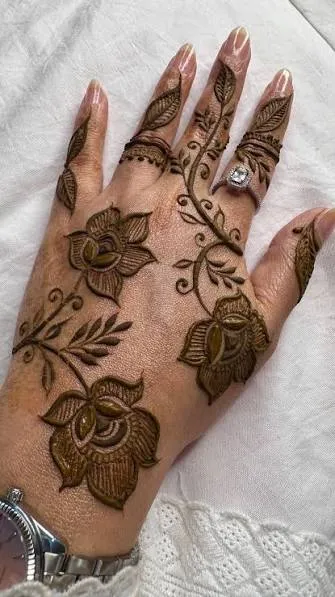
Arabic henna uses bold, sweeping floral and leaf shapes with more negative space between elements than Indian styles — meaning bare skin peeks through intentionally instead of being fully covered. The line weight varies noticeably within the same design, thick at the base of a petal and tapering to a fine point at the tip, which takes real cone control to pull off. This style suits the back of the hand or the top of the foot, where the negative space reads clearly against the skin tone. A palm-sized design usually takes 20 to 30 minutes. Because the shapes are large and simple, this design tends to age well as it fades, breaking down evenly instead of looking blotchy. Bring reference images showing the flow direction you like, since Arabic henna often follows a diagonal sweep rather than a symmetrical grid. It’s a solid pick for matching friend tattoos since simplified versions scale down easily.
Dotwork Henna Accents
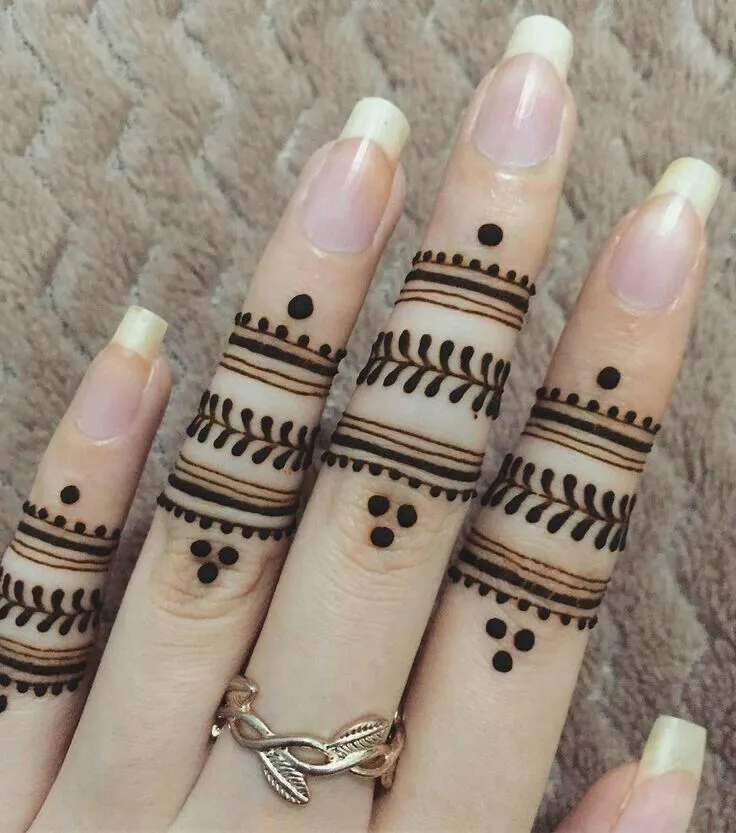
Dotwork, in henna terms, means using small dots — either from the cone tip or a fine stick applicator — to build borders, fill negative space, or create a delicate netting pattern called jaal. Instead of solid fill or continuous lines, the design is built entirely from tiny repeated points, giving it a stippled, textured look up close. This works well as an accent around the edges of a larger mandala or vine design, or on its own along the fingers and wrist. Because each dot is applied individually, this technique takes patience — expect a slower session than solid linework. Fine dotwork holds up best on smooth, flat skin like the inner wrist; bony or heavily creased areas can blur the dots as the paste settles. Ask your artist to space dots slightly wider than usual if you have sensitive or textured skin, since tighter dotwork can look muddy once it stains. Let’s move to a design built entirely around one recognizable motif.
Peacock Motif Henna Design
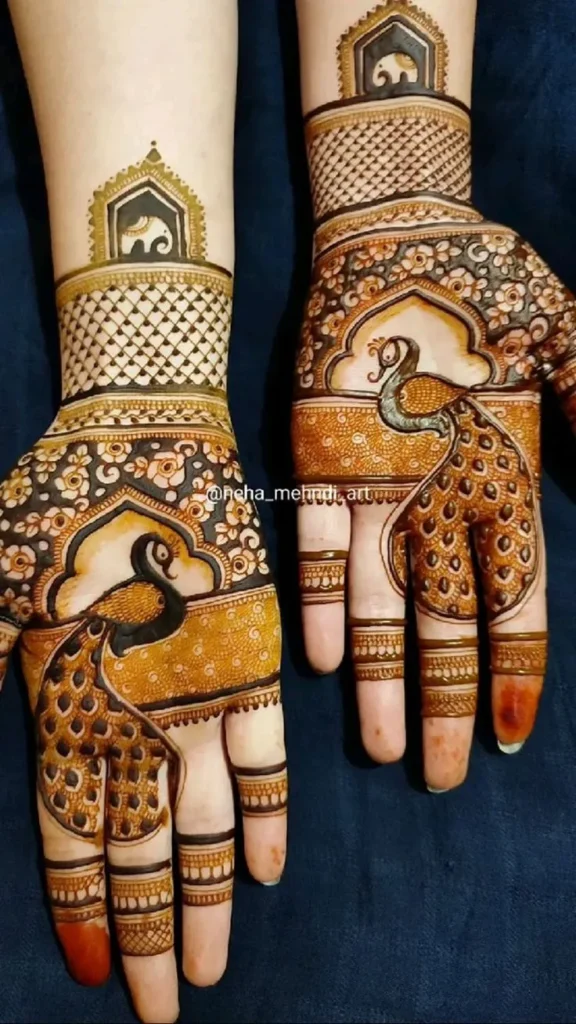
The peacock is one of the most requested single-motif henna designs, typically rendered with a mix of fine linework for the feather detail and bolder fill for the body. Artists usually build the tail as a fan of individual feather shapes, each one outlined thin and then filled with small repeating patterns — dots, lines, or tiny leaf shapes — instead of solid color. This design needs real space to read clearly, so the back of the hand, upper arm, or shoulder blade works better than a small wrist placement. Give it at least 4 inches of room. Because of the detail level, sessions run 30 to 60 minutes depending on tail size. Bring a reference photo with a clear feather pattern you like, since “peacock” alone gives an artist too much room to guess your preference. This motif holds meaning for a lot of people, which makes it a strong choice for a design you’d actually want to repeat as a permanent tattoo down the line.
Full-Hand Bridal Mehndi (Dulhan Style)
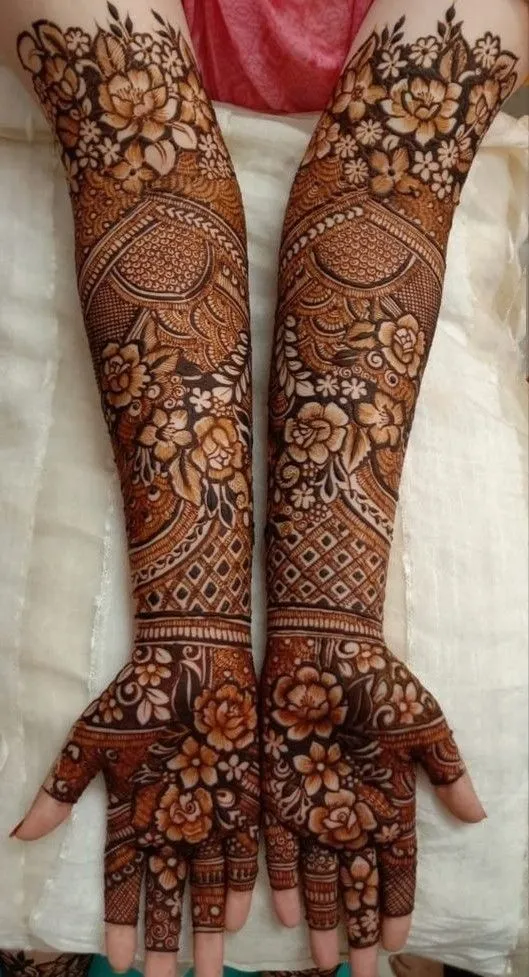
This is the most elaborate design on the list — full coverage across the palm, back of the hand, and fingers, often extending past the wrist. It combines nearly every technique already mentioned: fine-line detail, dense fill sections, dotwork borders, and negative space cutouts, all layered into one composition. Sessions can take 3 to 5 hours for both hands, so this isn’t something you book last minute. The palm holds the darkest, longest-lasting stain of anywhere on the body since the skin there is thicker, which is exactly why bridal designs concentrate detail there. Sit somewhere you can keep both hands still and elevated while drying — a support pillow helps more than people expect. If you’re booking this for an event, do a small test patch on your inner arm a few days ahead to see how your skin takes stain. From full coverage, let’s scale things back down to the feet.
Ankle and Foot Henna Chain Design
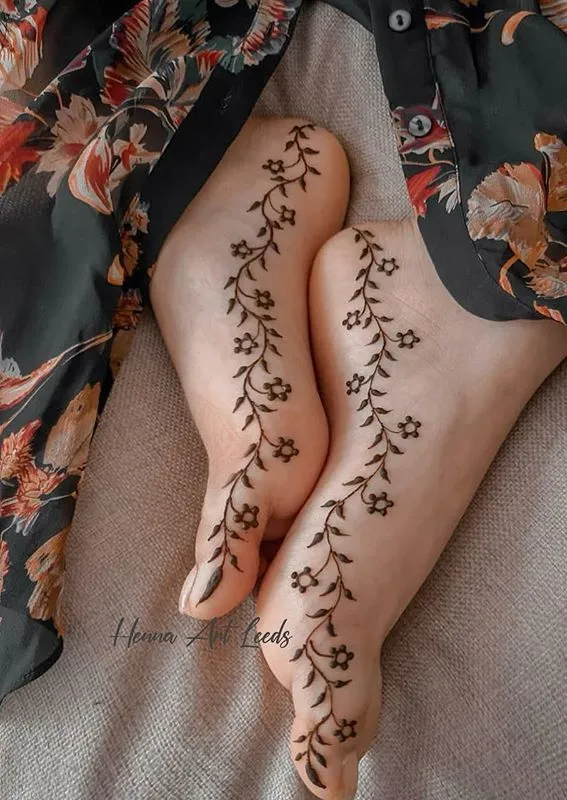
A chain-link or anklet-style henna design traces a continuous band around the ankle, sometimes extending in a thin line down to the toes. The linework stays consistent in weight throughout, mimicking real jewelry, which is what makes this design read as intentional rather than random. Feet stain darker and hold color longer than most other placements because of thicker skin, so this is a good option if you want maximum longevity from one application. Keep the band width under an inch if this is your first foot henna — thicker bands can crack while drying since feet flex more than you’d think. Footwear friction is the biggest threat to longevity here, so open sandals for the first 24 hours help the stain set properly. This design works well for beach trips, weddings, or festivals where feet are visible anyway. Now let’s look at a design built for a much smaller canvas.
Back-of-Hand Lace Henna
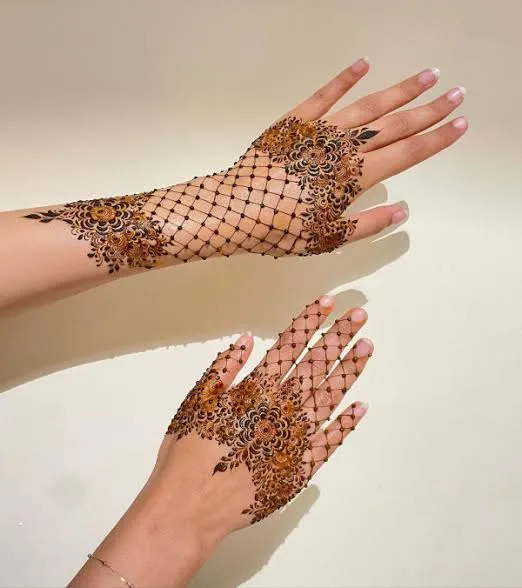
Lace-style henna mimics the look of delicate fabric lace using a grid of small connected shapes — tiny florets, loops, and fine connecting lines — spread evenly across the back of the hand. The effect depends entirely on consistent spacing; uneven gaps make the “lace” illusion fall apart. This design needs flat, smooth skin to read clearly, so the back of the hand or top of the foot works better than curved areas like the wrist. A single hand usually takes 25 to 35 minutes. Because the pattern is so fine, ask your artist about paste consistency — thinner paste holds finer lines but stains lighter, while thicker paste stains darker but can blur delicate details. This is a great option if you want something elegant for a wedding guest look without committing to full bridal coverage. Next, the simplest design on this whole list.
Simple Wrist Band Henna
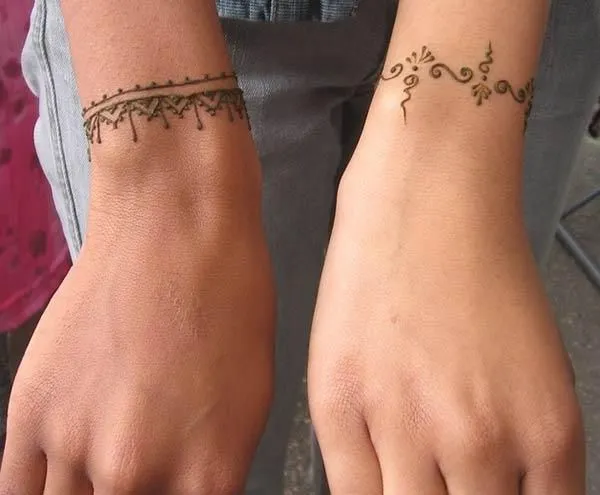
A wrist band is exactly what it sounds like — a thin, continuous line or simple repeating pattern circling the wrist like a bracelet. Line weight stays uniform and thin, usually applied freehand without a stencil since the pattern is simple enough to eyeball. This is the fastest design on the list, often done in under 10 minutes, making it a solid choice if you’re just testing whether you like henna at all. The wrist is a bonier area, so while there’s no actual pain from the paste itself, you’ll notice you’re more aware of the sensation there than on fleshier spots like the forearm. Watches and bracelets rubbing against a fresh design speed up fading, so skip accessories on that wrist for the first two days. This design transitions naturally into permanent fine-line wrist tattoos if you decide you like the placement long-term.
Behind-the-Ear Micro Henna

A tiny motif — a small flower, star, or crescent — placed just behind the ear is about as subtle as henna gets. The design has to stay small, usually under an inch, so line weight needs to be extremely fine and precise; a heavy-handed cone will blur into an unreadable blob at this size. This placement is nearly invisible with hair down, making it a low-commitment option if you’re not ready for anything visible at work or around family. Skin behind the ear is thinner and stains a bit lighter than hands or feet, so don’t expect this one to last as long as a foot or palm design. Ask your artist to use their finest applicator tip specifically for this placement. It’s a good matching-tattoo idea for close friends who want something meaningful but private. From micro to shared, let’s talk about matching designs directly.
Matching Sibling or Friend Henna Symbols
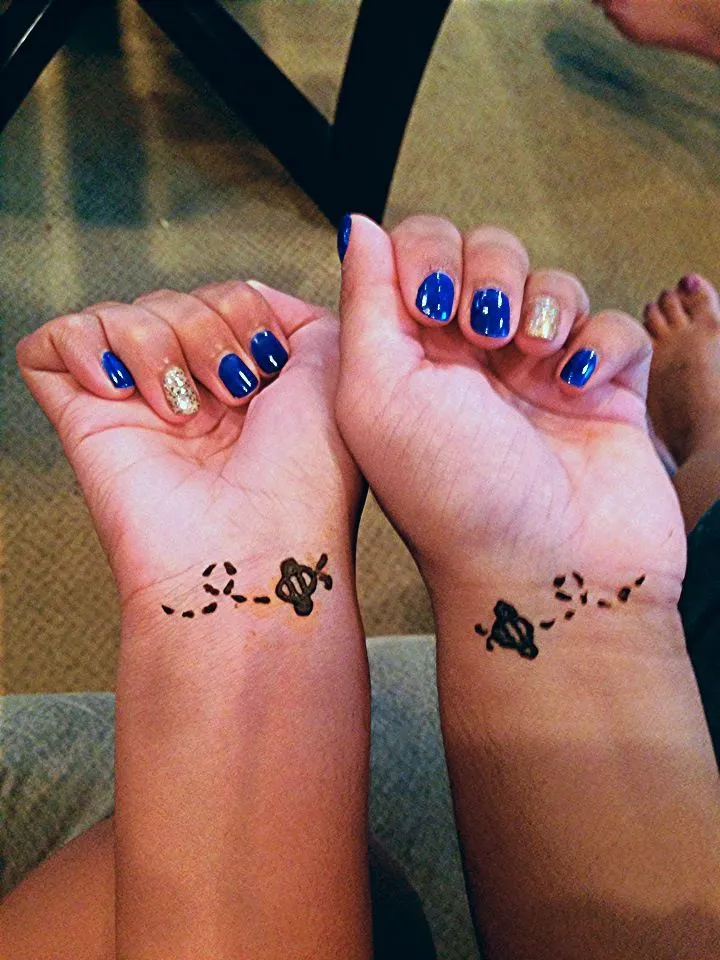
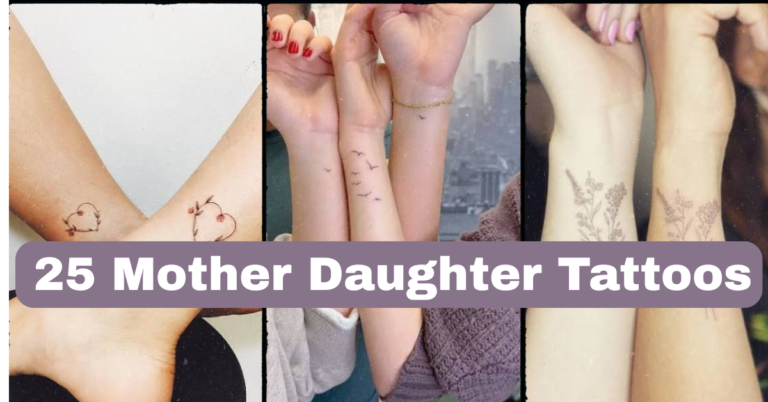
Matching henna designs work best when they’re simplified down to one clear symbol — a small sun, an infinity loop, a single flower — rather than a busy pattern that’s hard to replicate identically across multiple people. Keep the linework simple and the size consistent, ideally under 2 inches, so the designs read as a clear set rather than random shapes. Wrists, inner forearms, or ankles all work well since they’re easy to compare side by side. Because everyone’s skin takes stain slightly differently, don’t expect identical color depth even with identical application — that’s normal and comes down to skin thickness and moisture, not artist error. Bring the whole group to one appointment if possible so the same artist applies every design with consistent pressure and paste. This is one of the lowest-cost, lowest-commitment ways to mark a shared moment with friends. Now, a design themed around balance and contrast.
Sun and Moon Henna Design

This design pairs two motifs — typically a sun with radiating linework rays and a crescent moon with a smoother, more solid fill — either placed together on one arm or split between two people. The contrast in technique is the interesting part: the sun relies on multiple thin, evenly spaced lines radiating outward, while the moon uses a heavier, more solid stain to create contrast against the sun’s linework. Forearms and shoulders give enough room for both elements to breathe without crowding. If splitting the design between two people, decide in advance who gets which half, since the sun generally reads as more detailed and time-consuming to apply. This pairing works well thematically for couples, siblings, or best friends who want complementary rather than identical designs. From symbolic pairings, let’s look at a technique built around what’s left unstained.
Negative Space Henna Design
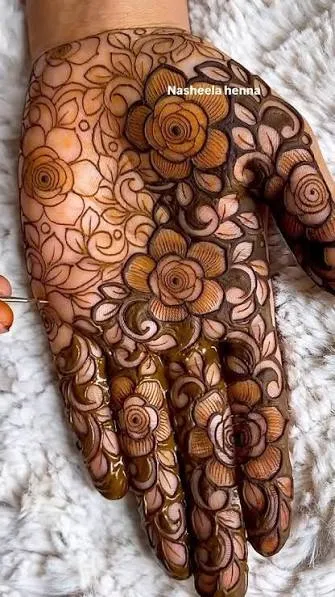
Negative space design flips the usual approach — instead of the pattern being what’s stained, the background is filled in solid and the pattern itself is left as bare skin, creating a bold silhouette effect. This requires more paste and a longer drying time since the “background” fill covers more surface area than a typical linework design. It looks striking on the upper arm or shoulder, where there’s enough flat space for the contrast to read clearly, especially on lighter skin tones where the contrast between stained and bare skin shows up sharply. On deeper skin tones, ask your artist about paste strength and drying time, since achieving visible contrast may take a longer sit. This is a bold option if you want something that photographs well without needing intricate detail. Last up, a placement built for a specific life moment.
Belly Blessing Maternity Henna

Also called a “belly blessing,” this design typically features a mandala, flower, or vine pattern centered around the belly button, sometimes extending outward in a sunburst pattern. Because the skin stretches during pregnancy, artists usually keep linework a bit thicker than average to prevent it from looking too faint as the skin shifts over the following days. This is a temporary, celebratory design meant for a specific event, like a baby shower, rather than long-term wear, since the design will naturally stretch and fade as skin changes. Comfortable seating matters here more than with most designs — plan on reclining rather than sitting upright for 30 to 45 minutes. Ask your artist about safe paste ingredients if you have any skin sensitivities, and always mention pregnancy directly so they can adjust technique accordingly. That wraps our list of 17 — now let’s cover what actually makes any of these designs turn out well.
Best Placement Ideas
- Hands and feet — darkest, longest-lasting stain due to thicker skin, but highest visibility, so consider your workplace or event needs.
- Wrist and forearm — moderate staining, easy to conceal with sleeves, good for first-timers testing the waters.
- Ankle — strong staining similar to feet, but exposed to footwear friction that speeds up fading.
- Behind the ear or collarbone — subtle, lighter staining, best for small minimalist designs rather than dense patterns.
- Shoulder or upper arm — plenty of flat space for bold or negative space designs, moderate staining depth.
- Belly — best for short-term, event-specific designs since skin movement affects longevity.
Tips for Success
Look for an artist whose portfolio shows consistent line weight across multiple photos, not just one flattering close-up. Smooth, even lines and clean paste application are good signs of steady cone control. Ask what’s actually in their henna paste — natural henna should list henna powder, water or lemon juice, and an essential oil like eucalyptus or tea tree, nothing else. Bring reference photos, mention any skin sensitivities upfront, and don’t be afraid to ask how long a design realistically lasts on your skin type before booking anything elaborate for an event.
Common Mistakes and How to Avoid Them
- Choosing overly intricate detail for a small area — fine dotwork and dense lace patterns need flat, smooth skin and enough space to stay legible.
- Booking “black henna” without knowing what’s in it — some black henna products contain a chemical additive called PPD, which dermatological consensus links to skin irritation and allergic reactions in some people; a patch test and a conversation with a licensed professional beforehand is the safer route.
- Washing the design too soon — removing paste before it’s had time to stain properly leads to a patchy, faint result.
- Skipping aftercare entirely — skin that’s freshly stained needs a little care to develop full color and last as long as possible.
- Copying a design exactly without adjusting for your skin — a flat stencil doesn’t account for your specific curves, creases, or skin tone, and a good artist will adjust for that instead of tracing blindly.
Similar Variations
Almost every design here can be resized up or down — a full mandala can shrink into a wrist-sized accent, or a simple vine can be stretched into a full-arm piece. Motifs combine well too: a peacock tail paired with dotwork borders, or a sun-and-moon design layered with a floral vine. Some people add temporary glitter gel or small rhinestones over a healed henna stain for extra shine at events, though that’s decorative and separate from the henna itself. If you love a design and want it to stick around permanently, most of these translate well into fine-line tattoo work later on.
Aftercare Basics
Leave the paste on as long as possible — at least 4 to 6 hours, ideally overnight — before gently flaking it off rather than washing it away. Avoid water contact for the first 24 hours, since moisture right after removal can lighten the eventual stain. A light coat of natural oil, like coconut or mustard oil, applied a few times a day can help deepen and extend the color. Avoid scrubbing, exfoliating, or swimming in chlorinated water over the design, since all of that speeds up fading. Always follow the specific aftercare guidance your artist gives you, and check in with a dermatologist if you notice unusual redness, swelling, or irritation that doesn’t settle down on its own.
Quick FAQ
How much does a henna tattoo design cost?
Prices vary widely by size and detail, but simple designs often run $10 to $40, while intricate bridal or full-hand work can range from $75 to $200 or more depending on the artist and region.
Does henna hurt?
No needles are involved, so there’s no real pain — the main sensation is the coolness of wet paste and the need to sit still while it dries, which some people find mildly tedious rather than uncomfortable.
How long does a henna tattoo last?
Most designs fade naturally over 1 to 3 weeks, depending on placement, skin type, and how well you follow aftercare — hands and feet tend to hold color the longest.
Is henna safe for everyone?
Natural henna is generally well tolerated, but “black henna” containing PPD has been linked to allergic reactions in some individuals according to dermatological consensus, so a patch test and a conversation with a licensed professional is worth doing before committing to a design.
Final Thoughts
Henna tattoo designs give you something rare in the world of body art: a real chance to try before you commit, whether that’s testing a placement, a motif, or just how you feel wearing visible art on your skin. Pain tolerance, skin reaction, and fade time all vary from person to person, so treat everything here as a starting point rather than a guarantee, and lean on a licensed, experienced artist to guide the final decision. Whatever you choose from these 17 henna tattoo designs, the right one is the one that fits your skin, your event, and honestly, your patience for sitting still while the paste dries.