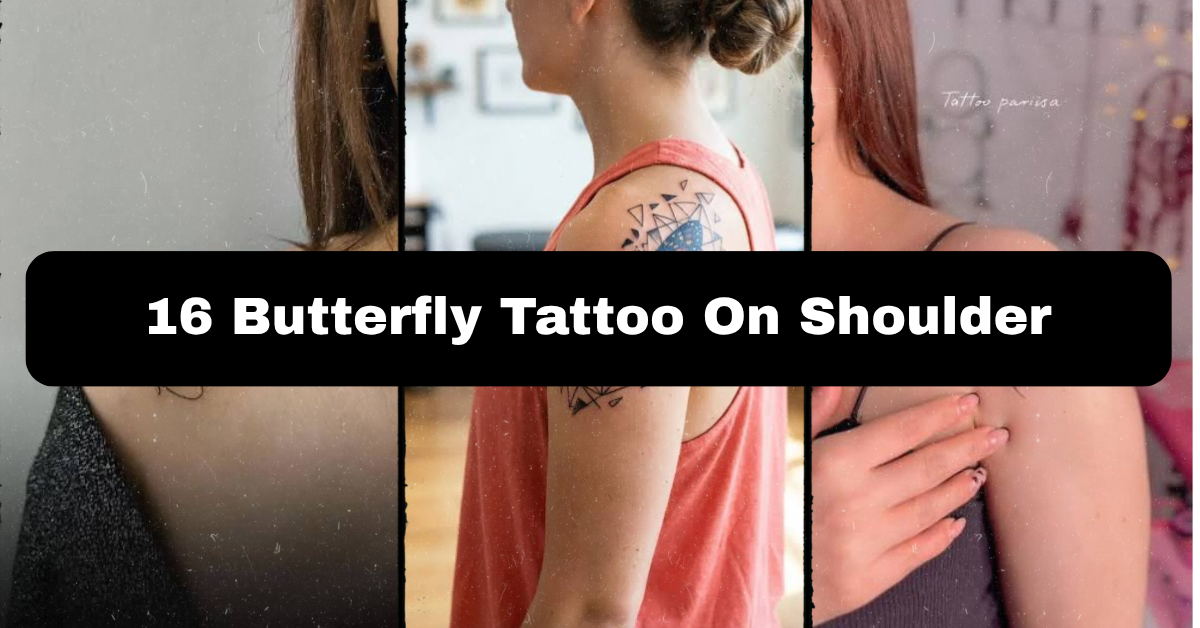
16 Butterfly Tattoo On Shoulder Ideas Worth Booking (And What to Know Before You Do)
Nervous about picking a butterfly tattoo on shoulder placement that you’ll regret in five years? You’re not alone, and honestly, that hesitation is a good sign — it means you’re thinking this through instead of just pointing at the first Pinterest image you see.
So what are the best butterfly tattoo on shoulder ideas? Fine-line single butterflies, blackwork silhouettes, and dotwork-shaded wings work best for shoulder placement because the curved surface shows off symmetry and wing detail without excessive stretching or distortion over time. Smaller, simpler designs also age better on this area than heavily saturated, large-scale pieces.
Stick around, because I’m going to walk you through 16 specific design directions, plus the stuff most articles skip entirely — pain level by exact spot on the shoulder, realistic healing timelines, what to actually say to your artist during a consult, and the mistakes that turn a good idea into a blurry regret three years later.
Why the Shoulder Works So Well for Butterfly Designs
The shoulder is one of the most forgiving canvases on the body for butterfly tattoos, and there’s a real reason for that beyond looks. The skin here is relatively flat with mild curvature, which means linework holds its shape well over time instead of warping the way it might on a joint like the elbow or wrist. There’s also more surface area than people expect — enough room to go from a tiny 2-inch accent piece up to a wrap-style design that travels over the cap of the shoulder toward the collarbone or upper arm. Muscle movement here is moderate, not extreme, so fine details in shading and dotwork (a technique where the image is built from tiny dots instead of solid lines) tend to hold up better here than on high-motion areas like hands or feet.
Fine-Line Single Butterfly
A fine-line butterfly uses thin, consistent needle strokes — usually a single needle or a small round configuration — to create delicate outlines without heavy shading. The wings are typically left mostly open or filled with sparse linework showing vein detail, giving the piece an airy, almost sketched-on-skin look. This style reads as understated rather than bold, which is exactly the appeal for people who want something meaningful without shouting about it.
Placement-wise, the upper outer shoulder or the area just below the collarbone works great, sized around 2 to 4 inches. Pain is generally moderate here since it’s fleshier than bone-heavy spots, and healing typically runs 10 to 14 days for the surface, though full settling takes closer to a month. Bring a reference photo with wing vein detail you like, and ask your artist about single-needle configurations for the thinnest lines possible. This design is workplace-friendly and a solid first-tattoo choice. Next, let’s look at what happens when you strip color entirely.
Blackwork Butterfly Silhouette
Blackwork means solid black ink filled in completely, with no shading gradient — just a bold, saturated silhouette. For a butterfly, this usually means the wing shape is fully inked in, sometimes with small negative-space cutouts (unfilled skin left in patterns) to suggest wing texture without adding detail through shading. It’s a high-contrast, graphic approach that photographs well and holds up visually from across a room.
This design suits the back of the shoulder or the shoulder blade area, sized 3 to 6 inches depending on how much detail you want in the negative space. Solid black fill tends to hurt more than linework because the needle passes over the same area repeatedly — expect noticeable discomfort, especially near the shoulder blade bone. Healing runs about two weeks. Ask your artist to sketch a few negative-space variations before committing to the stencil. It’s a strong pick for anyone wanting bold visibility, though it’s less subtle for conservative workplaces. From here, let’s soften things up with texture instead of solid fill.
Dotwork Shaded Butterfly
Dotwork builds shading and depth using thousands of small dots instead of solid black fill or blended shading. On a butterfly, this technique is often used to create gradient effects on the wings — darker near the body, fading out toward the wingtips — giving a soft, almost powdery texture that solid blackwork can’t replicate. It takes more time in the chair than a simple outline but produces a genuinely unique surface texture.
The upper shoulder or the curve near the deltoid works well for this, ideally sized 3 to 5 inches so the dot gradient has room to breathe. Pain tends to run moderate to high since dotwork involves repeated puncturing in the same zones. Healing typically takes 2 weeks on the surface, longer for the dots to fully settle and show their final texture. Tell your artist you want a “gradient dotwork fade” specifically, since plain dotwork and gradient dotwork are priced and executed differently. This style ages well because dots fade more gracefully than solid lines. Now, let’s talk about a softer, more painterly approach.
Watercolor-Style Butterfly
Despite the name, this isn’t actual watercolor paint — it’s a tattooing technique that mimics loose, blended color washes using diluted ink saturation and soft edges instead of hard outlines. A butterfly done this way often has a fine-line or no-line wing shape with color “bleeding” outward in soft gradients, giving an artistic, painted-on effect rather than a crisp illustration.
This works best on flatter shoulder skin, sized 3 to 5 inches, since color saturation needs consistent surface tension to heal evenly. Pain is moderate, similar to standard color work. Realistically, colored tattoos require more touch-up sessions over the years than pure blackwork, since color pigment fades faster under UV exposure according to general dermatological consensus. Bring reference images showing the exact color blend you want — vague requests like “colorful” lead to guesswork. This style is less ideal for workplaces with strict visible-tattoo policies but gorgeous for those wanting artistic flair. Let’s move to something with more structure and less flow.
Geometric Butterfly
A geometric butterfly translates the natural wing shape into angular, symmetrical line patterns — think triangles, hexagons, or straight-line facets replacing the organic curves you’d see in a realistic butterfly. Line weight is usually consistent throughout, medium-thin, giving the design a modern, almost architectural feel. Shading is minimal or absent, relying instead on the geometry itself for visual interest.
This design suits the top of the shoulder where symmetry is easiest to showcase, sized 3 to 4 inches for clean proportions. Pain is moderate on fleshier shoulder areas. Healing runs the standard 2-week surface window. Because precision matters so much here, ask to see your artist’s ruler-and-compass work in their portfolio specifically — freehand geometric work often looks slightly off without proper tools. This design ages exceptionally well since straight lines hold their shape better than curved fine lines over decades. Next, let’s talk about going bold and traditional.
Bold Traditional Butterfly
Traditional (or “American traditional”) style uses thick, bold outlines, limited but saturated color palettes — usually reds, yellows, and blacks — and minimal shading gradients. A traditional butterfly leans into flash-style flatness rather than photorealism, with thick black borders defining each wing segment clearly.
The shoulder cap area is ideal here, sized 4 to 6 inches to let the bold linework and color blocks read clearly at a distance. Pain runs moderate, and because color saturation is heavier, expect a slightly longer healing window, sometimes pushing toward 3 weeks for full settling. This is a great walk-in style since many shops keep traditional butterfly flash sheets ready to go, meaning lower cost and no wait for custom design work. It’s also one of the most resilient styles against fading over the years. Let’s shift from bold to airy and open.
Negative Space Butterfly Wings
Negative space tattooing uses the untouched skin itself as part of the design, rather than filling every area with ink. A negative space butterfly might have solid black wingtips with the inner wing shape left as bare skin, or vice versa — creating a striking push-pull effect between ink and skin tone.
This works especially well on the upper shoulder where there’s enough flat space to let the contrast read clearly, sized 3 to 5 inches. Pain level matches standard blackwork since the inked portions still involve solid fill. Healing takes about 2 weeks. This technique looks noticeably different depending on skin tone, so ask your artist directly how the contrast will appear on your specific skin before booking — what looks bold on pale skin may need adjusted ink density on deeper tones. It’s a distinctive choice for anyone tired of fully-filled designs. Now let’s go small and multiply the effect.
Mini Butterfly Cluster

Instead of one large butterfly, this design scatters 3 to 5 small butterflies, usually 1 to 2 inches each, in a loose trail or cluster pattern. Typically done in fine-line or light single-needle work, the cluster mimics a natural, in-flight scattering rather than a single static image.
This suits the top or back of the shoulder, spreading toward the collarbone or upper arm for movement. Pain is generally lower per-butterfly since each piece is small and quick, though the cumulative session may run longer overall. Healing is fast per piece, typically under 2 weeks. Bring a rough placement map to your consult rather than leaving spacing entirely up to guesswork — clusters look best with intentional, not random, spacing. This is a great low-commitment option and works nicely as a matching design among friends, since each person’s cluster can vary slightly. Let’s add some botanical elements next.
Butterfly with Floral Accents

Pairing a butterfly with small flowers — often done in matching fine-line or light shading — adds symbolic depth and fills out negative space that a lone butterfly might leave feeling sparse. The flowers are usually smaller and secondary in visual weight, framing the butterfly rather than competing with it.
This combo suits a slightly larger shoulder placement, around 4 to 6 inches, to give both elements room. Pain is moderate, and healing follows the standard 2-week timeline, though larger combined pieces may feel more tender toward the end of a long session. When briefing your artist, specify which flower species matters to you symbolically, since generic “flowers” leave too much open to interpretation. This design is popular for memorial or milestone tattoos and ages gracefully since fine-line florals and butterflies fade at similar visual rates. Let’s look at a design built for symmetry lovers.
Symmetrical Twin Butterflies
This design mirrors two identical or near-identical butterflies, usually placed side by side or one slightly above the other, emphasizing balance and precision. Line weight stays consistent across both to maintain the mirrored effect, and shading, if used, is applied identically on each side.
The shoulder cap or the space spanning toward the upper back works well, sized 4 to 7 inches total for both butterflies combined. Pain runs moderate to high given the increased time in the chair for matching precision. Healing takes the standard 2 weeks, but ask your artist about their stencil-mirroring process specifically, since hand-mirrored designs often show slight asymmetry that machine-mirrored stencils avoid. This design suits meaningful pairings — twins, sisters, or personal duality themes — and holds its symmetry well over years since both sides age at the same rate. Next, let’s talk about realism.
Illustrative Realistic Butterfly
This style aims for lifelike detail — visible wing vein patterns, subtle color gradients, and shading that mimics actual butterfly texture rather than a stylized interpretation. It’s typically done with fine to medium needle work combined with soft shading passes, requiring more time and skill than flatter styles.
Because of the detail level, this needs more space than most — 4 to 6 inches minimum on the upper shoulder or shoulder blade. This is one of the more painful options on this list since repeated shading passes are involved, and sessions often run longer. Healing takes the full 2 to 3 weeks. Bring high-resolution reference photos of real butterfly species, not cartoon illustrations, so your artist can accurately replicate texture. This is a strong choice for nature lovers wanting something that looks intentional and detailed rather than symbolic and simple. Now, something with more flow and movement.
Cascading Butterfly Trail
This design has butterflies decreasing in size as they trail from the shoulder down the upper arm or toward the shoulder blade, suggesting motion and flight. Usually done in matching fine-line or light blackwork, the trail creates visual movement that a single static butterfly can’t achieve.
This needs more vertical space, so it suits the outer shoulder extending toward the arm, spanning 5 to 8 inches total. Pain increases slightly toward the end of a long session simply due to sustained time under the needle. Healing runs 2 weeks per section, though the whole piece might be done in one longer sitting. Discuss with your artist whether this should be one continuous session or broken into two visits, since fatigue affects linework precision. This design suits people wanting a larger visual statement that still feels light rather than heavy. Let’s shift to something with cultural pattern influence.
Butterfly Mandala Fusion
This design merges the natural butterfly shape with mandala-style geometric patterning — repeating shapes, dots, or linework radiating from a central point, often incorporated into the wing structure itself. It typically combines fine-line detailing with dotwork shading for texture.
This works best on the shoulder cap where the radial symmetry has room to display fully, sized 4 to 6 inches. Pain runs moderate to high given the detail density. Healing takes about 2 to 3 weeks given the combination of techniques involved. Ask your artist specifically about their dotwork consistency in mandala work, since uneven dot spacing is noticeable on close inspection. This design suits people wanting spiritual or symbolic layers added to a nature-based image, and it photographs exceptionally well due to the pattern density. Let’s simplify again with an accent-color approach.
Butterfly Silhouette with Color-Tip Accents
This design keeps the main wing shape in solid black or grey-black shading, then adds small pops of color only at the wingtips or edges — a technique that limits color saturation to a small area while keeping the overall piece mostly monochrome. It’s a middle ground between full-color and blackwork.
The upper shoulder suits this well, sized 3 to 5 inches, giving enough room for the color accent to stand out against the black base. Pain is moderate, similar to standard blackwork with a touch of color work. Healing takes the standard 2 weeks, though the colored sections may need a touch-up sooner than the black areas since small color accents can fade slightly faster. Specify the exact accent color and its placement clearly, since “a little color” is too vague for consistent results. This works well for people wanting a hint of color without full saturation commitment. Now, one more variation to round things out.
Script and Butterfly Combination
This pairs a small fine-line butterfly with a short word, name, or phrase in matching thin script, usually positioned so the butterfly appears to be “carrying” or accenting the text. Both elements use similar thin linework to keep visual consistency between the image and the lettering.
This suits a slightly elongated placement along the collarbone-adjacent shoulder area, sized 3 to 5 inches depending on word length. Pain is moderate, typical of fine-line work. Healing runs about 2 weeks. Bring the exact wording written out and discuss font weight with your artist directly, since script that’s too thin can blur together as it settles into the skin over the following weeks. This combination works well for memorial pieces or personal mantras, and it remains one of the more versatile options for meaningful, story-driven ink.
Best Placement Ideas
Where exactly on the shoulder matters more than most people think. Here’s how it breaks down:
- Top of shoulder (deltoid cap): High visibility, moderate pain, best for symmetrical or geometric designs that benefit from a flat, visible surface.
- Back of shoulder near shoulder blade: Easier to conceal with clothing, slightly more pain due to thinner skin over bone, great for larger silhouette or blackwork pieces.
- Front shoulder near collarbone: Very visible, moderate pain, ideal for smaller fine-line or script-combo designs.
- Outer shoulder extending to upper arm: More space for trailing or cluster designs, pain increases slightly toward the arm due to muscle definition.
- Under-shoulder crease (near armpit): Highly concealable, notably more sensitive, best reserved for very small accent pieces only.
Tips for Success
Choosing the right artist matters more than choosing the “perfect” design off Pinterest. Look through a portfolio specifically for consistency — does their fine-line work stay thin and clean across multiple pieces, or does it vary wildly? Check healed photos, not just fresh ink shots, since fresh tattoos always look sharper than they will in six months. During your consultation, bring at least two or three reference images, be upfront about your pain tolerance and any skin sensitivities, and ask directly what needle configuration they plan to use for your specific design. A good artist will walk you through sizing and placement tradeoffs rather than just agreeing to whatever you first suggest.
Common Mistakes and How to Avoid Them
- Going too small for detailed work: Intricate shading or dotwork needs enough surface area to actually show the detail; a 1-inch space can’t hold a gradient dotwork fade well.
- Ignoring how the design will age: Fine details fade faster on textured or frequently-sun-exposed skin; ask your artist how the specific style tends to hold up over 5-10 years.
- Skipping personalization: Copying a flash design exactly is fine for traditional styles, but for custom fine-line or geometric work, tweak proportions or add a personal element so it doesn’t feel generic.
- Choosing placement based on pain avoidance alone: A design meant to flow with the shoulder’s curve won’t look right crammed into a tiny flat spot just because it hurts less there.
- Skipping aftercare instructions: Even minor lapses in aftercare can affect how crisp the final healed result looks.
Similar Variations
Nearly every design above can be resized down for a subtler version or scaled up into a half-shoulder or wrap-style piece. Swap solid blackwork for dotwork shading to add texture without adding color. Add a color accent to any blackwork silhouette for a hybrid look, or strip color entirely from a traditional-style butterfly for a more muted, blackwork-only version. Combining two smaller designs — like a mini cluster with a single script accent — is also a common way to personalize a popular idea without starting from scratch.
Aftercare Basics
General aftercare guidance includes keeping the area clean, avoiding direct sun exposure while healing, not picking at any peeling skin, and avoiding swimming pools or soaking baths until fully healed. Always follow the specific aftercare sheet your artist provides, since products and timelines can vary by studio. If you notice unusual redness, prolonged irritation, or anything that seems off beyond normal healing, consult a licensed dermatologist rather than guessing.
Quick FAQ
How much does a butterfly shoulder tattoo cost?
Small fine-line pieces often start around $80-150, while larger custom or multi-butterfly designs can run $300-800+ depending on detail, color, and your artist’s hourly rate. Always get a quote during consultation rather than assuming a flat rate.
How painful is a shoulder butterfly tattoo?
Pain tolerance varies by individual, but the shoulder is generally considered a moderate-pain zone — less painful than ribs or wrists, more than outer arms. Areas near the shoulder blade or armpit crease tend to be more sensitive.
How long does healing take?
Surface healing typically takes about 2 weeks, though full settling into the skin can take up to a month. Larger or color-heavy pieces may take slightly longer.
Will a butterfly tattoo fade over time?
All tattoos fade gradually due to UV exposure and natural skin turnover, according to general dermatological consensus. Blackwork and solid linework tend to hold their shape longer than fine color gradients, though touch-ups every several years keep any style looking sharp.
Final Thoughts
Picking from these 16 butterfly tattoo on shoulder ideas really comes down to matching the technique to your lifestyle — how visible you want it, how much time you’re willing to spend in the chair, and how it’ll look ten years from now, not just this week. Talk openly with a licensed, experienced artist about placement, sizing, and aftercare before you commit to anything permanent.
At the end of the day, a well-planned butterfly tattoo on shoulder placement can be one of the most versatile, meaningful pieces you get — as long as you go in informed rather than just inspired.