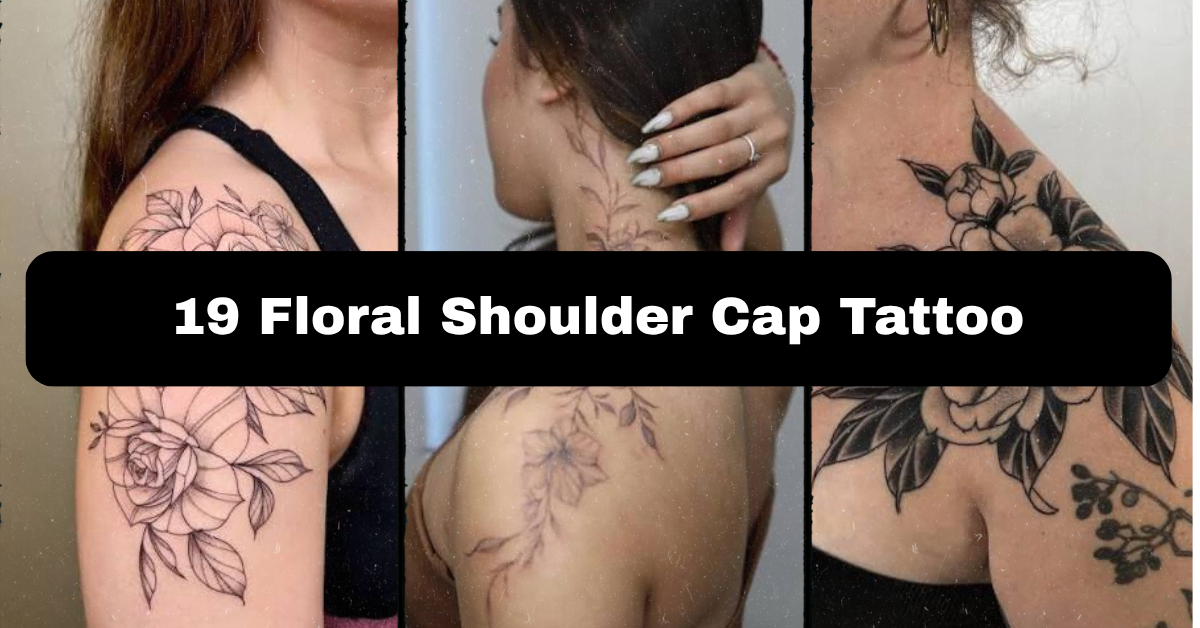
19 Floral Shoulder Cap Tattoo Ideas: A Complete Style and Placement Guide
Nervous about picking a floral shoulder cap tattoo you’ll actually still love in five years? You’re not alone, and you’re asking the right question at the right time — before the needle touches skin, not after. This guide pulls from real studio experience and current tattoo trends to give you accurate, specific guidance instead of just pretty pictures.
So what are the best floral shoulder cap tattoo ideas? Fine-line botanical clusters, blackwork peonies, and dotwork mandalas layered with flowers work best because the shoulder cap’s curve suits designs that wrap and taper naturally. Bold traditional florals also hold up well long-term since thicker lines resist blurring as skin ages.
Stick around, because I’m also going to walk you through placement tradeoffs, honest pain expectations, how to brief your artist so you don’t end up with a generic flash piece, and what these designs actually look like five, ten years down the road.
Why the Shoulder Cap Works So Well for Floral Designs
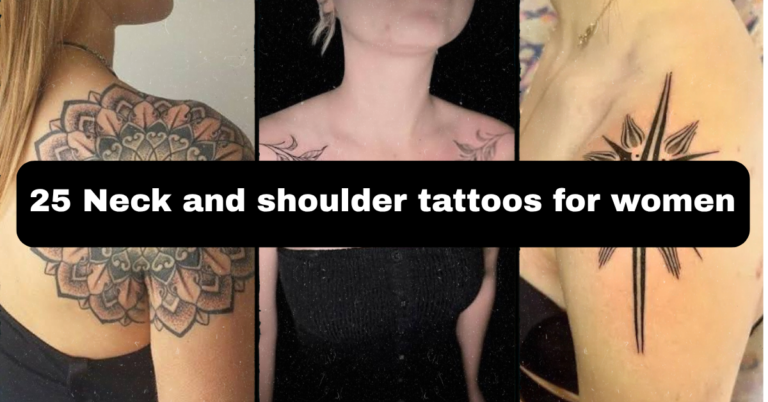
The shoulder cap is basically a built-in canvas. It curves over the deltoid muscle, which means a design can wrap around the arm naturally instead of sitting flat like it would on the forearm or ribs. Florals especially benefit from this because stems and petals can follow the muscle’s contour, giving the piece a sense of movement even when the arm is still. It’s also one of the more forgiving placements for pain — the deltoid has more muscle and fat coverage than bony spots like the wrist or collarbone, so most people find it manageable. And practically speaking, it’s easy to show off or cover up depending on your sleeve choice, which matters if you’ve got a workplace with a dress code.
Before we get into the 19 designs, here’s a quick reference so you know what you’re actually asking for when you sit down with an artist.
Technique Quick Reference
Fine Line
: Thin, consistent needle work (usually a single needle) that creates delicate outlines with little to no shading. Ages well in small-to-medium sizes but can blur faster on sun-exposed or stretch-prone skin.
Blackwork
: Solid black ink filled in with bold, saturated line work. High contrast, holds up for decades, but less forgiving of design changes later since it’s harder to cover.
Dotwork
: Shading and texture built from tiny individual dots instead of solid fill. Creates a soft, stippled gradient — great for mandala-style florals but takes longer in the chair.
Traditional (American Bold)
: Thick black outlines with limited, saturated color fill — think old-school tattoo flash. Extremely durable over time because the heavy line weight resists fading.
Negative Space
: Uses the untouched skin itself as part of the design, letting shapes emerge from what’s not inked rather than what is.
Now let’s get into the actual designs.
1. Fine-Line Rose Shoulder Cap
A single-needle rose rendered in thin, unbroken lines is one of the more requested shoulder cap designs, and for good reason — it reads as elegant without needing color or heavy shading. The line weight stays consistent throughout, maybe 0.3–0.5mm, with subtle cross-hatching for petal depth instead of solid black fill. This works best sized at 3–5 inches to keep the petal detail from collapsing into a blob as it heals. Pain-wise, the shoulder cap is moderate — expect more sensitivion near the collarbone edge. Bring a reference photo of a rose from multiple angles so your artist can build depth rather than copying a flat image. It’s a solid first-tattoo choice since it heals in about two to three weeks and stays subtle at work.
2. Blackwork Peony Cap
Blackwork peonies trade delicacy for impact. The entire flower is filled with saturated black ink, leaving negative space (bare skin) to suggest petal folds instead of drawing every line. This creates dramatic contrast that photographs well and ages slower than fine line because there’s more ink density holding the shape. Go bigger here — 4–6 inches — since blackwork loses detail if cramped. Healing takes closer to three to four weeks given the ink saturation. Ask your artist about their “solid fill” technique specifically; some blackwork specialists use a different needle grouping for fill versus outline, and that affects how crisp the final piece looks. This isn’t the most subtle option, so factor in visibility if your workplace has strict tattoo policies.
3. Dotwork Mandala Floral Cap
This one blends a floral centerpiece with a mandala-style dotwork border, meaning the shading and geometric patterns are built entirely from small dots rather than solid lines. It’s slower to tattoo — sometimes two sessions instead of one — because dotwork is time-intensive by nature. The payoff is a soft, almost lace-like texture that fine line or blackwork can’t replicate. Size should be at least 5 inches to let the dot gradient breathe; anything smaller muddies the pattern. Expect moderate-to-higher discomfort since dotwork involves repeated puncturing over the same area. Bring examples of mandala symmetry you like, not just florals, so your artist can balance both elements. Great for people who want something detailed but not fully bold.
4. Watercolor Wildflower Cap
Watercolor-style tattoos use diluted color saturation and soft edges to mimic actual paint bleeding on paper, with little to no black outline holding the shape together. It’s visually striking but worth knowing upfront: color-heavy work without solid black linework tends to fade faster and may need a touch-up sooner than blackwork or traditional pieces, according to general dermatological consensus on how ink settles in skin. Keep it in the 4–5 inch range on the shoulder cap so color transitions have room to spread. Ask specifically for an artist experienced in color-saturation techniques, not just line work — it’s a different skill set. This design suits people who want something painterly and less “traditional tattoo” looking.
5. Negative Space Floral Vine Cap
Instead of inking the entire flower, this design uses negative space — meaning your actual skin becomes the petals or leaves, while the surrounding black ink defines the shape from the outside. It’s a striking technique because it plays with what the eye fills in versus what’s literally drawn. This requires a steady, experienced hand since the “empty” areas need to be precisely shaped or the flower reads as unfinished rather than intentional. Best at 4 inches or larger on the cap so the negative space has room to register clearly. Mid-level pain, similar to blackwork. Request a stencil preview before starting — negative space is hard to visualize from a flat sketch alone.
6. Single-Needle Botanical Line Art Cap

This is a step beyond basic fine line — it’s illustrative, almost like a botanical textbook drawing translated onto skin. A single needle creates extremely thin, precise lines mapping out stems, leaves, and small flower clusters with zero shading. It suits people who want something that looks intentional and minimal rather than decorative. Ideal size sits around 3–4 inches; go smaller and the linework risks fading into indistinct smudges within a few years. Lower-to-moderate pain given the thin needle and lighter overall ink deposit. Bring botanical illustration references (actual plant sketches, not other tattoos) so your artist understands the aesthetic you’re after.
7. Bold Traditional Floral Cap

American traditional florals use thick black outlines, limited color palettes (usually red, yellow, green), and minimal shading — it’s the tattoo style most people picture when they think “old school.” The heavy line weight is actually a practical advantage: thick lines hold their shape far longer than fine line as skin ages, stretches, or gets sun exposure. Go big here, 5+ inches, since traditional design language depends on bold shapes reading clearly from a distance. Pain is moderate; the deltoid handles the needle work fine. This is a smart pick if you want something that’ll still look sharp at 60, not just at 25.
8. Cherry Blossom Cascade Cap

A cascade of cherry blossoms flowing down and around the shoulder cap uses smaller individual flowers repeated in a pattern, usually in fine line or light dotwork, sometimes with a soft pink or red wash. The “cascade” composition — flowers trailing from dense at the top to sparse near the bicep — makes the piece feel like it’s moving with your arm. Sizing needs to account for the full cascade, often 6+ inches top to bottom. Ask your artist about “flow direction” specifically; how the blossoms trail affects whether the design feels cohesive or scattered. Healing time runs a bit longer due to the spread-out placement across more skin.
9. Sunflower Statement Cap

Sunflowers are naturally bold, so this design leans into thicker linework and warm color saturation (deep yellows, browns) rather than trying to make it delicate. It works as a true statement piece rather than something subtle. Because of the detail in the seed center and layered petals, don’t go smaller than 4 inches — the center pattern needs room. Expect moderate pain and a healing window of three weeks minimum given the color work. This is a good option if you want a shoulder cap tattoo with obvious visual weight, not something that quietly blends in.
10. Wildflower Bouquet Scatter Cap

Rather than one large flower, this design scatters several smaller wildflowers — think baby’s breath, daisies, small buds — across the cap in a loose, asymmetrical arrangement. It’s done in fine line typically, sometimes with light dotwork shading for depth. The scattered composition is actually harder to execute well than it looks; spacing has to feel intentional, not random, so ask your artist to sketch a full placement map before tattooing rather than winging it flower by flower. Best around 5 inches to give each flower room to stay legible. Lower pain overall since no single area gets heavy needle repetition.
11. Geometric Floral Cap
This pairs floral elements with clean geometric shapes — triangles, hexagons, straight-line borders — creating contrast between organic curves and rigid structure. It’s usually done in blackwork or bold fine line to keep the geometry crisp. The placement geometry matters a lot here: the shoulder cap’s curve can distort perfectly straight lines if the stencil isn’t mapped correctly for the body’s contour, so this is one design where you really want an artist experienced specifically in geometric work. Size around 4–6 inches. Moderate pain, comparable to blackwork given similar ink density.
12. Lavender Sprig Minimalist Cap

A small cluster of lavender sprigs in fine line is one of the more low-commitment shoulder cap options, sitting around 2–3 inches. The thin stems and small buds keep line weight consistent and light, making this a genuinely good first-tattoo choice if you’re worried about pain or regret. It’s subtle enough to stay hidden under a t-shirt sleeve but visible in a tank top. Lower pain, faster healing (roughly two weeks). Ask for “botanical accuracy” reference photos if you want it to look like real lavender rather than a generic floral shape.
13. Chrysanthemum Bold Cap

Chrysanthemums have naturally intricate, layered petals, which makes them a good test of an artist’s linework consistency — uneven spacing between petals becomes obvious fast. This design usually combines bold outlines with selective black shading to create depth without full color. Because of the petal density, undersizing is the most common mistake here; stay at 4 inches minimum. Moderate-to-higher pain due to the concentrated detail work in one area. This flower carries symbolic meaning in some cultures (longevity, honor), so it doubles well as a design with personal significance, not just aesthetics.
14. Fern and Floral Mixed Botanical Cap

Combining ferns with small flowers creates natural negative space and visual breathing room, since fern fronds are thin and linear compared to dense flower shapes. This mix is typically done in fine line with occasional light shading on the flower centers only. It suits people who want something botanical but not overly floral or “girly” in a stereotypical sense — the fern adds a more neutral, nature-inspired balance. Size flexibly between 3–5 inches depending on how many elements you want. Pain and healing are comparable to standard fine-line work.
15. Orchid Realism Cap

Realism-style orchids require actual shading gradients, not just outlines, to mimic the flower’s natural light and shadow. This is a more advanced technique, and it genuinely matters who you book with — ask specifically to see healed (not just fresh) realism work in their portfolio, since shading holds up very differently once skin settles. Minimum size should be 4–5 inches to accommodate the gradient work; anything smaller and the shading turns muddy within a year or two. Expect higher pain and a longer single session given the shading density.
16. Floral Vine Wrap Cap
A vine that wraps fully around the shoulder cap, with small flowers and leaves growing off it at intervals, uses the arm’s natural curve as part of the design instead of fighting it. This is done in fine line or light blackwork depending on how bold you want the vine itself to look. Because it wraps rather than sitting flat, ask your artist to do a full 360-degree stencil fitting before tattooing, not just a front-facing sketch. Sizing depends on how much of the shoulder you want wrapped, but plan for at least 5–6 inches of coverage.
17. Daisy Chain Delicate Cap
A simple chain of connected daisies in thin fine line is one of the most understated shoulder cap options on this list, usually 2–4 inches. The connecting stems create a subtle border-like effect rather than a solid floral mass. This is a strong matching-tattoo option for friends or family members since the simplicity translates well even if sized slightly differently between people. Pain and healing are on the lower end. Bring a simple line sketch to your consultation — overly complex daisy references can get misinterpreted as a different flower entirely.
18. Hibiscus Tropical Cap
Hibiscus flowers bring bold color saturation (deep reds, oranges, pinks) and larger petal shapes, making this a good option if you want a tropical or vacation-inspired piece rather than a soft, delicate one. Usually done in traditional-leaning bold line with color fill. Size should stay at 4+ inches since the layered petals need room. Moderate pain, and color-heavy work like this may need a touch-up appointment within the first year as pigment settles — factor that into your budget upfront.
19. Monochrome Floral Silhouette Cap

This design strips a floral arrangement down to a solid black silhouette — no internal linework, no shading, just the outer shape filled solid. It’s essentially a stylized blackwork technique that reads more like a graphic design element than a traditional tattoo. Because there’s no internal detail, sizing is more forgiving; it can work anywhere from 3–6 inches. Pain is comparable to standard blackwork. This is a strong option if you want something bold but ages exceptionally well, since solid black fill resists blurring better than fine detail over the long term.
Best Placement Ideas
- Outer shoulder cap (classic placement): High visibility in tank tops, moderate pain, easy to cover with sleeves — best for bold or medium-detail designs.
- Upper shoulder blending into collarbone: More visible even in some tops, slightly more sensitive near the bone, works well for cascading or trailing floral designs.
- Shoulder cap wrapping toward the back: Lower visibility day-to-day, good for people who want a more private piece, suits wrap-around vine designs.
- Shoulder cap extending into upper arm (partial sleeve start): Best for larger, more detailed pieces since it offers more skin real estate; slightly longer healing due to size.
Tips for Success
Look for an artist whose portfolio shows healed photos, not just fresh ink — fresh tattoos always look crisp, but healed results tell you how their line weight and shading actually hold up. Check that their portfolio includes multiple examples of the specific technique you want (fine line, blackwork, dotwork), not just one lucky piece. At your consultation, bring reference images, be honest about your pain tolerance and any skin sensitivities, and ask directly about their approach to sizing for your chosen design — a good artist will push back if you’re going too small for the detail level you want. Walk-in flash designs are fine for simple daisy chains or small sprigs, but anything with layered detail is worth booking as a custom piece.
Common Mistakes and How to Avoid Them
- Sizing too small for the detail level. Intricate petal work or dotwork shading needs room to breathe; going too small causes the design to blur together as it ages.
- Choosing a placement that fights the linework. A design meant to wrap and flow (like a vine) looks off if flattened onto a spot that doesn’t follow the body’s curve.
- Skipping aftercare instructions. Ink settling and healing quality depend heavily on how well you follow your artist’s specific aftercare sheet.
- Copying a design exactly without personalizing it. A generic Pinterest peony loses meaning; adding a personal element (a specific flower species, a color tweak) makes it genuinely yours.
- Not asking about touch-ups upfront. Color and dotwork pieces especially may need a follow-up session — budget for it before you book, not after.
Similar Variations
Nearly every design above can be resized down for a smaller, more discreet version or scaled up into a half-sleeve extension later. Blackwork pieces can be softened with selective dotwork shading for texture. Fine-line florals can gain color later through a touch-up session if you decide subtlety wasn’t bold enough. Multiple smaller designs (like the daisy chain or lavender sprig) also combine well into a cluster if you want to build a shoulder cap piece gradually rather than committing to one large session.
Aftercare Basics
Keep the tattoo clean and follow the specific aftercare instructions your artist provides — they know their own ink and technique best. Generally, that means gentle washing, avoiding direct sun exposure while healing, and skipping swimming pools or soaking baths until the skin has fully closed. Avoid picking at any scabbing or peeling, since that can pull ink out unevenly. If you notice anything that seems unusual during healing, check with a licensed dermatologist rather than guessing. Healing time varies by individual and by design size, but most shoulder cap pieces settle within two to four weeks.
Quick FAQ
How much does a floral shoulder cap tattoo cost?
Pricing depends on size, detail, and your artist’s hourly rate, but expect anywhere from $150 for a small single-session piece to $600+ for larger, multi-session designs with color or dotwork shading.
How painful is a shoulder cap tattoo?
Most people rate it moderate — the deltoid area has decent muscle coverage, so it’s generally more tolerable than bony spots like the collarbone or ribs. Pain tolerance genuinely varies person to person.
How long does it take to heal?
Typically two to four weeks for the surface to heal, though full ink settling can take a couple months. Larger or color-heavy pieces may take slightly longer.
Will the design fade over time?
All tattoos fade somewhat with age and sun exposure. Bold linework and blackwork tend to hold their shape longer than fine, delicate lines, which is worth considering if longevity matters to you.
Final Thoughts
A floral shoulder cap tattoo can be as subtle as a single lavender sprig or as bold as a full blackwork peony — the right choice really comes down to how much detail, color, and visibility you actually want long-term, not just what looks good in a reference photo. Take the placement, pain, and healing information here seriously, and don’t be afraid to ask your artist tough questions before you book.
At the end of the day, the best floral shoulder cap tattoo is the one that fits your lifestyle, your pain tolerance, and your personal meaning — not just the trend of the moment. Talk to a licensed professional, bring solid references, and give yourself permission to personalize whatever design you land on.