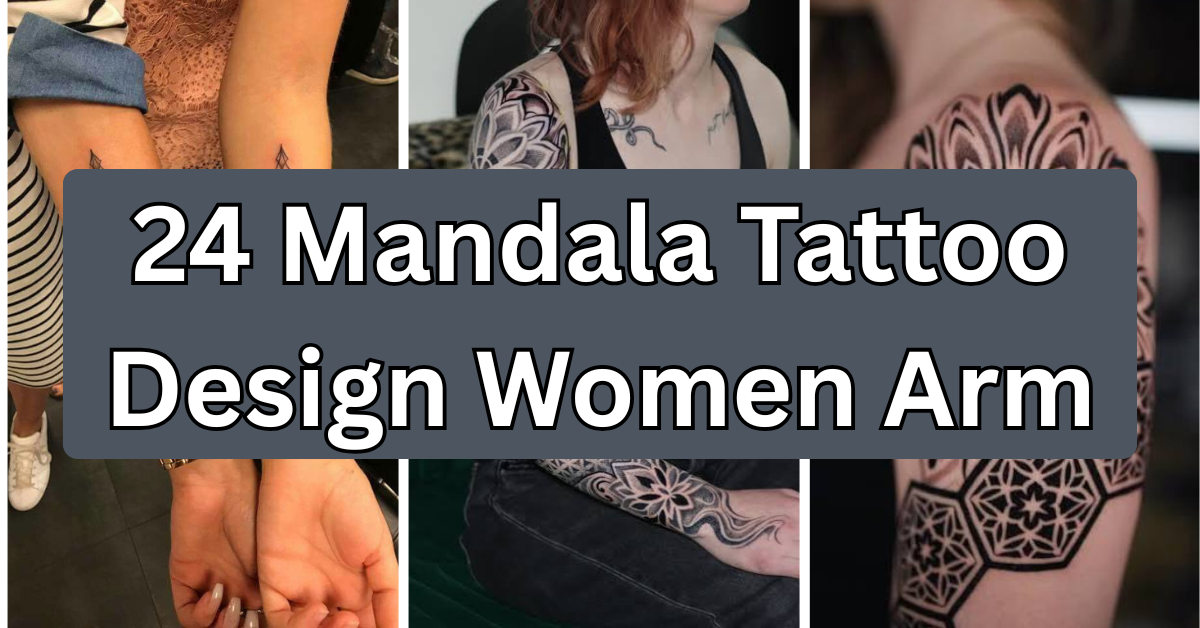
24 Mandala Tattoo Design Ideas for Women’s Arms: Placement, Pain, and What to Know Before You Book
Worried about committing to a mandala design that ends up looking blurry or lopsided a few years down the line? That’s a fair concern, and it’s exactly why picking the right style and artist matters more than picking the prettiest reference photo.
So what are the best mandala tattoo designs for a woman’s arm? Dotwork and fine line mandalas placed on the outer forearm or upper arm work best, since the flatter, less-moving skin keeps the radial symmetry crisp and the fine details from blurring as they heal. Geometric blackwork mandalas hold up well too, especially at larger sizes.
Stick with me, because we’ll go through placement tradeoffs, realistic pain levels by arm section, healing timelines, how to actually brief an artist on symmetry, and the mistakes that turn a great mandala into a lopsided regret.
Why Mandalas Work So Well on the Arm
A mandala is a circular, symmetrical pattern, usually built from repeating geometric shapes, dots, or lines radiating out from a central point. The arm is one of the best places to put one because it gives you a long, mostly flat, gently curved surface that a circular design can sit on without warping. Unlike the ribs or the back of the knee, the forearm and upper arm don’t fold or stretch dramatically during normal movement, so the symmetry an artist spends hours perfecting actually stays symmetrical over time. Mandalas also scale really well, you can go tiny and delicate on the wrist or big and bold wrapping the whole upper arm, and the design principle holds up at either size. That flexibility is part of why this remains one of the most requested arm tattoo categories.
1. Dotwork Mandala Centered on the Forearm
Dotwork means the entire pattern is built from tiny individual dots rather than solid lines, which creates a soft, textured look instead of a hard outline. A dotwork mandala centered on the outer forearm uses this technique to build layered rings of pattern radiating from a central point. This style needs real precision, since uneven dot spacing shows up more obviously in a circular design than in a straight line. Best kept between three and five inches so the inner detail doesn’t crowd. Pain runs moderate, and sessions tend to be long given how many dots go into even a mid-size piece. Ask your artist how they plan the initial dot grid, a consistent underlying structure is what keeps the whole thing symmetrical. This suits people who want a bold statement without full black saturation. Fine line versions offer a lighter alternative.
2. Fine-Line Mandala Wrist Accent
This scales the mandala concept down small, usually under two inches, using thin, single needle line work instead of dots or shading. Single needle just means the artist uses one very fine needle tip, which allows for delicate, hairline-thin detail. Best placed on the inner or outer wrist where the small scale stays proportionate. Because there’s so little ink involved, healing is quick, typically under two weeks. This is a strong first-tattoo option since it’s low commitment and easy to keep subtle for work. Pain here tends toward moderate to higher, since the wrist has thinner skin and more nerve endings than the forearm. When briefing your artist, ask them to keep line weight slightly thicker than you’d expect, extremely thin lines can soften and blur faster at this scale. Bold geometric versions take the opposite approach.
3. Bold Blackwork Geometric Mandala
Blackwork means solid, heavily saturated black fill rather than fine outlines or dot texture, which gives this version serious visual weight and contrast. A geometric mandala built from triangles, chevrons, and straight radiating lines reads clean and modern rather than ornate. This needs a bigger canvas, usually four inches or more, to let the geometry breathe. Best on the outer upper arm or forearm where there’s enough flat space. Pain runs moderate to higher given the dense saturation and longer session time. Ask your artist about their solid fill technique specifically, uneven black saturation is one of the most common issues with this style. It ages well since solid black holds depth longer than fine detail does. Half mandala designs offer a different compositional approach.
4. Half Mandala Along the Forearm Edge
Instead of a full circle, this uses only half the pattern, positioned along the outer edge of the forearm so the straight edge follows the natural line of the arm. This composition works particularly well for people who want a mandala feel without a large circular commitment. Line weight can be fine or slightly bolder depending on preference, and shading is optional. Best sized between two and four inches running along the forearm’s outer border. Pain is generally mild to moderate depending on final size. Bring your artist a reference of the full mandala pattern you like, then ask them to sketch how it looks cut in half, since not every design splits cleanly. This suits people wanting something less visually dominant than a full circle. Matching mandala pairs bring a shared meaning into the mix.
5. Matching Mini Mandala Tattoos

Two smaller, simplified mandalas, usually under an inch and a half, done in fine line and meant to be gotten together with a friend or family member. Because the design is so small, detail has to be simplified, fewer rings, fewer tiny elements, so it doesn’t blur together as it heals. Best placed on the inner forearm near the wrist for visibility. Pain is generally mild given the size and quick session time. This is a popular choice for sisters, best friends, or parent-child pairs. Ask your artist to simplify the pattern intentionally rather than shrinking a complex design down to this scale, over-detailed small mandalas tend to lose clarity within a year or two. Watercolor mandalas bring color into the picture.
6. Watercolor-Style Mandala with Fine Line Overlay

This layers soft, translucent color washes behind a fine line mandala outline, mimicking the loose, blended look of watercolor paint rather than solid fill. Saturation stays lighter here than in traditional color work, which creates that soft gradient effect around the crisp linework. Best suited to the outer upper arm where there’s room for the color to spread and blend. Because pigment can fade faster than black ink over time, this style may need a touch-up down the line to keep the color vibrant, though this varies by skin and sun exposure. Pain is moderate, and color sessions typically run longer than black-only work. Ask your artist about their color retention experience specifically, this technique is more demanding than standard blackwork. Negative space mandalas take a more minimal approach.
7. Negative Space Mandala Pattern
Negative space tattooing uses untouched skin as part of the actual design, so instead of the pattern being solid black lines, some sections are defined by what’s left unshaded around black fill. A mandala using this technique creates a striking, almost sculptural look with real depth. This requires an experienced hand, since the artist has to plan the blank sections as carefully as the inked ones. Best on the outer forearm or upper arm with enough space to let the pattern read clearly, generally three inches or more. Pain is comparable to standard blackwork in the shaded areas. Ask specifically to see portfolio pieces showing negative space work before booking, this technique separates skilled artists from beginners quickly. Upper arm sleeve-style mandalas go even bigger.
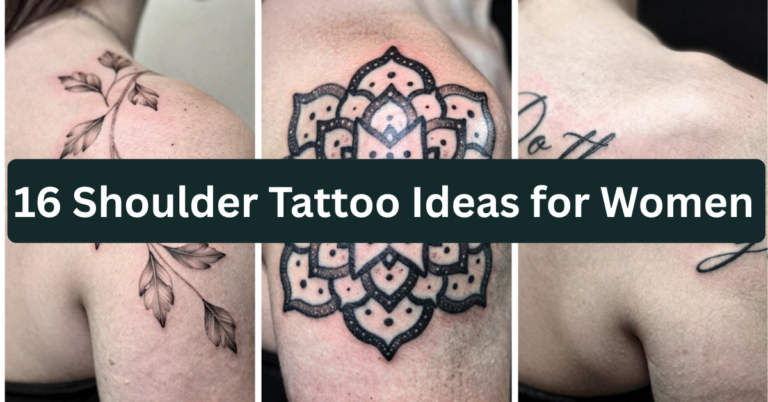
8. Upper Arm Sleeve-Style Mandala Panel

A larger mandala, or several connected mandalas, wrapping a significant portion of the upper arm, often as a starting piece for a future half or full sleeve. This typically takes multiple sessions given the size and detail involved. Best planned with your artist as part of a broader concept from the start, even if you’re only booking one section now, so future additions connect naturally. Pain runs on the higher end given the session length. This is a serious, highly visible commitment worth thinking through for workplace visibility and long-term plans. Ask your artist to sketch how the piece could extend later even if you’re not booking that yet. It ages well thanks to the density of the linework and shading. Small elbow-adjacent mandalas offer a subtler option.
9. Small Mandala Near the Elbow Crease
A compact mandala, generally under two inches, placed just above or beside the elbow crease. This spot is more sensitive than the flatter parts of the arm due to thinner skin and more nerve endings, so keep the design simple rather than overly detailed. Fine line works best here since bold shading can look cramped at this scale in a higher-movement area. Healing takes a bit longer than flatter placements since the elbow bends constantly. Pain runs moderate to higher. Ask your artist whether they recommend avoiding the exact crease itself, placement slightly above or beside it usually heals more evenly. This suits people wanting a design that peeks out from a short sleeve. Dotwork shading adds texture to the next idea.
10. Dotwork-Shaded Mandala with Fine Line Border
This combines a crisp fine line outer border with dotwork shading filling the inner rings, blending both techniques into one layered design. The contrast between the sharp outline and the softer, textured interior gives real visual depth. Best sized four inches or larger so both techniques have room to read clearly. Placement works well on the outer forearm or upper arm. Pain is moderate to higher given the combined technique and longer total session time. Ask your artist how they sequence the two techniques, outline first is standard, since it gives a clean guide for the dot shading to fill within. This design suits people who want more visual complexity than a single-technique mandala. Symmetrical geometric mandalas bring a cleaner, more structured look.
11. Precision Geometric Mandala with Straight-Line Radials

This version relies entirely on straight lines and sharp angles radiating from the center, rather than curved or floral elements, for a more architectural look. Precision is everything, every radial line needs to match in length and angle for the symmetry to actually read as intentional. Best on the flatter outer forearm where a perfectly straight-lined design won’t warp around a curve. Keep it between three and five inches for the geometry to stay crisp. Pain is moderate depending on total linework. Ask your artist whether they use a ruler or protractor guide for the radial lines, this genuinely affects precision at this level of detail. It’s a clean, modern take that reads well in professional settings. Floral mandala hybrids soften that structure.
12. Floral and Mandala Hybrid Design
This blends traditional mandala geometry with small floral elements, like tiny petals or leaves, woven into the outer rings instead of purely geometric shapes. The floral touches soften the overall look while keeping the radial symmetry mandalas are known for. Best placed on the outer forearm or upper arm with enough room, generally three to five inches, for both elements to stay distinct. Pain is moderate. Ask your artist to mock up the full composition together rather than adding florals as an afterthought, spacing between the geometric and floral sections matters for balance. This suits people who want a mandala’s structure with a softer, more organic feel. Mini finger-to-wrist trailing mandalas take things in a different direction.
13. Trailing Mini Mandala Sequence

A series of three or four progressively smaller mandalas trailing from the outer wrist up toward the mid-forearm, rather than one single centered design. Each mandala should stay under an inch and a half to keep the trailing effect visually balanced. Fine line works best here to keep each small piece legible. Pain is mild to moderate and manageable in one sitting for the whole sequence. This is a flexible option if you want more visual interest than a single small mandala but aren’t ready for one larger piece. Ask your artist about spacing proportions relative to your specific arm length before finalizing placement. Bold single-ring mandalas simplify the concept entirely.
14. Bold Single-Ring Mandala

Instead of multiple layered rings, this design uses just one thick, bold ring of pattern, radiating a simpler but still symmetrical look. The reduced complexity makes this a good option for people newer to detailed tattoos who still want that mandala aesthetic. Line weight should stay thicker than a typical fine line piece so the single ring holds up clearly over time. Best sized around two to three inches on the outer forearm. Pain is mild to moderate given the simpler linework. Ask your artist to keep the ring proportionally even all the way around, asymmetry is more noticeable with fewer design elements to distract from it. This is workplace-friendly and ages well thanks to the bolder line weight. Color-accented mandalas bring a pop of saturation.
15. Blackwork Mandala with Single Color Accent
This keeps the majority of the mandala in solid black blackwork but adds one small pop of color, often at the center point or a few outer details. The restraint here is intentional, one accent color reads more sophisticated than full multicolor saturation. Best on the outer forearm or upper arm with enough space for the black detail to stay the visual focus. Pain runs moderate to higher given the black saturation work. Ask your artist about color placement specifically, centering it draws the eye inward and keeps the design balanced. This suits people who want a hint of color without committing to a fully colored piece. Micro mandala clusters offer yet another compact option.
16. Micro Mandala Cluster
:max_bytes(150000):strip_icc()/salty_fox_tattoo-bc50afafb0a9472c8058e71535fba1ec.jpg)
Two or three tiny mandalas, each under an inch, grouped together rather than spaced individually along the arm. Fine line keeps each one crisp despite the small scale. Best placed on the inner forearm or near the wrist where the cluster reads as one cohesive grouping. Because each mandala is so small, detail needs to be simplified significantly, fewer rings and larger individual elements hold up better than tiny intricate ones. Pain is generally mild. This works well as a growing collection you add to over time or a group tattoo idea for more than two people. Ask your artist how they’ll space the cluster to avoid the designs blurring into each other visually. Symmetrical upper arm band mandalas wrap things differently.
17. Mandala Band Wrapping the Upper Arm
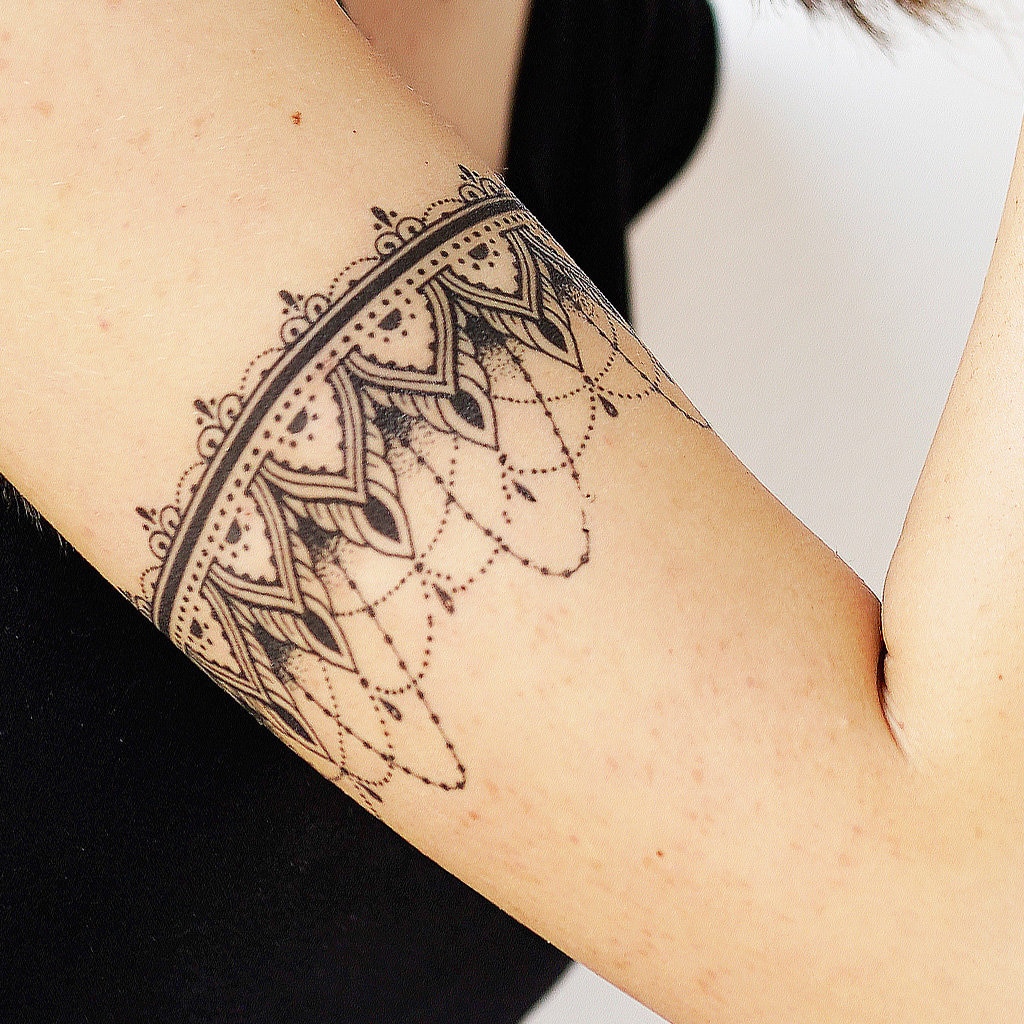
A mandala pattern adapted into a continuous band that wraps most or all of the way around the upper arm, rather than sitting as a flat circular design. This requires careful planning since the pattern needs to connect seamlessly where it meets itself. Best measured precisely during consultation to account for your specific arm circumference. Pain runs moderate to higher given the wraparound placement and total session length. Ask your artist how they’ll handle the seam where the pattern connects, a poorly planned connection point is one of the most common issues with wraparound designs. This is a bold, highly visible choice suited to people comfortable with a statement piece. Symbolic center-point mandalas add deeper personal meaning.
18. Mandala with Symbolic Center Element

This replaces the traditional geometric center point with a small personal symbol, an initial, a small icon, a meaningful shape, surrounded by the usual radiating mandala pattern. The symbolic center adds a layer of personal meaning without disrupting the overall symmetry. Best sized three inches or more so the center symbol stays legible within the surrounding pattern. Pain is moderate depending on total size. Ask your artist to sketch the center element first and build the surrounding pattern to complement its shape and size, rather than the reverse. This suits people who want the mandala aesthetic paired with something more individually meaningful. Ombre-shaded mandalas add a gradient effect.
19. Ombre-Shaded Dotwork Mandala
This uses dotwork technique with intentionally varying dot density to create a gradient effect, denser and darker near the center, fading lighter toward the outer rings. The gradual fade adds real depth compared to uniform shading. Best on the outer forearm or upper arm with enough room, generally four inches or larger, for the gradient to read smoothly. Pain is moderate to higher given the extended shading work. Ask your artist how they plan the density transition, an abrupt shift between dark and light sections looks less intentional than a smooth gradual fade. This design suits people wanting more dimension than a flat, single-saturation mandala. Petite behind-the-elbow mandalas take placement in a different direction.
20. Petite Mandala Behind the Elbow

A small mandala, generally under two inches, placed on the back of the upper arm just above the elbow rather than the more common forearm placement. This spot is easy to keep hidden with sleeves but still visible when you want it seen. Fine line or light dotwork both work well at this size. Pain here can run moderate given the proximity to bone, though it varies by individual. Healing takes slightly longer than flatter forearm spots due to the area’s frequent bending. Ask your artist whether the exact spot you’re picturing will stretch much during normal arm movement, this affects how well fine detail holds up. Layered geometric and dotwork mandalas add more complexity.
21. Layered Geometric and Dotwork Combination
This combines sharp, straight-lined geometric outer rings with softer dotwork detail filling the inner sections, creating contrast between structure and texture. Best sized four to six inches to give both techniques enough room to read distinctly. Placement works well on the outer forearm or upper arm where there’s ample flat space. Pain runs moderate to higher given the combined techniques and total session time. Ask your artist how they sequence the geometric linework and dot shading, most complete the structural lines first as a guide for the dot work. This suits people wanting a more intricate, layered mandala than a single-technique piece offers. Minimalist single-line mandala outlines simplify things dramatically.
22. Minimalist Single-Line Mandala Outline
This strips the mandala down to just its outer circular outline and a few simple internal radiating lines, done in one continuous fine line stroke without shading or dot texture. The appeal is in the restraint, a simplified structure that still reads clearly as a mandala. Best kept small to medium, one and a half to three inches, on the wrist or forearm. Pain is generally mild given the minimal linework. This is an excellent first-tattoo option since it’s quick, relatively low pain, and heals fast. Ask your artist to keep the line weight slightly thicker than typical fine line work, since minimalist designs with very thin lines can soften noticeably within a few years. Two-tone mandala designs bring contrast without full color.
23. Two-Tone Black and Grey Mandala

Rather than solid black or full color, this uses varying shades of grey alongside black to build depth and contrast within the pattern, achieved through diluted ink or shading technique rather than actual color pigment. This creates a softer, more dimensional look than flat black alone. Best on the outer forearm or upper arm with enough space for the shading variation to read clearly, generally three inches or more. Pain is moderate given the shading work involved. Ask your artist about their grey wash technique specifically, since inconsistent dilution can lead to patchy healing. This suits people wanting more depth than blackwork alone without moving into full color. Our final idea brings everything together in one larger statement piece.
24. Full Forearm Statement Mandala
A large, detailed mandala spanning most of the forearm from wrist to elbow, often combining fine line detail, dotwork shading, and geometric structure into one comprehensive design. This is the most involved option on this list and typically requires multiple sessions to complete properly. Best planned carefully with your artist from the very first consultation, given the size and detail level involved. Pain runs on the higher end given the extended session length and shading depth. This is a serious, highly visible commitment, so think through workplace visibility and long-term plans before booking. Ask your artist for a full stencil preview before the first session so you can assess proportion and placement while it’s still adjustable. That wraps our full list of twenty-four mandala tattoo ideas for the arm.
Best Placement Ideas
- Outer forearm: flattest, most stable surface, ideal for larger dotwork, geometric, or blackwork mandalas
- Inner wrist: high visibility, more sensitive due to thin skin, best for small fine line or micro mandalas
- Upper arm: good middle ground for concealment, suits medium to large pieces and future sleeve planning
- Near the elbow crease: more sensitive and higher movement, better for very small, simplified designs
- Wraparound band placement: most visible and highest commitment, best for experienced clients wanting a bold statement
Tips for Success
Choosing the right artist matters as much as choosing the right design, especially with mandalas, since symmetry mistakes are far more obvious in a circular pattern than in most other styles. Look through an artist’s portfolio specifically for mandala or geometric work, not just their general portfolio, since precision-heavy styles like this reward specialization. Check that their circles and radial lines look genuinely even across multiple pieces. Bring a clear reference image to your consultation and be upfront about how much detail you actually want, more rings and elements mean more time and often more cost. Ask about their approach to stenciling symmetry, most experienced mandala artists use a grid or compass-based method rather than freehanding the whole thing. Finally, confirm licensing and sterilization practices, a reputable studio will answer without hesitation.
Common Mistakes and How to Avoid Them
- Sizing a detailed mandala too small: intricate ring patterns need enough space to stay legible as they heal and age
- Choosing a curved or high-movement placement for a rigid geometric design: straight radial lines read better on flatter skin
- Skipping proper aftercare: shaded or dotwork mandalas especially need consistent care through the full healing window
- Copying a reference design exactly without personalizing it: small tweaks in ring count, center element, or size help avoid looking identical to a stock image
- Booking based on price alone: mandala precision takes real skill, and the cheapest option isn’t always the most experienced with this style
Similar Variations
Almost every design on this list can be resized larger for a bolder statement or smaller for something more subtle. A blackwork mandala can be softened into a dotwork gradient version, a fine line piece can gain a color accent later as a touch-up, and any single mandala can expand into a cluster or trailing sequence over multiple sessions. Half mandalas can also be completed into full circles down the line if you start smaller and want to build on it later, though this should always be planned with your artist rather than attempted as a rushed addition.
Aftercare Basics
General aftercare typically involves keeping the area clean, avoiding direct sun exposure, and avoiding soaking the tattoo in water such as pools or baths during the initial healing window. Avoid picking at any peeling skin, since this can affect how the ink settles into the surrounding skin tone. Every studio provides its own specific aftercare sheet, and you should always follow your individual artist’s instructions over generic advice, since techniques and products vary by studio. If you notice unusual redness, swelling, or irritation beyond normal healing, consult a licensed dermatologist or your artist promptly. Pain tolerance and healing experiences vary significantly by individual, and this article isn’t a substitute for professional medical guidance.
Quick FAQ
How much do mandala arm tattoos typically cost? Cost varies widely based on size and detail level, but small fine line mandalas often start in the low hundreds while larger dotwork or blackwork panels can run considerably higher. Always get a direct quote from your chosen artist rather than relying on general estimates.
Are mandala tattoos more painful than other designs? Mandalas themselves aren’t inherently more painful, but their detailed shading and longer session times, especially for dotwork or blackwork versions, can make sessions feel more intense than a simple outline tattoo. Placement matters just as much as style.
How long does a mandala tattoo take to heal? Smaller fine line mandalas often heal on the surface within about two weeks, while larger dotwork or shaded pieces can take three to four weeks to fully settle. Full depth and clarity can continue developing for a few weeks beyond that.
Do mandala tattoos fade or distort over time? Like any tattoo, mandalas can fade somewhat with sun exposure and skin aging, and very fine detail is more prone to softening than bolder linework. Choosing a flatter, more stable placement and following your artist’s aftercare guidance both help the design hold its shape longer.
Final Thoughts
Finding the right mandala tattoo design for your arm really comes down to matching the technique, fine line, dotwork, blackwork, or a blend, to your placement, pain tolerance, and how bold or subtle you want the final result to be. None of these twenty-four ideas are one-size-fits-all, and that’s really the point, the best mandala is the one that actually fits your arm, your lifestyle, and the level of detail you’re genuinely ready to commit to.
Take your time finding an artist whose portfolio actually shows strong symmetry and precision work, ask the questions we covered, and trust that a little extra research now saves you from a lopsided regret later. Whatever size or style you land on, a well-planned mandala tattoo is one of those designs that only looks better as you live with it.