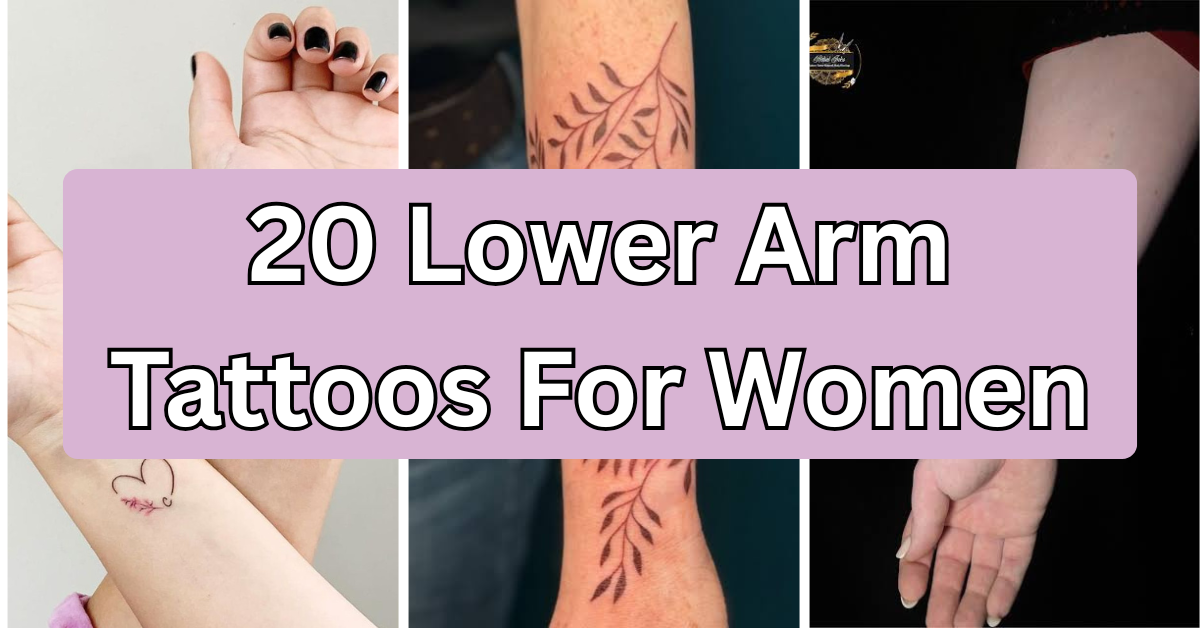
20 Lower Arm Tattoos For Women: Design Ideas, Placement Tips, and What to Know Before You Book
Nervous about picking a lower arm tattoo you’ll actually still love in five years? You’re not alone, and you’re asking the right question at the right time, before the needle touches skin instead of after.
So what are the best lower arm tattoos for women? Fine line florals, small linework symbols, script quotes, and delicate blackwork patterns work especially well on the forearm because the skin here is relatively flat and low-movement, which helps detailed linework stay crisp for years. Bolder blackwork and dotwork pieces also hold up nicely if you want something with more visual weight.
Stick around, because we’re covering placement tradeoffs, realistic pain levels, healing timelines, what to actually say to your artist during a consultation, and the mistakes that turn a great design into a regret. Let’s find something that actually fits you.
Why the Lower Arm Works So Well for Detailed Tattoo Designs
The lower arm, meaning the forearm from wrist to elbow, is one of the most forgiving canvases on the body for tattoo work. It’s mostly flat, has fairly consistent skin thickness, and doesn’t stretch or fold the way areas like the ribs or stomach do. That matters more than people realize. Fine line and single needle work (single needle just means the artist uses one very thin needle instead of a grouped needle, which allows for hairline-thin detail) tends to age better on the forearm because the skin doesn’t distort the linework over time. It’s also one of the easiest spots to keep clean and visible during healing, which shortens the practical hassle of aftercare. Whether you want something you can hide under a sleeve for work or something you want people to see, the forearm gives you options other placements simply don’t.
1. Fine-Line Botanical Wrist-to-Elbow Vine
This design runs a single, continuous vine with small leaves and buds from the wrist up toward the elbow, done entirely in fine line work with no shading. The line weight stays thin and consistent throughout, which is what gives it that delicate, almost hand-drawn look. Best placed along the outer forearm where the vine can follow the natural curve of the arm. Size-wise, keep the vine at least a quarter-inch wide at its thickest point so it doesn’t blur as it ages. Pain here is generally mild to moderate, since the outer forearm has more muscle and fat padding than the inner wrist. Bring a reference photo of an actual plant, not just a cartoon vine, so your artist can adapt real botanical structure. This one reads professional enough for most workplaces and ages gracefully because there’s no shading to fade unevenly. Next, if florals aren’t quite your thing, symbolic linework might be.
2. Single Needle Constellation Design

A scattering of small dots connected by thin straight lines to form a real or personal constellation, usually placed diagonally across the forearm. Single needle technique keeps every dot and line razor-thin, which is exactly what constellation designs need to look intentional rather than sloppy. This works beautifully as a small forearm accent, roughly two to four inches, and suits nearly any skin tone since the design relies on precision rather than heavy saturation. Healing typically takes ten to fourteen days for the top layer. Ask your artist about dot consistency, uneven dot sizing is one of the fastest ways this style looks amateur. Pain is usually low to moderate on the forearm’s flatter sections. It’s a popular matching tattoo choice for friends or siblings who each want a different star pattern. Speaking of matching designs, let’s look at one built specifically for that.
3. Matching Fine-Line Heart Outline Tattoos

Simple open-outline hearts, usually under an inch, done in fine line with zero shading or fill. The appeal is in the restraint, a single unbroken line that forms the heart shape without any extra detail competing for attention. Best placed on the inner or outer forearm near the wrist where the design stays visible but small. Because there’s so little linework, healing is quick, often fully settled within two weeks. This is a strong first-tattoo option since the low detail means low long-term maintenance and minimal touch-up need. Pain tends to be mild given the small size and short session time. When briefing your artist, specify the exact line thickness you want, thinner lines read as more delicate but fade first, so a slightly bolder line often ages better on this design specifically. Great for best friend or sibling pairs. If you want something with more personal narrative, script might be your next stop.
4. Cursive Script Quote Along the Forearm

A short phrase, name, or word written in cursive script, typically placed running vertically along the forearm or wrapping slightly around the side. Line weight should stay thin and even, since script tattoos rely on legible spacing rather than heavy strokes to look clean. Font choice matters enormously here, ask your artist to hand-letter a custom version rather than tracing a generic font off the internet, since custom lettering holds up better as skin ages. Placement along the forearm rather than the wrist gives more surface area for longer phrases. Pain is generally mild to moderate. This is one of the more visible placements, so think about workplace norms before committing to something highly personal. Keep phrases under six or seven words for lasting legibility. Bold blackwork offers the opposite approach, so let’s cover that next.
5. Bold Blackwork Geometric Band
A solid black geometric pattern, think triangles, chevrons, or interlocking lines, wrapped as a band around the upper forearm. Blackwork means heavy, solid black saturation rather than fine outlines, which gives this design serious visual weight and contrast. This style needs a larger canvas to read clearly, usually at least three inches wide, so it suits people comfortable with a bolder, more visible statement piece. Placement works best on the outer forearm where the band can wrap evenly around the curve. Pain runs moderate to higher here because of the dense, saturated shading work, sessions also tend to run longer. Ask your artist about their specific technique for solid black fill, even saturation prevents patchy healing. This design ages well because solid black holds its depth longer than fine detail. It’s less workplace-subtle, so factor that in. Dotwork offers a softer middle ground between fine line and full blackwork.
6. Dotwork Mandala Forearm Piece
Dotwork uses thousands of small individual dots, rather than solid lines or fill, to build shading, texture, and pattern. A mandala (a circular, symmetrical geometric design) built entirely from dots creates a soft, almost textured gradient effect that solid blackwork can’t replicate. This design suits the outer forearm well, where there’s enough flat space for a circular pattern to sit symmetrically. Sizing between two and four inches keeps the pattern detailed without the dots blurring together over time. Healing takes slightly longer than fine line, often two to three weeks, since dotwork covers more surface area. Pain is moderate, and sessions can run long due to the repetitive dot placement. Bring a symmetrical reference image and ask your artist how they’ll keep the dot spacing consistent across the whole design. It’s a striking option for someone wanting bold detail without full black saturation.
7. Minimalist Single-Line Wave or Mountain Range

A continuous unbroken line depicting a simple wave, mountain silhouette, or horizon, done in fine line with no lifting of the pen mid-design. The single continuous stroke is the whole point, it should look like it was drawn in one motion. Best kept small, one to two inches, and placed near the wrist or along the outer forearm. This is an excellent first-tattoo choice because it’s quick to complete, generally low pain, and heals fast. Ask your artist to sketch the line freehand a few times before stenciling, since true single-line designs look best when they’re not overly mechanical. It suits nearly any lifestyle since it’s easy to keep small and discreet. This design ages well as long as the line stays thick enough not to blur, thinner than a millimeter tends to soften with time. Symbolic imagery takes this further with more personal meaning.
8. Fine-Line Symbolic Icon Cluster
A small grouping of two or three meaningful symbols, an arrow, a small moon, initials, arranged together in a cluster rather than a single large image. Fine line keeps each icon crisp and legible even at small scale. Best placed on the inner forearm near the elbow crease or along the outer wrist area, giving enough room to space the icons without crowding. Keep the whole cluster under three inches so each symbol stays readable. Pain varies by exact placement, closer to the elbow crease tends to be more sensitive due to thinner skin and more nerve endings. When briefing your artist, bring separate reference images for each symbol rather than one busy composite, this makes spacing and proportion easier to plan. This design suits people who want personal meaning without one large, dominant image. It also works well as a growing collection you add to over time.
9. Watercolor-Style Floral Accent
This style layers soft, blended color washes behind or around a fine line flower outline, mimicking the loose, bleeding look of watercolor paint. Unlike solid color fill, saturation stays lighter and more translucent, which creates that soft gradient effect. Best suited to the outer forearm where there’s enough flat space for the color blending to read clearly. Because color pigment can fade faster than black ink, expect this design may need a touch-up appointment down the line to keep the color vibrant, this varies by skin and sun exposure. Pain is moderate, and color work often takes longer per session than black linework alone. Ask your artist specifically about their color retention experience, this style is more technically demanding than most. It’s a bold, artistic choice best for people comfortable with more visible, colorful ink. Negative space work offers a completely different, more restrained approach.
10. Negative Space Linework Pattern
Negative space tattooing uses the untouched skin itself as part of the design, so instead of solid lines, the pattern is built from what’s left unshaded around black fill. A geometric or organic pattern using this technique on the forearm creates a striking, almost sculptural look. This requires precise, experienced technique, since the artist has to plan the un-inked areas as carefully as the inked ones. Best on the outer forearm with enough space to let the pattern breathe, roughly two to four inches. Pain is comparable to standard blackwork in the shaded sections. Definitely ask to see a portfolio specifically showing negative space work before booking, this technique separates skilled artists from beginners fast. It’s a distinctive, less common choice for someone who wants their forearm piece to stand out from typical designs. Let’s move into designs built specifically for smaller, subtler placements.
11. Tiny Wrist-Adjacent Star or Sun Icon

A small single icon, a star, sun, or simple celestial shape, placed right where the wrist meets the forearm. Fine line keeps the icon delicate at this small size, usually under an inch. This spot is one of the more sensitive areas on the arm due to thinner skin and proximity to bone, so expect pain on the higher end of mild to moderate. Healing is quick given the tiny surface area, often under two weeks. This is a popular first-tattoo or matching-tattoo choice because it’s quick, relatively affordable, and easy to keep private under a watch or bracelet. Ask your artist about ink saturation at this size, too little ink and small designs can look grey or patchy as they heal. It ages well as long as the initial linework isn’t too thin. Bold traditional style takes the opposite approach in weight and visibility.
12. Bold Traditional-Style Flash Piece
Traditional tattoo style uses bold, thick outlines with limited but saturated color fill, think classic roses, swallows, or anchors. A flash piece just means a pre-drawn, ready-to-book design rather than a custom one. This style is durable by nature, the thick lines and solid color are specifically why traditional tattoos have historically aged so well over decades. Best placed on the outer forearm with enough room for the bold linework to sit clearly, usually three inches or more. Pain runs moderate given the saturated color work and session length. This is a great walk-in option if you want a quicker, less custom booking process, most street shops keep flash sheets on hand. It’s a highly visible placement choice, so consider your comfort with a bold, colorful piece before booking. Custom symbolic pieces offer more personalization if that’s what you’re after.
13. Custom Symbolic Line Portrait (Non-Facial)
Rather than a photorealistic portrait, this uses simple fine line strokes to represent a meaningful object, a pet’s silhouette, a hand, a small item, in an abstract, sketch-like way rather than a detailed rendering. This keeps the design elegant and less prone to looking dated compared to attempting full photorealism at small scale. Best on the outer forearm with two to three inches of space. Pain is generally mild to moderate depending on exact placement. Bring your artist a clear, well-lit reference photo and ask them to sketch a simplified line version before the actual session, this lets you adjust proportions before it’s permanent. This design suits people who want deep personal meaning without the visual heaviness of full realism, which also tends to hold up better over the years. Let’s look at a design built for visibility and boldness instead.
14. Blackwork Sleeve-Style Panel
A larger blackwork panel, combining pattern, shading, and linework into one cohesive piece that covers a significant portion of the forearm, often used as a starting panel for a future full sleeve. This requires multiple sessions typically, given the size and saturation involved. Best planned with your artist from the start as part of a broader arm concept, even if you’re only doing one section now, so future additions flow naturally. Pain is on the higher end given session length and shading depth. This is a serious, highly visible commitment, worth thinking through carefully regarding workplace visibility and long-term plans. Ask your artist to sketch how this panel could extend later, even if you’re not booking the rest yet. It ages well due to heavy black saturation. If that commitment feels like too much right now, smaller dotwork accents offer a lighter alternative.
15. Small Dotwork Accent Trio
Three small dotwork elements, tiny geometric shapes or simple symbols, spaced evenly along the forearm rather than clustered together. This gives a scattered, intentional look without committing to one larger piece. Each element should stay under an inch to keep the dot texture readable at this scale. Best spaced with at least an inch of bare skin between each piece so they read as a set rather than a jumble. Pain is mild to moderate and manageable in one sitting for all three. This is a flexible, low-commitment option, and a strong choice if you’re unsure about a bigger piece but want more than a single tiny icon. Ask your artist about spacing proportions relative to your specific arm length before finalizing placement. It works well as a growing collection over multiple appointments. Fine line lettering initials offer another understated option.
16. Fine-Line Roman Numeral or Date

A meaningful date or number rendered in thin, evenly spaced fine line numerals, often a birth date, anniversary, or significant year. Keep spacing and numeral height consistent, uneven numeral sizing is one of the most common mistakes with this style. Best placed along the inner or outer forearm in a straight horizontal line. Pain is generally mild given the small scale and quick session time. This is one of the more meaningful, personal choices on this list, and works well as a first tattoo since it’s quick and low maintenance. Ask your artist to write out the exact numeral style you want on paper first, small differences in font can change the whole feel. It stays legible over time as long as the linework isn’t too thin. Let’s close out with a design built for texture and visual movement.
17. Fine-Line Feather with Dotwork Trail
A single feather rendered in fine line, transitioning into a scattered dotwork trail that fades into small dots trailing down the forearm, blending two techniques into one flowing design. The contrast between the crisp feather outline and the softer, fading dots creates real visual movement. Best placed running diagonally along the forearm to follow the natural fade of the dot trail. Size around three to five inches gives enough room for the transition to read clearly. Pain varies across the piece, the dotwork trail section is typically more tolerable than the denser feather detail. Ask your artist how they plan to taper the dot density, a smooth fade looks far more intentional than an abrupt stop. This design suits people who want something a bit more artistic and layered than a single flat symbol. Geometric line patterns offer a more structured final option.
18. Fine-Line Geometric Line Pattern
A structured pattern of straight lines and angles, triangles, chevrons, or simple repeating shapes, done entirely in fine line without shading. Precision is everything here, every angle and line length needs to match for the pattern to look deliberate rather than uneven. Best on the flatter outer forearm where a ruler-straight design won’t warp around a curve. Keep the pattern between two and four inches for the geometry to stay crisp. Pain is mild to moderate depending on total linework. Ask your artist whether they use a ruler or stencil guide for straight sections, this genuinely affects precision. It’s a clean, versatile design that works for almost any personal style and stays workplace-appropriate given its structured, understated look. Combined pieces bring several smaller elements together as one composition.
19. Combined Floral and Script Composition

This pairs a small fine line flower with a short script word or name, arranged together as one cohesive composition rather than two separate tattoos. The floral element softens the piece while the script adds personal meaning. Best placed along the forearm with enough length to let both elements breathe without crowding each other. Keep the overall composition under four inches for balance. Pain is mild to moderate, and session length runs a bit longer given the two combined elements. Ask your artist to mock up the full composition together rather than placing each piece separately, spacing between the flower and text matters as much as either element alone. This suits people who want florals but also want a bit more personal narrative attached. Our final idea circles back to the boldest option on this list.
20. Bold Blackwork Cuff Design
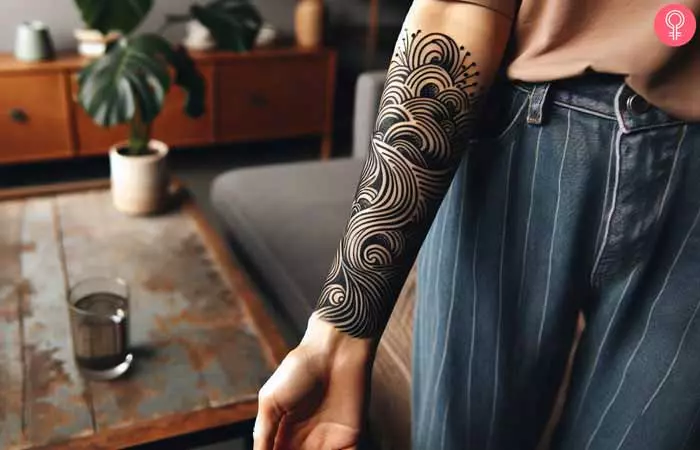
A thick, solid black band or cuff-style pattern that wraps fully or partially around the lower forearm near the wrist, similar to a bracelet in placement but rendered in bold blackwork saturation. This is one of the most visible, statement-making designs on this list. Best kept proportional to wrist and forearm width, your artist can help measure this accurately during consultation. Pain runs moderate to higher given the solid saturation and wraparound placement near the wrist bone. This is a serious commitment in visibility, definitely think through workplace and lifestyle factors before booking. Ask your artist about their specific solid-fill technique to avoid uneven patchiness as it heals. It ages exceptionally well due to the heavy black saturation holding its depth for years. That wraps our full list of twenty lower arm tattoo ideas.
Best Placement Ideas
- Inner wrist to lower forearm: high visibility, higher pain sensitivity due to thin skin, best for small fine line pieces
- Outer forearm: lower pain, flatter canvas, ideal for larger blackwork, dotwork, or geometric pieces
- Elbow crease area: more sensitive, better suited to very small designs rather than large detailed work
- Full wraparound forearm: most visible and highest commitment, best for experienced clients comfortable with bold statement pieces
- Upper forearm near elbow: easier to conceal with short sleeves, good middle ground for workplace considerations
Tips for Success
Choosing the right artist matters more than choosing the perfect design. Look through an artist’s portfolio specifically for the style you want, fine line, blackwork, dotwork, since most artists specialize rather than doing everything equally well. Check that their linework looks consistent across multiple pieces, not just their single best photo. Bring clear reference images to your consultation rather than vague descriptions, and be upfront about your pain tolerance and any skin sensitivities. Ask about their sterilization practices and licensing, a reputable studio will answer this without hesitation. Finally, ask whether they recommend a custom design (drawn specifically for you) or a flash piece (a pre-made design ready to book), depending on your budget and timeline.
Common Mistakes and How to Avoid Them
- Sizing detailed work too small: fine line and dotwork pieces need enough space to stay legible as they heal and age
- Choosing poor placement for the linework style: wraparound or curved designs need flatter skin than bent or high-movement areas
- Skipping proper aftercare: even simple designs need consistent care in the first two to three weeks
- Copying a design exactly without personalizing it: minor tweaks in size, spacing, or added elements keep your piece from looking identical to a stock reference photo
- Booking based on price alone: the cheapest option isn’t always the most skilled, especially for detailed styles like fine line or negative space
Similar Variations
Nearly every idea on this list can be resized up for a bolder statement or down for something more subtle. Fine line pieces can gain a dotwork shadow for added depth, blackwork designs can be softened into a dotwork gradient version, and any single symbol can be turned into a small cluster over multiple sessions. Color can also be introduced later as a touch-up to an existing black and grey piece, though this should always be planned with your artist rather than attempted as a rushed addition.
Aftercare Basics
General aftercare typically involves keeping the area clean, avoiding direct sun exposure, and avoiding soaking the tattoo in water (pools, baths) during the initial healing window. Avoid picking at any peeling skin, since this can affect how the ink settles. Every studio provides its own specific aftercare sheet, and you should always follow your individual artist’s instructions over generic advice, since techniques and products vary by studio. If you notice unusual redness, swelling, or irritation beyond normal healing, consult a licensed dermatologist or your artist promptly. Pain tolerance and healing experiences vary significantly by individual, and this article isn’t a substitute for professional medical guidance.
Quick FAQ
How much do lower arm tattoos typically cost? Cost varies widely by size, detail, and artist experience, but small fine line pieces often start in the low hundreds while larger blackwork or dotwork panels can run considerably higher. Always get a direct quote from your chosen artist rather than relying on general estimates.
How painful are forearm tattoos compared to other placements? The outer forearm is generally considered one of the more tolerable placements due to muscle and fat padding, while areas near the wrist bone or elbow crease tend to be more sensitive. Individual pain tolerance still varies a lot.
How long does healing typically take? Surface healing for smaller fine line pieces often takes around two weeks, while larger or more saturated designs like blackwork can take three to four weeks to fully settle. Full color and depth can continue settling for several weeks after that.
Will a lower arm tattoo fade or need touch-ups? All tattoos can fade somewhat over time depending on sun exposure, skin type, and ink saturation. Fine line and detailed work occasionally needs a touch-up years down the line to keep lines crisp, which is worth discussing with your artist upfront.
Final Thoughts
Finding the right lower arm tattoos for women comes down to matching the technique, fine line, blackwork, dotwork, or a blend, to your placement, pain tolerance, and how visible you want the final piece to be. None of these twenty ideas are one-size-fits-all, and that’s the point, the best design is the one that actually fits your arm, your lifestyle, and the meaning you’re trying to carry with you.
Take your time picking an artist whose portfolio genuinely matches the style you want, ask the questions we covered, and trust that a little research now saves you from a regret later. Whatever direction you choose, a little planning goes a long way toward loving your lower arm tattoo for years to come.