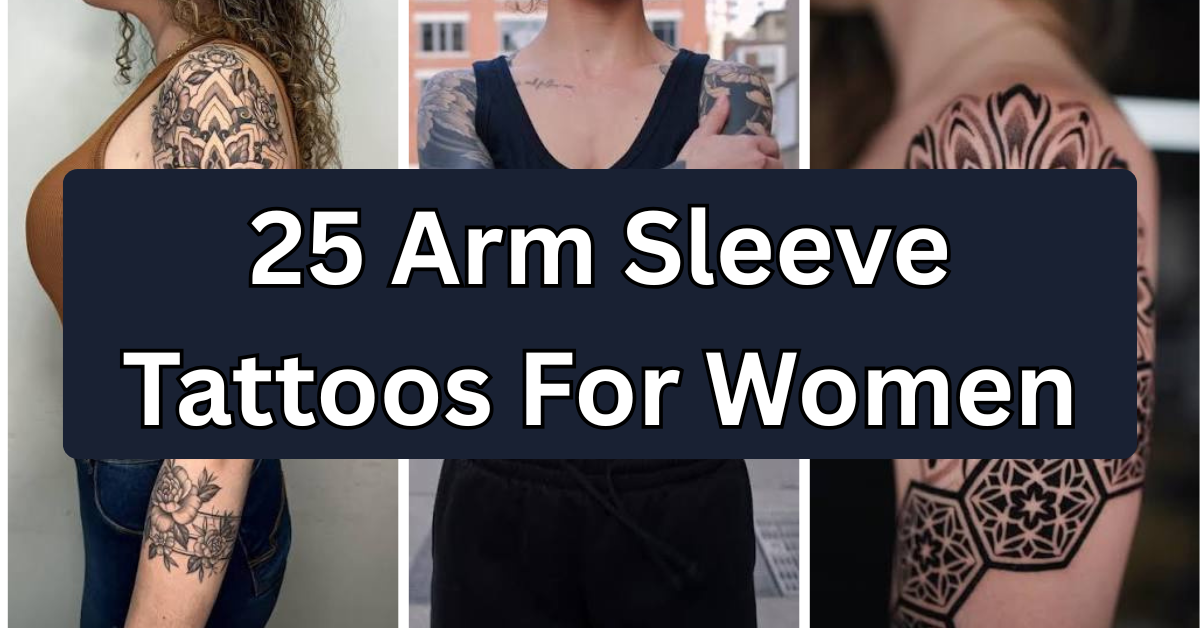
25 Arm Sleeve Tattoos For Women
Nervous about committing to something as big as an arm sleeve tattoo? That’s a fair worry — a sleeve is a long-term relationship with your skin, not a quick weekend decision. This guide pulls from real studio experience and current tattoo trends so you can walk into a consultation knowing exactly what to ask for.
So what are the best arm sleeve tattoos for women right now? The strongest options combine fine-line botanical work, blackwork florals, dotwork shading, and negative-space geometry, because these techniques scale well across the arm’s curves and age gracefully over ten-plus years. Mixed-style sleeves that blend two techniques — like fine line with dotwork shading — are also trending because they read as custom rather than flash off a wall.
Stick around, because we’re covering placement tradeoffs, real pain levels by zone, rough cost ranges, how to brief your artist so you don’t get a generic version of your idea, and the aftercare habits that actually protect your investment.
Why Arm Sleeves Are Such a Versatile Canvas
An arm is basically a long, curved, mostly-visible billboard, and that’s exactly why sleeves work so well artistically. The natural taper from shoulder to wrist gives an artist room to build a composition that flows — vines that thicken near the shoulder and thin out by the wrist, or a wave pattern that crests at the elbow. Unlike a single small tattoo, a sleeve lets you tell a longer visual story, mix techniques, and leave room for future additions. It’s also flexible on commitment level: you can start with a quarter sleeve and expand later, which takes pressure off getting everything “perfect” on day one.
Before we get into specific designs, it helps to know the vocabulary artists use, because “just do something pretty” gets you a generic result.
Technique quick-reference:
- Fine line — thin, single-pass lines made with a small needle grouping (often a single needle). Delicate, detailed, but fades faster on sun-exposed skin than bolder work.
- Bold traditional — thick outlines, solid color fills, high contrast. Ages slower and stays readable from a distance even after 15-20 years.
- Blackwork — solid black ink used for shapes, fills, or heavy shading rather than outlines alone. Reads as bold and graphic.
- Dotwork — shading and texture built from thousands of individual dots instead of solid shading. Creates a soft, stippled gradient effect.
- Negative space — using unt attooed skin as part of the design (like a white line running through a black shape) rather than filling every area with ink.
Fine-Line Botanical Half Sleeve
This is probably the most requested style for a first sleeve, and for good reason. Thin, single-needle lines trace stems, leaves, and small blooms in a way that looks hand-drawn rather than stamped on. There’s usually little to no shading, just clean linework with maybe a touch of fine stippling for depth. It works best running along the outer forearm, where the natural curve mimics a climbing vine. Keep individual flowers at least 2 inches across so the linework doesn’t blur together as it ages. Pain is moderate here — the outer forearm has more flesh than bone, so it’s usually tolerable even for first-timers. This design reads professional in most workplaces since it stays soft and floral rather than heavy.
Blackwork Floral Full Sleeve
Where fine line whispers, blackwork florals speak up. This style uses solid black fills for petals and leaves, sometimes with negative-space veins left unt attooed inside the black shapes for contrast. It’s bolder, holds up better over decades, and reads clearly even from ten feet away. A full sleeve like this typically takes multiple sessions — plan for at least three sittings of two to three hours each. Bring reference photos of botanical illustrations, not just flower photos, since illustrators already simplify shapes in a way that translates well to blackwork. Expect more discomfort on the inner arm and elbow crease than the outer arm. This is a strong choice if you want something that ages into a bold, still-legible piece rather than a soft blur.
Watercolor-Style Wildflower Sleeve
This technique layers translucent color washes behind or around linework to mimic loose watercolor painting. It’s visually striking in the first few years but worth knowing upfront: color saturation fades faster than black ink, and the soft-edged color blooms can migrate slightly over a decade. Artists usually pair a thin black outline with the color wash so the design holds its shape even after the color softens. Best placed on the upper arm or shoulder cap, where skin is less exposed to constant sun. Size should be generous — small watercolor work loses its blended effect. Ask your artist about touch-up scheduling upfront, since color refreshes every several years keep this style looking sharp.
Dotwork Mandala Sleeve
Dotwork mandalas are built entirely from small dots that fool the eye into seeing smooth gradients and texture, similar to how newspaper photos are made of tiny dots up close. It’s meditative to look at and gives incredible depth without a single line of solid shading. This style demands a steady-handed artist — ask to see close-up healed photos in their portfolio, not just fresh ink, since dotwork spacing has to be precise to heal evenly. Best on the upper arm or shoulder where there’s a flatter surface for the geometric pattern to sit symmetrically. Sessions run long because of the repetitive needle work, so expect more cumulative discomfort than sharper pain. It’s a great fit if you want something intricate that doesn’t rely on color at all.
Single-Needle Script Sleeve
Script sleeves — meaningful words, lyrics, or names woven with small botanical accents — rely on a single needle for crisp, thin letterforms. The risk here is legibility over time, since very thin script can blur at the edges after ten-plus years, especially on high-friction areas like the inner forearm. Ask your artist to slightly increase line weight on lettering compared to standalone fine-line work, which helps it hold up longer. Best placed on the outer forearm or upper arm where skin stays flatter and stretches less. Pain is moderate to low on fleshier zones. This works well for a first tattoo since the design is simple to book as a custom piece without needing multiple long sessions.
Negative Space Geometric Sleeve
Negative space designs flip the usual approach — instead of filling shapes with ink, the untouched skin becomes part of the pattern, like a white line cutting through a solid black triangle. This creates a striking, modern look that reads as more abstract than floral or script sleeves. It requires precise planning before the first line goes down, since mistakes are harder to cover later. Best suited to the outer arm where the geometry can wrap cleanly around the natural curve. Ask your artist for a printed stencil preview on your actual arm before starting, so you can see how the negative space interacts with your skin tone. This suits people who want a bold, architectural statement rather than something soft or sentimental.
Japanese-Inspired Irezumi Sleeve
This traditional style uses bold outlines, flowing composition, and background elements like clouds or waves to unify the whole sleeve into one continuous scene. It’s one of the most labor-intensive options on this list, often requiring five or more sessions to complete properly. Common motifs include koi, cherry blossoms, and dragons, but a respectful, well-researched approach matters here — study the symbolism before committing, and work with an artist experienced specifically in this style. Best as a full sleeve rather than a partial one, since the background elements need room to flow. Expect more soreness than lighter styles simply due to session length. This is a long-term commitment, both in ink and in the story it tells.
Fine-Line Butterfly Migration Sleeve
A cluster of butterflies in varying sizes, rendered in delicate fine-line work, creates a sense of movement up the arm — smaller and sparser near the wrist, larger and denser toward the shoulder. Minimal shading keeps the wings looking light rather than heavy. This placement geometry (small to large) is a simple but effective trick any artist can execute well. Best on the outer forearm for visibility, or the inner arm if you want something more private. Wrist-adjacent placement tends to be more sensitive due to thinner skin over bone. This design ages best when butterflies are kept at least an inch wide, since tiny wing details blur first as fine lines soften over the years.
Bold Traditional Rose Sleeve
Bold traditional work uses thick black outlines and solid, saturated color fills — think classic Americana tattoo flash. Roses in this style hold their shape remarkably well over decades because the heavy outline anchors the design even as color mellows. This is a good option if you’re worried about a design looking “blurry” in twenty years. Best on the upper arm or full sleeve format where the bold scale has room to breathe; cramming bold traditional into a small space muddies the linework. Pain tends to run moderate to high on the inner elbow area specifically. This style suits people who want something unmistakably a tattoo rather than something soft or illustrative.
Ocean Wave and Marine Life Sleeve
Waves, coral, and marine creatures blend well with dotwork shading for texture and fine linework for detail — a mixed-style approach that’s increasingly popular for a custom look. The composition typically flows downward from shoulder to wrist, following the arm’s natural line the way water flows downhill. Best for a three-quarter or full sleeve, since a short segment cuts the flow off awkwardly. Bring your artist reference images of the specific marine life you want (not just “ocean stuff”) to avoid a generic result. Moderate pain throughout, with the inner arm running higher. This design suits people drawn to nature symbolism without wanting an obviously floral piece.
Celestial Moon Phase Sleeve
A sequence of moon phases, from crescent to full, works beautifully as a vertical or diagonal line up the forearm, usually done in fine line with light dotwork shading for the moon’s shadowed side. It’s a popular symbolic choice representing change or cycles, and the repeating-shape composition is visually satisfying even to someone who doesn’t know the meaning. Best kept to the outer forearm or upper arm for a clean line of visibility. Small moons under an inch can lose crispness after a decade, so aim for slightly larger phases than you’d think you need. Pain is generally moderate. This design transitions well into a matching tattoo with a friend or family member, since each person can take a different phase.
Abstract Linework Sleeve
This style relies purely on the confidence of the line itself — sweeping, continuous, single-pass strokes that suggest movement or shape without depicting anything literal. No shading, no color, just intentional negative space and line weight variation. It’s deceptively hard to execute well, so portfolio review matters enormously here; ask to see multiple examples of healed abstract work, not just fresh photos, since thin abstract lines are the first thing to soften as skin ages. Best on the upper arm or shoulder where a continuous line has room to breathe. Lower pain overall since there’s no dense shading involved. This works for someone who wants a sleeve that feels artistic and modern rather than symbolic or thematic.
Fine-Line Bird and Branch Sleeve
Small birds perched along a branch that winds up the arm gives a naturalistic, storybook feel using thin, single-needle linework with minimal shading on the wing feathers. The branch itself often follows the arm’s natural muscle line, which is a smart placement trick — ask your artist to sketch directly on your skin before tattooing so the branch flows with your specific arm shape rather than a generic template. Best on the outer forearm for a look that reads clearly even at a distance. Pain runs low to moderate on fleshier areas. This design works well as a first sleeve since it can be built in stages, adding birds or leaves over multiple sessions without looking unfinished at any point.
Bold Blackwork Sun and Moon Sleeve
Contrasting sun and moon imagery rendered in heavy blackwork creates a graphic, high-contrast statement piece. Solid black fills dominate, sometimes broken up with negative-space rays or craters for visual interest. This design ages exceptionally well because saturated black holds up better over time than most colors or thin gray-wash shading. Best suited to the upper arm or shoulder cap, where there’s enough flat space for the circular shapes to sit symmetrically. Expect more discomfort during solid-fill sections compared to outline work, since repeated passes over the same skin add up. This suits people who want something bold and low-maintenance in terms of long-term touch-ups.
Delicate Lace Pattern Sleeve
Lace-inspired sleeves recreate the look of fabric patterns using extremely fine linework and small dotwork accents to mimic the texture of lace fabric. This is one of the more delicate, detail-heavy options and requires an artist skilled specifically in fine line work — ask to see extreme close-up healed photos, since lace patterns are unforgiving of shaky lines. Best on the upper arm or wrapped around the forearm like an actual sleeve of fabric. Pain is generally moderate. Because the detail is so fine, expect this design to soften noticeably faster than bolder styles, so budget for a touch-up around the five-year mark to keep the pattern crisp.
Fine-Line Constellation Sleeve
Star maps and constellations connected by thin lines create a quiet, personal design, often customized to a specific date or location’s night sky. This is an easy one to make genuinely custom — bring your artist the exact coordinates or date you want represented rather than a generic zodiac symbol. Best on the outer forearm or upper arm where the scattered dot-and-line pattern has room to spread naturally. Pain is low to moderate given the thin, quick linework involved. This design ages reasonably well since the dots (representing stars) are less prone to blurring than long connecting lines, though very thin connecting lines may soften first.
Mixed-Style Nature Collage Sleeve
Rather than one theme, this approach collages several nature elements — florals, insects, small animals — using a blend of fine line and dotwork shading to unify everything into one cohesive sleeve. It’s the most flexible option on this list since pieces can be added over multiple years without it looking disjointed, as long as the artist maintains consistent line weight throughout. Best as a full sleeve project built in stages rather than rushed into one sitting. Pain varies by session depending on which zone is being worked. This suits people who like the idea of a sleeve as an evolving piece rather than a single finished statement.
Best Placement Ideas
- Outer forearm — highly visible, moderate pain, easiest to keep aftercare clean since you can see it easily.
- Upper arm/shoulder cap — easy to cover for work, flatter surface for symmetrical designs, generally lower pain.
- Inner arm — more private, but thinner skin here often means higher sensitivity during the session.
- Elbow crease — best avoided for delicate linework since constant movement accelerates fading in this specific spot.
- Full sleeve (wrist to shoulder) — maximum visual impact and storytelling room, but highest cost and longest total session time.
Tips for Success
Start any consultation by reviewing an artist’s portfolio for consistency, not just a handful of great photos. Look specifically for healed photos, not only fresh ink, since fresh tattoos always look sharper than they will in six months. A portfolio full of only one style (say, all bold traditional) tells you they’re not the right fit for a fine-line request, even if their work looks skilled. Bring reference images that show line weight and composition you like, and be upfront about your pain tolerance and time availability, since a full sleeve might mean three to six separate appointments. Ask about their process for stencil placement — a good artist will let you see and adjust the stencil on your actual skin before any ink goes down.
Common Mistakes and How to Avoid Them
- Going too small for detailed work. Fine line and dotwork both need enough space to breathe — cramming detail into a tiny area causes it to blur together within a few years.
- Ignoring how a placement stretches or moves. Elbow creases and areas with lots of natural movement age designs faster than flatter zones.
- Skipping the aftercare instructions. Every artist’s sheet is slightly different based on their ink and technique; following it matters more than generic internet advice.
- Copying a design exactly from a photo. A tattoo that’s identical to someone else’s reference photo often looks flat; personalizing size, angle, or a small detail makes it genuinely yours.
- Booking a walk-in slot for a complex custom sleeve. Big, detailed pieces need a proper consultation and custom design time, not a rushed same-day session.
Similar Variations
Almost every idea above can shift dramatically with small changes. A fine-line floral sleeve becomes bolder by switching to thicker outlines and solid color fills. A blackwork piece can incorporate negative space for more visual complexity without adding color. Dotwork shading can be layered into almost any linework design to add dimension without committing to full color saturation. And any single design here can be scaled down to a quarter sleeve or scaled up into a full sleeve depending on your comfort with pain, time, and cost.
Aftercare Basics
General dermatological consensus recommends keeping a new tattoo clean, moisturized, and away from direct sun exposure and swimming during the initial healing period. Healing time varies by individual and by design size, but many people see visible surface healing within two to three weeks, with full settling taking longer underneath. Avoid scratching or picking at any peeling skin, since that can distort the linework. Always follow the specific aftercare sheet your artist provides, since ink and technique differences can change their exact recommendations — and check in with a licensed professional or dermatologist if you notice unusual redness, swelling, or discharge beyond normal healing.
Quick FAQ
How much does an arm sleeve tattoo cost?
Costs vary widely by region, artist experience, and design complexity, but a full sleeve typically runs from several hundred to a few thousand dollars total across multiple sessions. Get a written quote after your consultation rather than relying on a rough estimate.
How painful is a full arm sleeve?
Pain tolerance varies by individual, but generally bony areas like the elbow and wrist feel more sensitive than fleshier zones like the outer forearm or upper arm. Session length also adds to overall discomfort more than any single needle pass.
How long does an arm sleeve take to heal?
Surface healing generally takes two to three weeks, though this varies by person and by how much of the arm was tattooed in one sitting. Full sleeves done across multiple sessions mean you’re often healing one section while starting the next.
Will my arm sleeve fade or need touch-ups?
Some fading is normal over years, especially with fine line and color work exposed to regular sun. Bold blackwork and traditional styles tend to hold their shape longer, but most sleeves benefit from a touch-up appointment at some point down the road.
Finding the right design among these 25 arm sleeve tattoos for women really comes down to matching the technique to how you want the piece to look in ten years, not just tomorrow. Take your time picking an artist whose healed work backs up their style, be honest about your pain tolerance and budget, and treat the aftercare instructions as seriously as the design itself. Do that, and you’ll end up with a sleeve you’re genuinely proud to wear for the long haul.