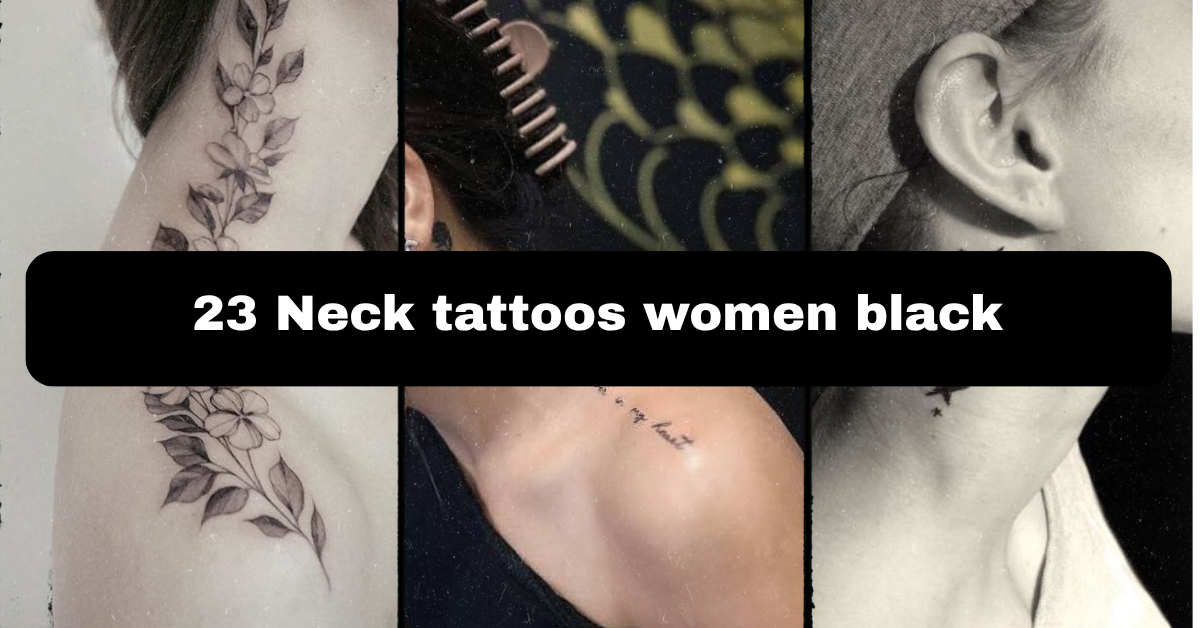
23 Neck Tattoos for Women in Black: Design, Placement, and Pain Guide
Neck tattoos for women in black ink come with more visibility tradeoffs than almost any other placement, and this guide comes from real time spent around studios watching those exact conversations happen, not from a stock photo roundup. Every idea below comes with the technical detail that actually decides whether a black neck piece looks sharp in year one and still looks sharp a decade later.
So what makes a great black neck tattoo for women? Fine-line and single-needle designs work best on the side neck and behind the ear since they stay subtle and heal cleanly on thinner skin, while bolder blackwork suits the nape or front throat where there’s more room for solid, high-contrast shapes. Keeping the design entirely in black also means fewer touch-ups long term compared to color work in the same spot.
Keep reading for placement-specific pain notes, a realistic healing timeline, rough cost ranges, and exactly what to bring to your consultation so the finished piece matches what’s in your head, not just what looked good on a screen.
Why the Neck Works as a Placement, and Why It Deserves Extra Thought
The neck is one of the most visually striking spots for a tattoo because it’s rarely fully hidden and it moves constantly with everyday expression, turning your head, laughing, tilting your chin. That makes a black neck tattoo read as a real style statement rather than a background detail. It also means visibility deserves more thought here than almost anywhere else on the body, since most workplaces, formalwear, and even certain hairstyles won’t cover it the way a sleeve or ankle piece can be hidden. Sticking to black ink keeps things simpler in one sense: no color fading to worry about, no color-matching touch-ups down the line, just clean linework or shading that ages predictably. Below are 23 ways to work with that space, organized from smaller and more private to bolder and fully visible.
Fine-Line Black Script on the Side Neck
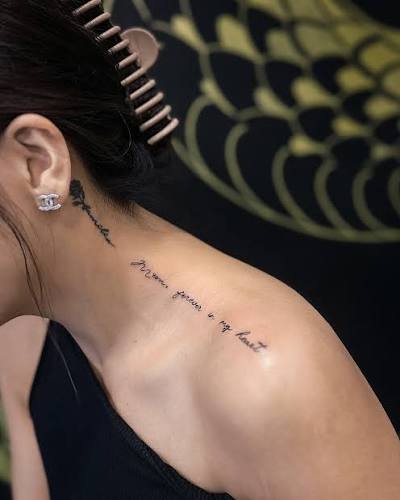
Fine line uses a single thin needle to create delicate, low-opacity lines instead of thick, saturated linework, which suits small script well since the letters stay legible without heavy shading crowding them. Placed along the side neck, just below the ear, a short word or phrase in a clean serif or simple script style reads clearly at 1 to 2 inches. Keep the wording short, long phrases at this size blur together within a few years as fine lines soften. Ask your artist to test the lettering size on paper first, since script that looks fine on a screen can crowd or blur at actual tattoo scale. The side neck has thin skin and sits close to nerve-dense areas, so expect a sharper, more concentrated sensation than fleshier spots. This placement is highly visible in most necklines, so think through workplace dress codes before booking, and it suits a personal, meaningful first tattoo more than a subtle one.
Blackwork Nape Tattoo
Blackwork uses solid black ink to build bold, high-contrast shapes rather than thin linework, and the nape gives it a flat, relatively private canvas to work with. A geometric shape, a bold symbol, or a simple silhouette all read clearly here at 2 to 3 inches, since hair typically covers this spot unless it’s pulled back or cut short. Solid black fill takes longer under the needle than simple linework, so expect steady, moderate discomfort, and the nape’s proximity to the spine and skull base makes it a more sensitive spot than most people expect. Ask your artist about their approach to solid black saturation specifically, since uneven fill here is one of the more common complaints. This placement offers real flexibility for hiding or showing the tattoo depending on hairstyle, making it a strong pick for anyone who wants visibility on their own terms.
Dotwork Black Mandala Behind the Ear
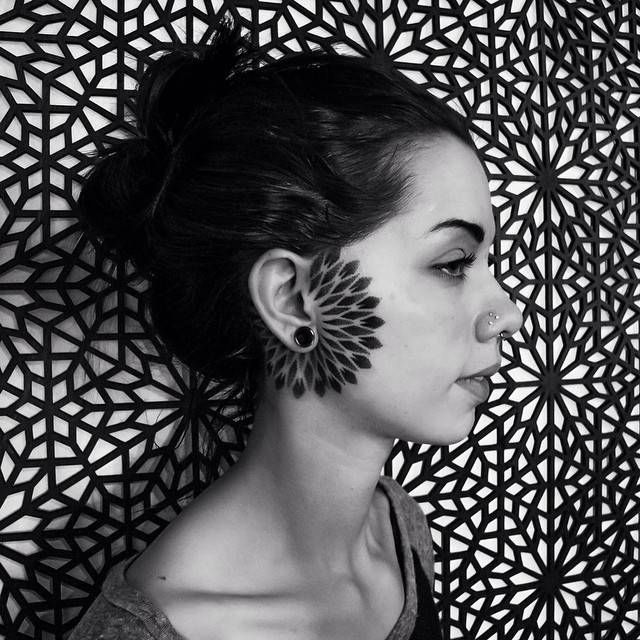
Dotwork builds shading and texture from clusters of tiny dots instead of solid lines or color blocks, which works well for a small mandala’s radiating pattern behind the ear. Denser dot clusters near the center create depth, while sparser dotting toward the edges fades gently into skin. Keep this design under 1.5 inches given the limited flat space behind the ear, larger mandalas lose their symmetry once the design wraps around the ear’s curve. This spot sits over thin skin and cartilage, so expect a sharper, more concentrated sensation than most neck placements. Ask your artist to sketch the mandala directly on your skin before tattooing, since a slightly uneven circle throws off the whole pattern. This placement is easy to hide with hair down, making it a popular choice for a first tattoo or anyone who wants something meaningful but private.
Single-Needle Small Black Star Cluster
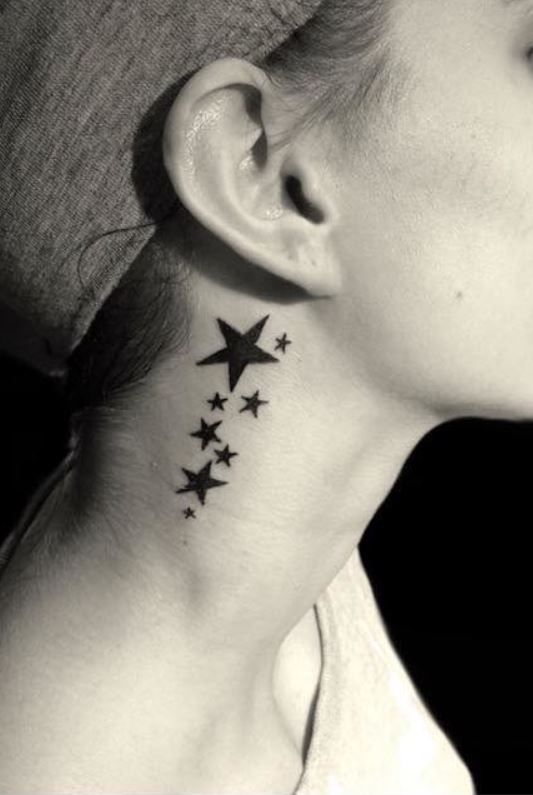
Single needle is the most minimal end of fine line, using one needle point to create thread-thin lines with very little shading, which suits a scattered cluster of tiny stars particularly well. Three to five small stars, varying slightly in size, placed along the side neck or trailing from behind the ear create a subtle, constellation-like effect at under an inch total. Keep spacing between the stars uneven and organic rather than perfectly symmetrical, a rigid grid pattern reads as less natural. This is a lower-pain option relative to other neck spots since the design is so small and quick to complete. Healing runs about a week given the minimal ink deposit. This placement suits a first tattoo or a matching design with a friend or sister, since it stays simple, low commitment, and easy to build on later.
Black Floral Vine Along the Side Neck
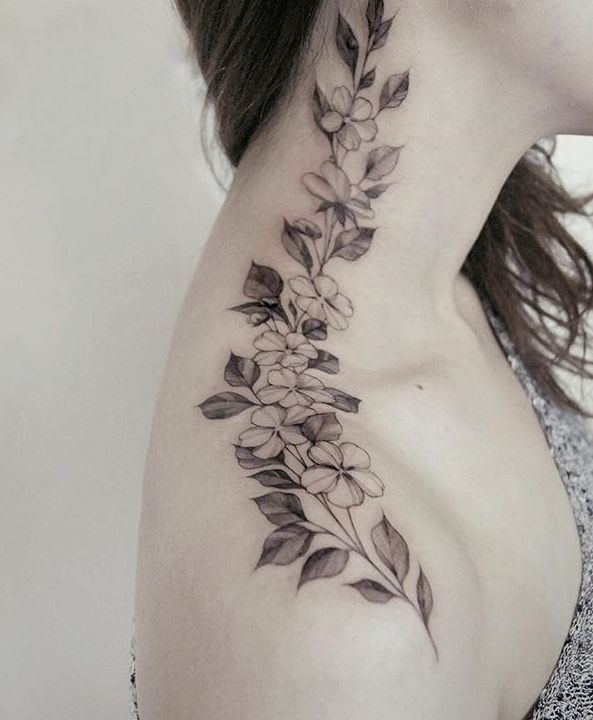
A trailing vine with small black flowers and leaves works well running vertically along the side neck, from just below the ear down toward the collarbone. This design typically combines fine-line stems with slightly bolder linework or light shading on the flower petals for visual contrast. Keep the vine under 4 inches in length to avoid it looking cramped against the neck’s narrower profile. Bring specific reference photos of the exact flowers you want, since a generic “floral vine” request gives an artist too much room to guess at the details. This is consistently one of the more sensitive placements on the body, thin skin and close nerve proximity mean discomfort builds steadily through a longer session. This design suits someone ready for a visible, more decorative piece rather than a subtle first tattoo.
Blackwork Snake Wrapping the Neck

A snake rendered in bold blackwork, coiling partway around the side or front of the neck, is one of the more dramatic and visually striking designs on this list. Scales are usually suggested through overlapping shapes rather than fully detailed individually, keeping the linework clean and legible at a glance. This composition needs real length to look intentional, 4 to 6 inches wrapping from behind the ear toward the collarbone works well. Ask your artist specifically about scale direction and how the coils will flow with your neck’s natural movement, since a poorly planned wrap can look flat once you turn your head. Expect a longer, more intense session given the placement and detail involved. This design suits someone ready for a bold, highly visible statement piece rather than a first tattoo.
Negative-Space Black Geometric Neck Piece
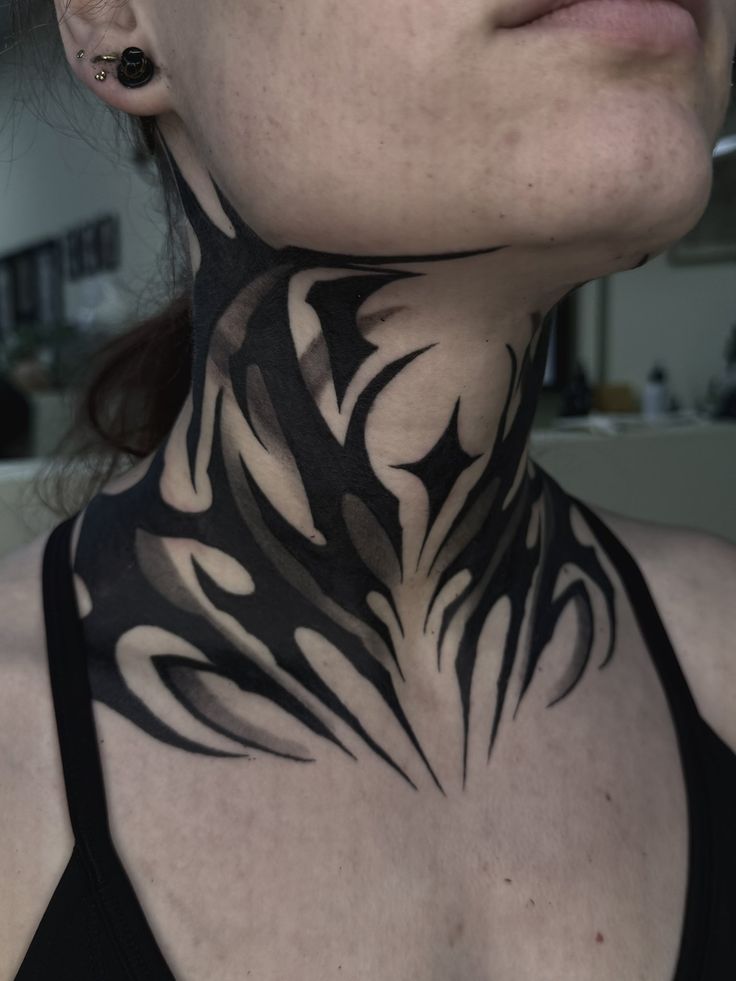
Negative space tattooing uses untouched skin as part of the design, so parts of a geometric shape are defined by what’s left blank against solid black fill rather than by outline alone. A common approach on the neck shades a triangle or hexagon solid, leaving a thin geometric line pattern inside as bare skin. This only works well on evenly toned, unblemished skin, since any scarring or discoloration inside the blank shape shows clearly. The side neck or nape gives a flat enough surface for the contrast to read properly at 2 to 3 inches. Ask your artist to sketch the piece directly on your skin before tattooing so you can preview the balance between black fill and negative space. This design ages best out of direct sun, since solid black and negative-space contrast both fade unevenly with prolonged UV exposure.
Black Butterfly on the Nape
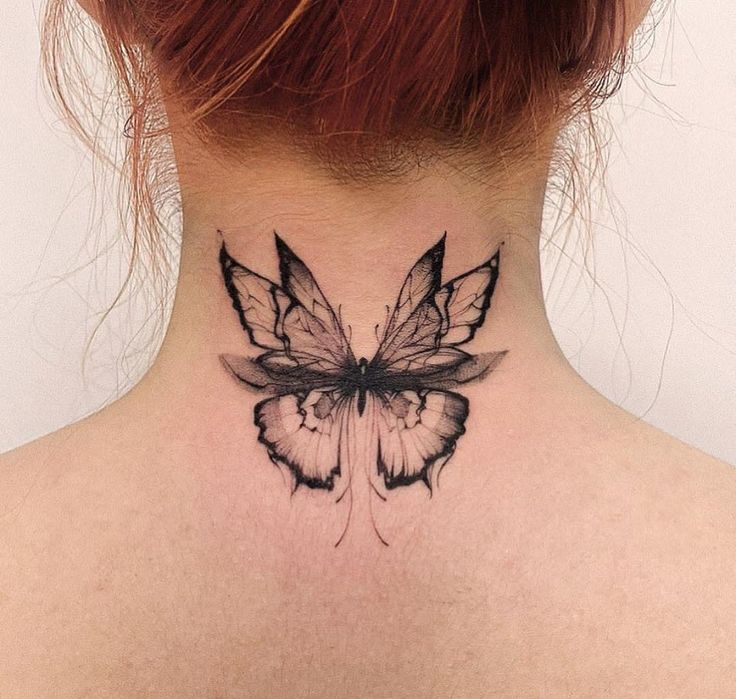
A small black butterfly on the nape works well in either fine line or solid blackwork silhouette, depending on how subtle or bold you want the final look. Fine line keeps the wings delicate with light interior veining, while a blackwork version turns the whole shape into a solid, high-contrast silhouette. Keep it under 2 inches for the nape’s relatively narrow flat space. This placement is naturally more private since hair covers it by default, making it a lower-pressure choice if you’re unsure about full-time neck tattoo visibility. Discomfort here tends to be more concentrated than fleshier spots given the proximity to the spine. Bring a reference showing your preferred wing shape and line weight specifically. This design suits a first tattoo in this general area since it can be resized easily and stays simple to execute.
Fine-Line Black Constellation on the Side Neck

A specific constellation, rather than generic scattered stars, gives this design more personal meaning while keeping the technique identical to a star cluster piece. Fine, thin lines connect each star point, mimicking how the constellation actually appears rather than an abstract pattern. Keep the whole design under 2 inches along the side neck, just below the jawline, so the connecting lines stay crisp rather than blurring together over time. Ask your artist to confirm the constellation’s accurate star positions using a reference chart rather than a rough approximation. Pain here tends to run moderate to sharp given the thin skin in this area. This design suits someone wanting a specific, symbolic piece rather than a purely decorative one, and it works well as a subtle first tattoo for anyone comfortable with some neck visibility.
Black Lettering Down the Spine of the Neck
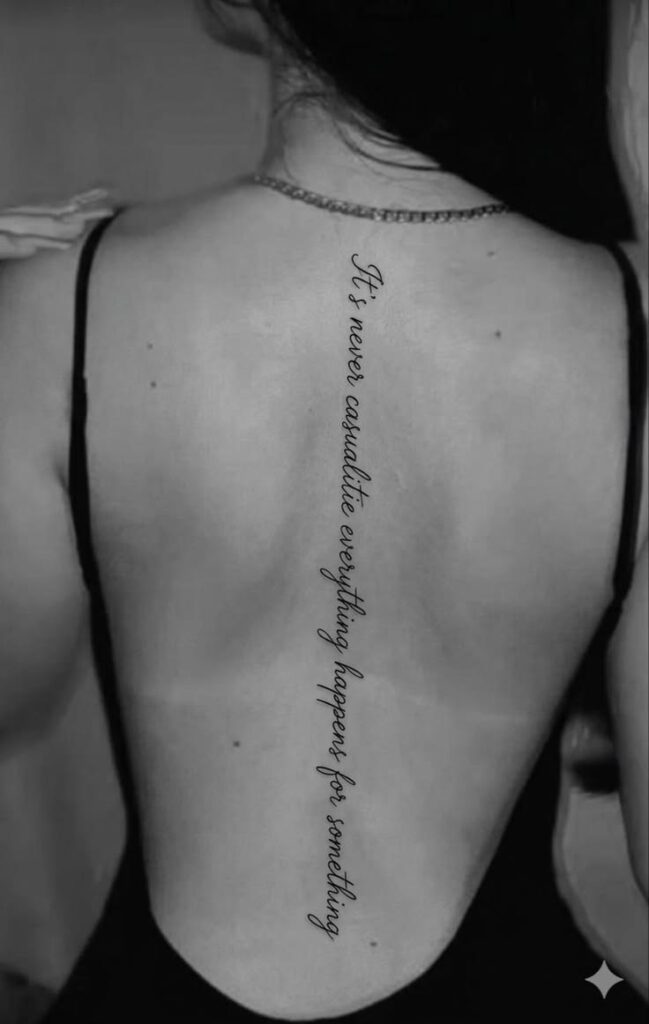
Vertical script running down the back center of the neck, right along the natural spine line, creates a striking, symmetrical placement that reads clearly whether hair is up or down. Keep letter height consistent throughout, uneven sizing is one of the more common mistakes with vertical script. This works well at 2 to 4 inches depending on word length, though shorter phrases hold their crispness better long term than longer ones. The area directly over the cervical spine is one of the more sensitive spots on the entire body, so budget for a slower, more careful session. Ask your artist about their specific approach to keeping vertical linework straight, since even a slight curve becomes obvious on this narrow canvas. This design suits someone confident about full visibility, since it’s difficult to hide regardless of hairstyle.
Blackwork Moon Phases Behind the Ear
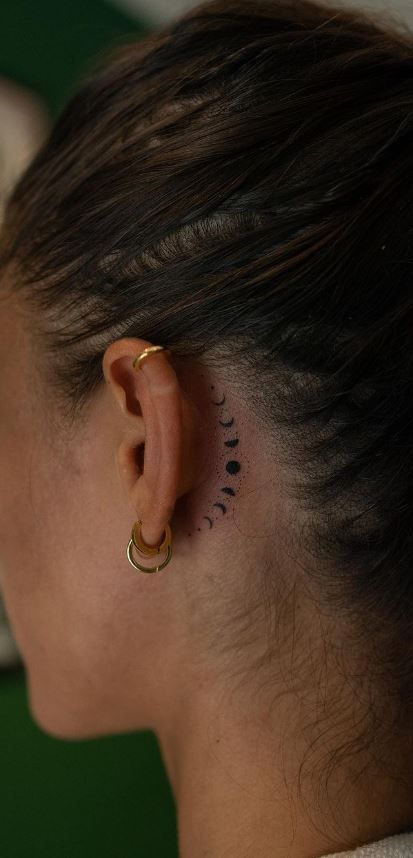
A row of simplified moon phases, from crescent to full and back again, works well as a small arc behind the ear, rendered in clean blackwork silhouettes without any shading gradient. Keep each moon consistent in size and spacing so the sequence reads clearly as a deliberate pattern. This design fits well under 1.5 inches total given the limited space behind the ear. Ask your artist to space the moons using a stencil rather than freehand, since uneven spacing is a common and noticeable issue with sequential designs like this. This spot carries a sharper, more concentrated sensation given the thin skin and cartilage proximity. This placement is easy to hide with hair down, making it a solid choice for a first tattoo or anyone wanting a subtle, symbolic piece.
Black Dagger Tattoo on the Side Neck

A dagger rendered in bold, clean blackwork lines makes a strong, graphic statement on the side neck, typically kept simple with a solid blade and minimal hilt detail rather than an overly ornate design. Keep the dagger vertical and proportionate, roughly 2 to 3 inches, so it doesn’t look stretched or cramped against the neck’s narrower shape. Ask your artist about line weight consistency along the blade specifically, since uneven thickness here is one of the more visible flaws in a simple bold design. This placement carries steady, moderate discomfort typical of blackwork in this general neck area. This design suits someone ready for a bold, highly visible piece, and it’s a common choice for people building a broader dark or minimalist tattoo collection elsewhere on the body.
Dotwork Black Rose on the Nape
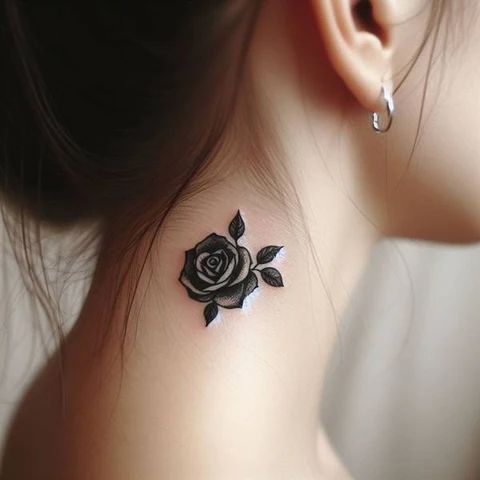
A rose rendered in dotwork uses clusters of small dots to build gradient shading across the petals, giving it a soft, textured look rather than the harder edges of solid blackwork. Denser dotting near the rose’s center deepens the shadow, while lighter dotting toward the outer petals fades gracefully into skin. Keep the design to 2 to 3 inches for the nape’s available space. This technique rewards a patient, steady hand, so check a portfolio specifically for dotwork shading rather than just linework examples. Discomfort here builds steadily but stays fairly consistent throughout the session. This placement is naturally more private thanks to hair coverage, making it a good option for someone who wants a detailed, shaded piece without full-time visibility pressure.
Black Minimalist Symbol Behind the Ear
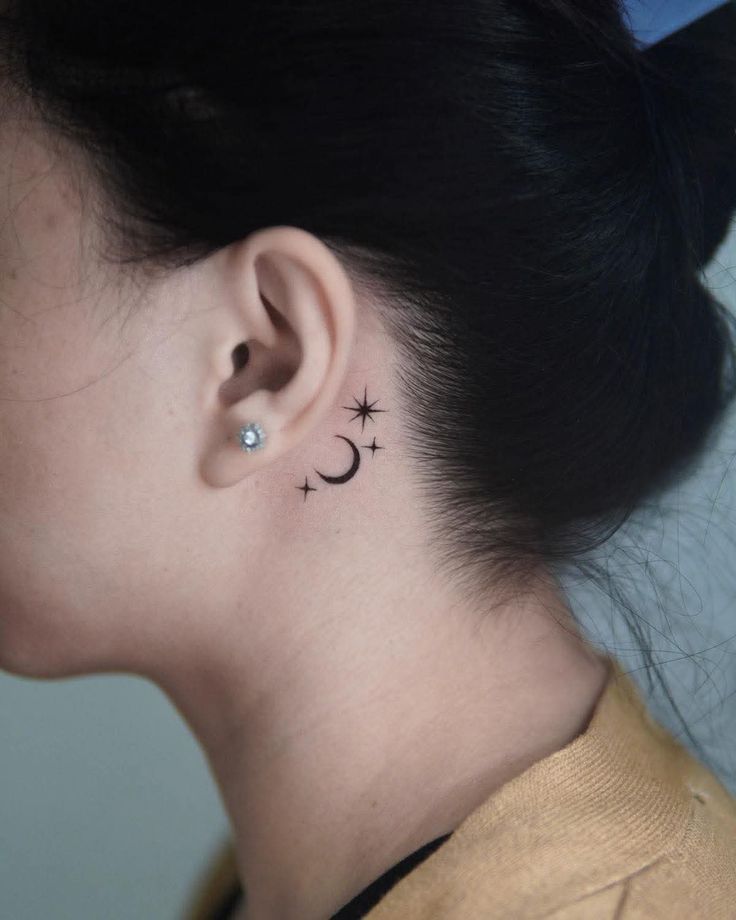
A single small symbol, an arrow, a simple shape, or a minimal icon, behind the ear is one of the most low-commitment black tattoo options on this list. Keep it under an inch, larger symbols lose their crispness on this curved, limited space. Simple single-needle or fine-line technique works best here since there’s no room for shading detail to develop properly. Ask your artist to keep line weight even throughout the symbol, since inconsistent thickness is more noticeable at this small scale. This spot carries a sharper sensation given thin skin and cartilage proximity, though the tattoo itself takes only a few minutes to complete. This design suits a first tattoo particularly well, since it’s simple, quick, and easy to keep private with hair down.
Blackwork Feather Along the Neck
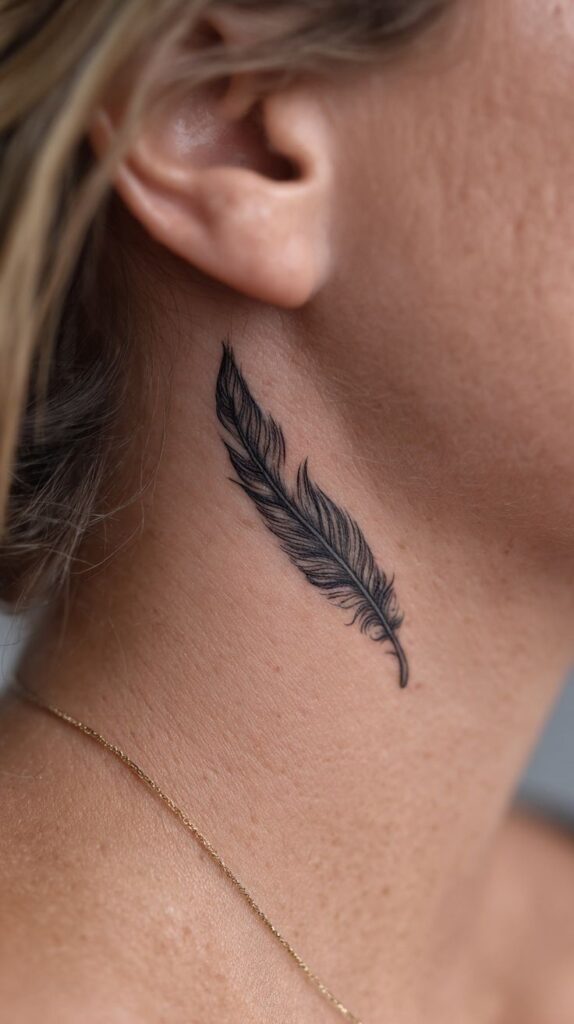
A feather running diagonally along the side neck combines bold linework for the central shaft with lighter, more delicate lines fanning out for the individual barbs. This contrast in line weight is what gives the feather its texture, so ask your artist specifically about varying thickness between the central line and the finer details. Keep the design to 3 to 4 inches to give the fanning lines enough room to read clearly without crowding. This placement carries moderate to sharp discomfort given the neck’s thin skin and nerve density. This design suits someone wanting a naturally flowing, slightly larger piece that still reads as elegant rather than heavy, and it works well for a first larger tattoo if you’re comfortable with the visibility that comes with the placement.
Black Chain Link Necklace-Style Tattoo
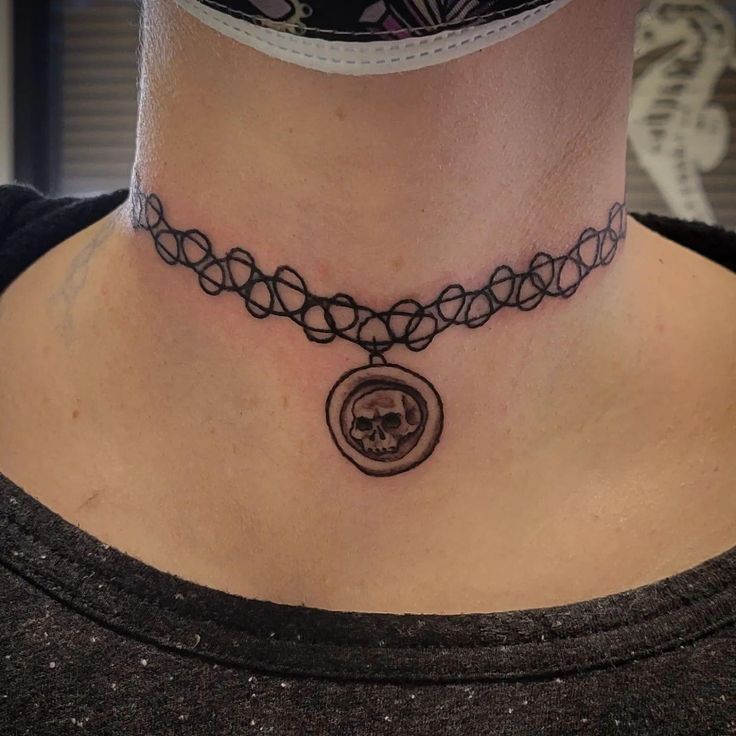
This design mimics a delicate necklace by running a thin chain-link pattern horizontally across the front of the throat or lower neck, sometimes with a small pendant shape hanging from the center. Keep the linework fine and evenly spaced, since a chain pattern with inconsistent link sizing looks noticeably off. This works well at 3 to 5 inches depending on how much of the neck’s width you want to cover. The front throat is one of the more sensitive areas on the body, so budget for a slower session with breaks if needed. Ask your artist to plan the chain’s curve to follow your neck’s natural line rather than a straight, rigid path. This design is fully visible in nearly any outfit, so it suits someone confident and ready for that level of exposure.
Fine-Line Black Wave Design on Side Neck
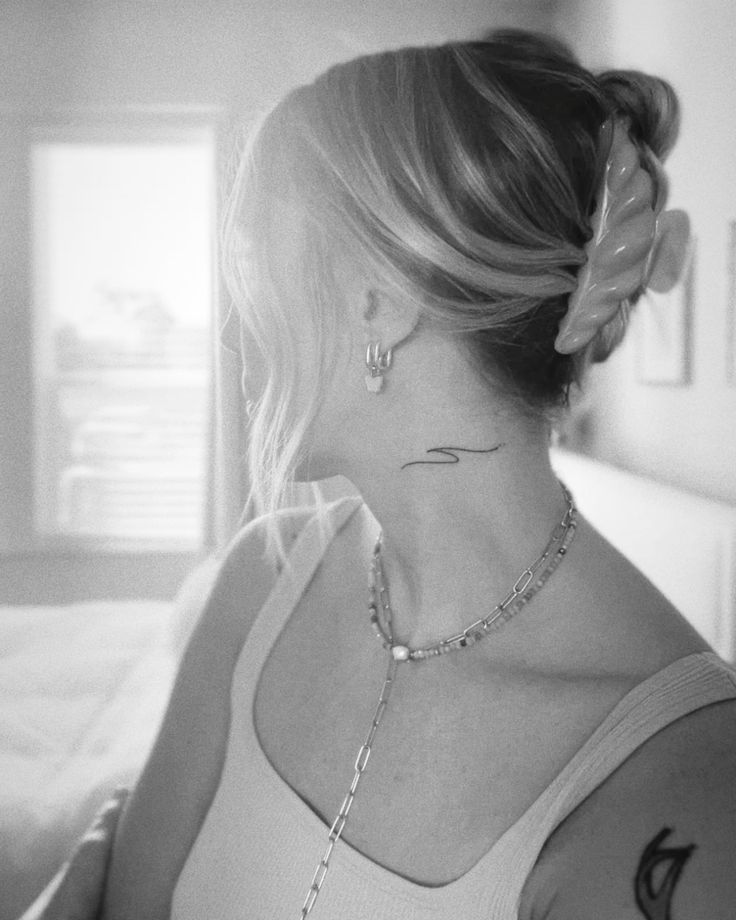
A simple wave line, sometimes single, sometimes repeated two or three times, works well as a minimalist design along the side neck, rendered entirely in thin, consistent fine-line work. Keep the design under 2 inches so the wave’s curve stays clean rather than looking cramped. Ask your artist to keep line thickness completely even throughout, since fine-line waves are especially prone to showing any inconsistency in pressure or needle depth. This spot carries a sharper sensation typical of side-neck placements generally. This minimalist design suits a first tattoo well, given its simplicity, and it’s a popular choice for anyone who wants a small, meaningful piece without heavy visual weight, transitioning naturally into thinking about pairing it with a second small design nearby.
Black Spider or Insect Accent Tattoo
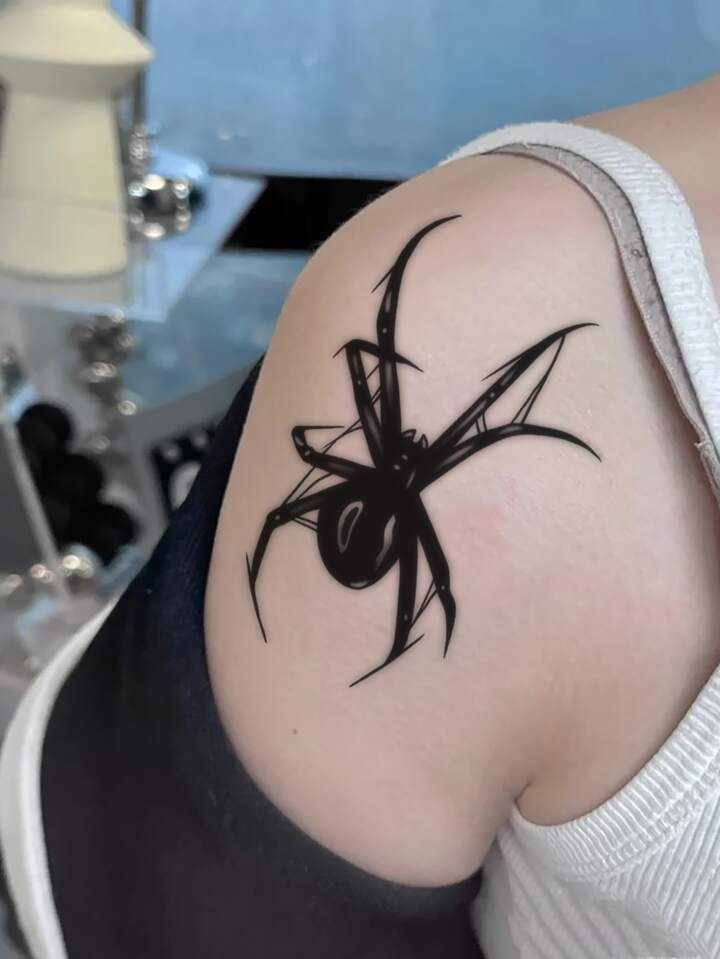
A small, stylized spider or insect silhouette works as an unexpected accent piece on the side neck or behind the ear, usually kept simple with solid blackwork legs and body rather than added detail like a web or additional shading. Keep it under 1.5 inches, given how quickly insect leg detail turns into a blur at larger sizes without more shading to support it. Ask your artist to keep leg proportions accurate rather than overly stylized, since an unbalanced silhouette reads as unclear at a glance. This spot carries a sharper, more concentrated sensation given the thin skin involved. This design suits someone wanting a distinctive, slightly unconventional piece rather than a typical floral or script option, and it works well as a standalone accent or paired with other small black designs.
Blackwork Cross on the Nape
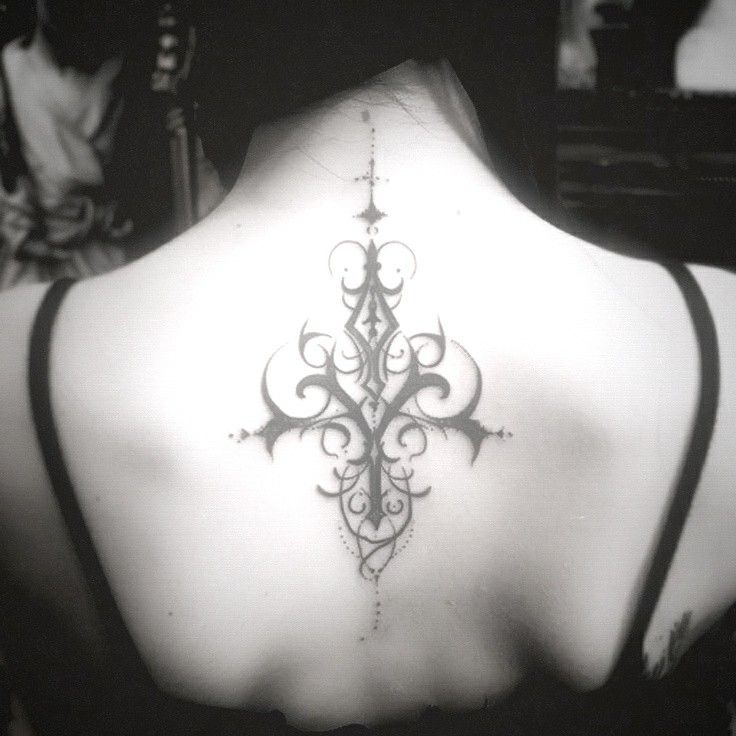
A simple cross rendered in solid, bold blackwork lines works well on the nape, kept minimal without ornate detailing so it reads clearly even at a small size. Keep the design to 1.5 to 2 inches, proportionate to the nape’s available flat space. Ask your artist about line weight consistency across both the vertical and horizontal parts of the cross, since uneven thickness is one of the more common small flaws in simple geometric designs like this. This placement carries moderate discomfort given the nape’s proximity to the spine. This design is naturally private thanks to hair coverage, making it a solid option for someone who wants a symbolic, meaningful piece without full-time visibility, and it’s a common choice for a first tattoo in this general area.
Black Vine and Thorn Wrap Around Neck
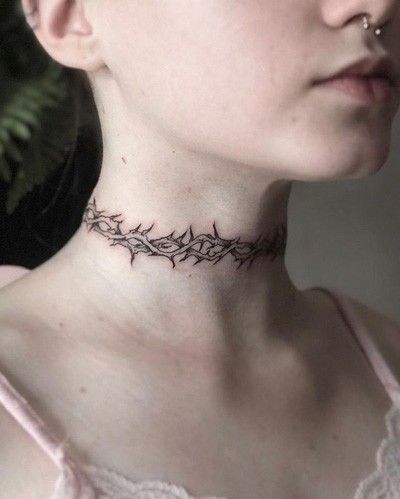
A thorned vine wrapping partway around the neck, typically starting behind one ear and trailing toward the front or opposite side, creates a bold, slightly edgier take on a floral theme. Thorns are usually rendered as small, sharp triangular shapes branching off the main vine line, kept in solid black rather than shaded for maximum contrast. This composition needs real length, 4 to 6 inches, to wrap convincingly without looking cramped. Ask your artist to plan the wrap’s path with you standing upright, since neck curvature changes significantly between sitting and standing positions. Expect a longer, more intense session given the wraparound length and the neck’s overall sensitivity. This design suits someone ready for a highly visible, dramatic piece rather than a subtle first tattoo.
Dotwork Black Sun Behind the Ear
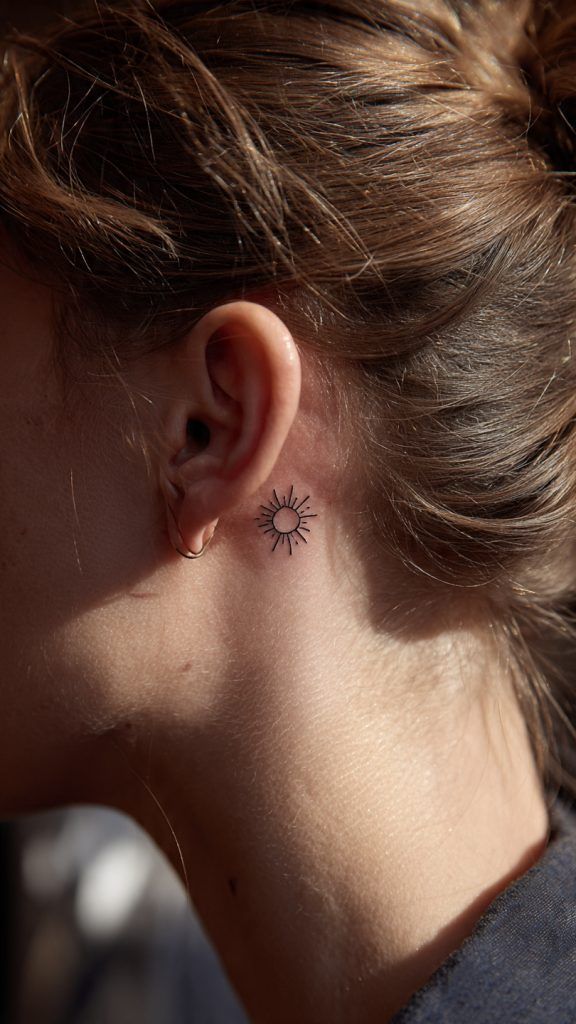
A small sun design, rays radiating from a solid or lightly shaded center, works well in dotwork behind the ear, using dot density to create a soft gradient fade toward the outer ray tips. Keep the whole design under 1.5 inches given the curved, limited space in this spot. Ask your artist to keep ray spacing even around the full circle, since asymmetry is one of the more noticeable issues with radiating designs like this. This spot carries a sharper, more concentrated sensation typical of behind-the-ear placements generally. This design is easy to hide with hair down, making it a good first-tattoo option for someone who wants a symbolic, slightly textured piece without full-time visibility.
Black Small Symbol Cluster on Front Throat
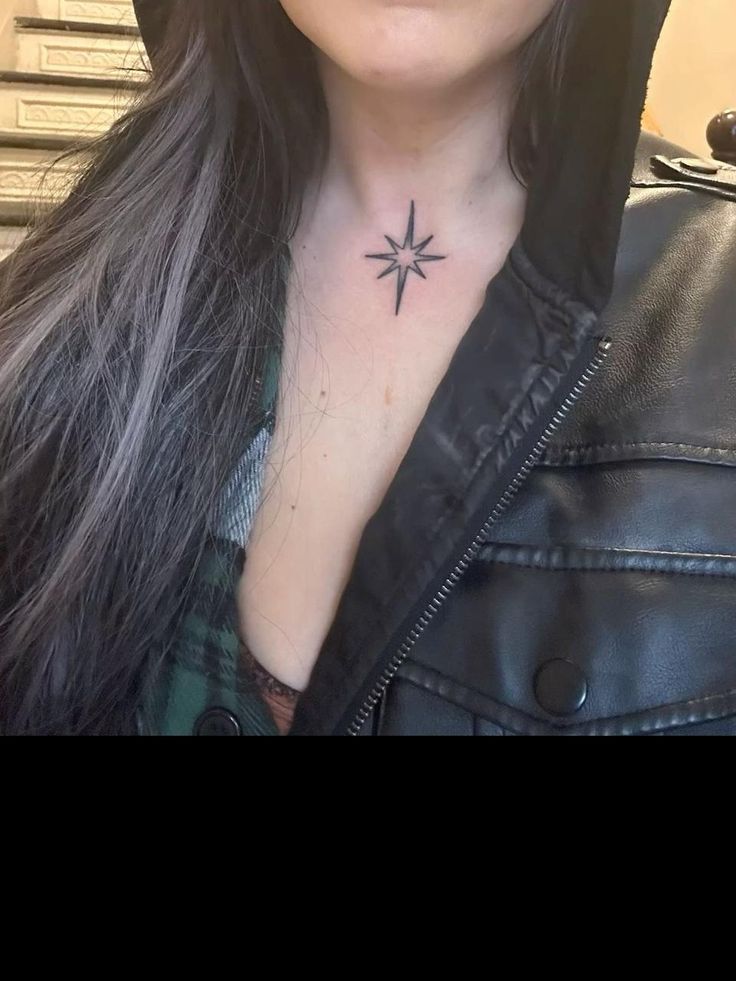
Grouping two or three tiny symbols together on the front of the throat, just below the chin line, creates a bold, deliberately visible statement piece. Keep each symbol small and simple, under half an inch each, so the cluster reads as intentional rather than cluttered. The front throat ranks among the most sensitive placements on the entire body, so this design demands real commitment and a longer, more careful session than most other neck spots. Ask your artist about their specific experience tattooing this exact area, not every artist takes front-throat bookings given the skill and precision required. This placement is fully visible in essentially any context, so think carefully about workplace and social visibility before booking, and it suits someone who’s already comfortable with prior visible tattoos rather than a first piece.
Large Blackwork Neck-to-Shoulder Piece
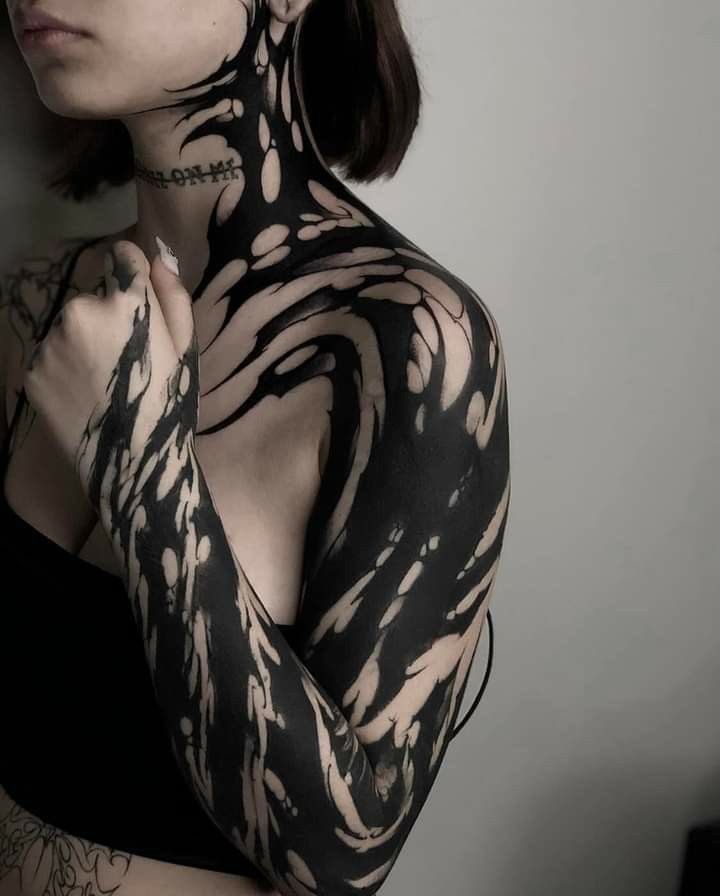
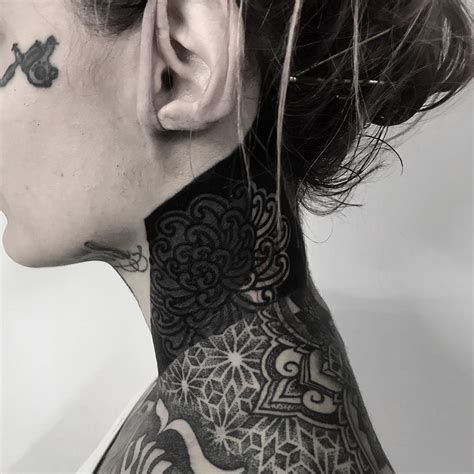
For those ready for a serious, highly visible piece, extending a blackwork design from the side or back of the neck down onto the shoulder creates a continuous, dramatic composition rather than an isolated accent. This spans 6 inches or more and often combines several of the elements above, a vine, a geometric pattern, or a larger symbolic centerpiece, into one cohesive design. Expect multiple sessions given the scale, and a noticeably higher total cost than any single smaller design on this list. Discuss a full sketch or stencil preview across both the neck and shoulder before starting, since adjustments become far harder once a piece this size is underway. This is a serious, long-term commitment best suited to someone with prior tattoo experience who understands the time, cost, and full visibility involved.
Fine Line vs. Blackwork: Knowing the Difference
Fine line — Uses a single thin needle to create delicate, low-opacity lines with minimal shading. Best for small, detailed designs on tighter spaces like behind the ear or the side neck.
Blackwork — Uses saturated, solid black ink for bold shapes, silhouettes, or heavy fill. Best for designs meant to stay high-contrast and visible from a distance.
Dotwork — Builds shading and texture from clusters of small dots rather than solid fill or continuous lines. Best for soft gradients and textured effects without full color saturation.
Single needle — The most minimal end of fine line, using one needle point for extremely thin, thread-like lines. Best for tiny, simplified designs like small symbols or scattered stars.
Best Placement Ideas
- Behind the ear — most private, easy to hide with hair down, sharper pain due to thin skin and cartilage
- Nape — moderate privacy depending on hairstyle, moderate pain, good flat space for small to mid-size designs
- Side neck — highly visible, moderate to sharp pain, ideal for script, florals, or fine-line accents
- Back of neck spine line — fully visible regardless of hairstyle, more sensitive given proximity to the spine
- Front throat — most visible and most sensitive placement, best reserved for those with prior tattoo experience
- Neck-to-shoulder — highest visibility and cost, but a strong choice for a cohesive, larger statement piece
Tips for Success
Look for an artist whose portfolio shows real examples specifically on neck placements, not just similar designs done on the arm or leg, since neck skin, curvature, and healing behave differently than flatter areas of the body. Check healed photos, not just fresh out-of-the-chair shots, since that’s the only honest preview of how solid black fill or fine linework actually settles into this particular skin. Bring at least two or three reference images and be specific about line weight, size, and exact placement rather than handing over a vague description and hoping for the best. During your consultation, ask directly about their experience tattooing the neck specifically, since some artists limit or avoid certain neck zones like the front throat given the skill required. A good consultation should feel like a real conversation about your specific design and visibility comfort, not a rushed sales pitch.
Common Mistakes and How to Avoid Them
Sizing a detailed design too small is one of the most common regrets, fine linework or shading that looks crisp on a stencil often blurs into a muddy shape within a few years if the piece is under an inch in a detailed spot like behind the ear. Choosing a placement without fully considering visibility, like a bold front-throat piece before thinking through workplace or social context, is a mistake that’s far harder to undo on the neck than almost anywhere else on the body. Skipping the artist’s specific aftercare instructions in favor of generic internet advice can affect how black ink saturation settles, especially given how much the neck moves day to day. Copying a design exactly from a photo without adjusting proportions to fit your neck’s specific curve and length often looks noticeably different once inked than it did as a flat reference image. Rushing the artist search and booking the first available appointment instead of checking neck-specific portfolio work is a mistake that’s difficult to undo once ink is under the skin.
Similar Variations
Any of the designs above can shift with a few adjustments. Swap a solid blackwork silhouette for dotwork shading for a softer, more textured finish. Resize a larger neck-to-shoulder piece down into a simplified single accent behind the ear. Add a second, smaller design nearby, like a small symbol paired with an existing script piece, to build a cohesive cluster over time. Turn a straight fine-line wave into a slightly more elaborate design by adding a second or third repeated line. Combine any of the smaller designs with a meaningful date, initial, or symbol for added personal weight.
Aftercare Basics
General aftercare guidance includes keeping the tattoo clean and moisturized, avoiding direct sun exposure and swimming while it heals, and not picking at scabbing or peeling skin. Loose scarves, collars, and necklaces should be avoided during the first one to two weeks, since friction and pressure on a healing neck tattoo can slow things down. Every studio provides a specific aftercare sheet tailored to their preferred products and your particular piece, and that sheet should always take priority over generic advice found online. If you notice unusual redness, swelling, or discharge beyond normal healing, check with a licensed dermatologist rather than waiting it out. Pain tolerance and healing speed vary by individual, so the timelines here are general estimates rather than guarantees.
Quick FAQ
How much does a black neck tattoo cost? Smaller fine-line or single-needle designs often start in the $80 to $200 range depending on your area, while larger blackwork or neck-to-shoulder pieces can run several hundred dollars or more across multiple sessions. Always get a direct quote from your chosen artist rather than relying on general estimates.
Do neck tattoos hurt more than other placements? Yes, generally. The neck sits close to nerve clusters and has thinner skin in several spots, especially the front throat and the area over the spine, making it one of the more sensitive placements on the body compared to fleshier areas like the outer arm or thigh.
How long does a black neck tattoo take to heal? Most designs heal on the surface within 10 to 14 days, though full healing beneath the skin can take up to a month. Constant neck movement and clothing friction can extend the surface healing window slightly compared to less active placements.
Will a black neck tattoo fade faster than one elsewhere on the body? Sun exposure affects the neck more than many other spots simply because it’s rarely covered, which can soften black ink saturation over time if sunscreen isn’t used consistently on the healed tattoo. Following your artist’s aftercare guidance helps maintain contrast and crispness longer.
Neck tattoos for women in black ink offer a wide enough range that there’s a fitting option for nearly any comfort level, from a tiny single-needle symbol behind the ear to a bold neck-to-shoulder blackwork piece. The right choice comes down to matching the technique to your desired visibility, your pain tolerance, and the time and budget you’re realistically ready to invest. Take the placement and pain notes above into your consultation, ask the questions that matter, and let a licensed professional help turn the idea into a black neck tattoo that still looks right on your skin years from now.