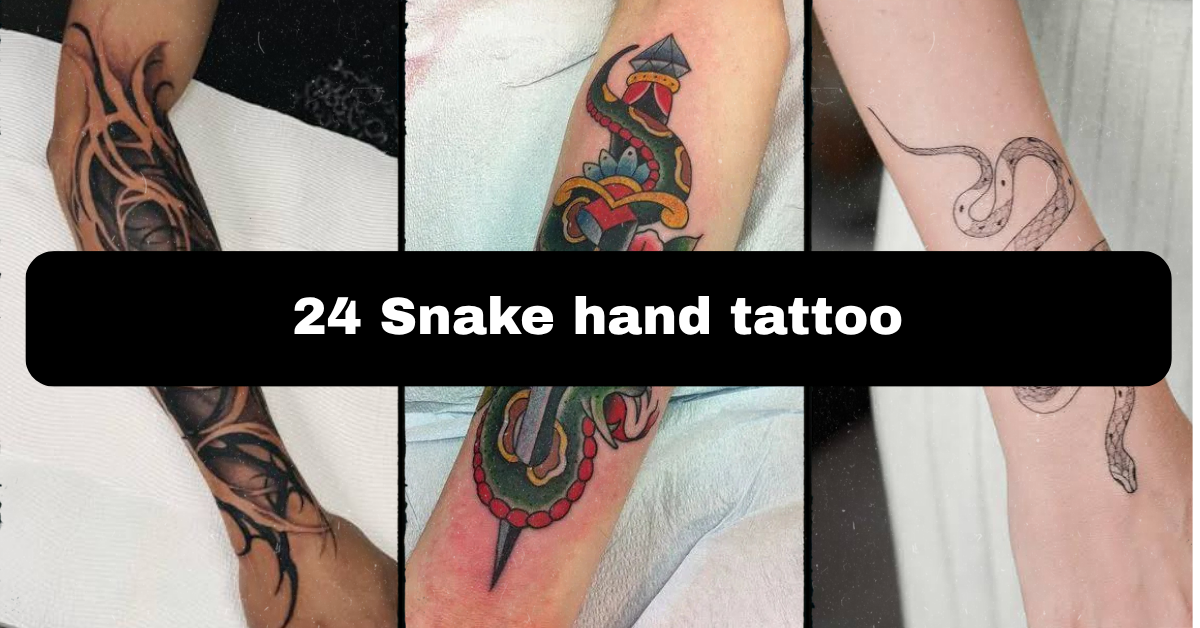
24 Snake Hand Tattoo Ideas: Placement, Pain, and What to Know Before You Book
Nervous about picking a 24 snake hand tattoo that looks like a muddy smudge in a few years instead of a sharp piece of art? That is a completely normal fear because the skin on our hands moves constantly and thickens over the knuckles, making high-quality ink execution notoriously tricky.
So what makes a great snake hand tattoo? Dynamic blackwork, American traditional style, and bold fine-line work using deliberate negative space hold up best over time, since tightly packed details will bleed together due to constant sun exposure and hand washing. Placing the snake so its coils follow the natural curves of your thumb webbing or wrap around the wrist keeps the design looking fluid as your hand moves. Strong, contrasting outlines age significantly better than soft, tiny shading on this high-friction part of the body.
Stick around because we will cover the reality of hand placement tradeoffs, actual pain levels, skin regeneration cycles, how to brief your blackwork artist, and the exact mistakes that cause hand ink to fade out completely.
Why Snake Hand Tattoos Work So Well as a Dynamic Concept
A snake hand design relies heavily on the anatomy of the hand itself to look alive. The natural curves of the muscles between your thumb and index finger provide the perfect slope for a serpent body to appear three-dimensional. Because snakes are naturally long and flexible, a skilled artist can manipulate the composition to frame your knuckles, wrap around a finger, or dive down toward your wrist.
The primary challenge here is the skin behavior. The skin on the back of the hand is thin and sits directly over tendons and bones, while the skin on the side of the hand sheds cells rapidly. If an artist uses light saturation or incredibly thin single-needle lines without solid structure, the daily friction from pockets and washing will erase parts of the design within months. Understanding the technical execution behind solid linework is what stands between you and a blurry hand.
Technical Definitions to Know Before Booking
- Blackwork: A tattooing style that uses bold, solid blocks of pure black ink to create high-contrast shapes and deep shadows.
- Negative Space: The areas of un-inked skin left inside or around a design, which acts as a visual highlight and keeps the tattoo from turning into a solid blob as it ages.
- American Traditional: A classic style defined by heavy black outlines, a restricted color palette (usually red, yellow, green, and black), and bold, iconic imagery that holds up for decades.
- Stippling (Dotwork Shading): A shading technique that builds up gradients and shadows using thousands of tiny individual dots instead of smooth, blended gray washes.
1. Traditional American Dagger and Serpent
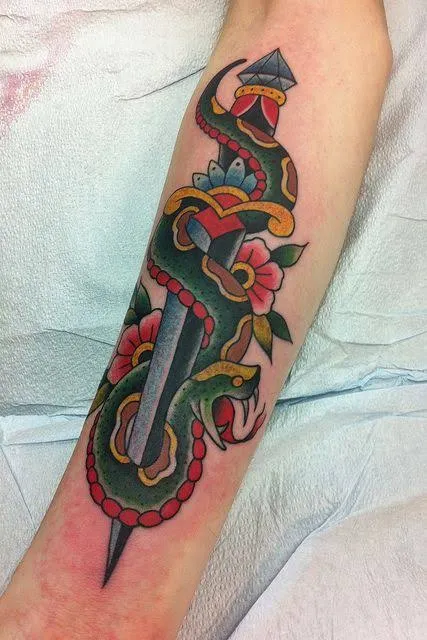
This layout positions a bold traditional snake coiling tightly around a central dagger, splitting the design right down the middle of the hand. The artist uses heavy black outlines and highly saturated solid colors like deep red and forest green to ensure the image remains readable from across the room. Best placed flat on the back of the main hand tissue, keeping the point of the dagger aimed toward the knuckles.
The ideal size for this piece covers the entire back of the hand, roughly three by four inches, to give the bold lines enough breathing room. Thicker skin texture on the back of the hand takes this style beautifully, holding the saturation well for a typical twelve-day surface healing cycle. When booking, ask your artist for an American traditional custom design with a heavy seven-round or nine-round liner needle. Pain is moderate on the flat skin but sharpens significantly as the needle passes over the wrist bones. This classic look is perfect for people who want a bold, timeless statement that will not wash out over the years. Let us move to a style that relies purely on clean, modern lines.
2. Fine-Line Micro Viper
This delicate approach utilizes an ultra-thin line weight to draw a tiny, elegant viper winding between the knuckles of the index and middle fingers. The technique depends on a single needle configuration to keep the scales and tiny tongue incredibly crisp without using heavy black fills. Best placed running vertically between the first and second joints of a single digit.
The ideal scale is small, keeping the entire snake under two inches long and less than a quarter-inch wide. The thin skin on top of the fingers can be delicate, meaning the surface healing time will take roughly two weeks of minimal stretching. Actionable tip: bring reference photos of aged fine-line tattoos to your consultation so you can discuss line thickening with your artist. Pain is quite sharp because the needle works directly over the finger bone with almost zero fat padding. This design solves the problem of wanting a snake motif while needing to maintain a subtle, low-profile look for workplace visibility. Next, let us explore an architectural approach that hugs the side of your hand.
3. Outer Edge Blackwork Crawler
This style wraps a solid black snake along the outer edge of the hand, starting from the base of the pinky finger and curving down toward the wrist bone. The artist uses heavy blackwork saturation to fill the body of the snake, relying on sharp negative space lines to define the overlapping coils. Best placed directly on the transition line where the back of the hand meets the palm side.
The ideal size is a long, narrow path about four inches in length to match the outer blade of your hand. This specific skin zone experiences heavy friction from resting on tables, so expect the healing time to take up to three weeks with careful protection. Tell your artist you want a custom design that follows the outer muscle line without creeping too far into the light palm skin. The pain level is highly intense because the edge of the hand contains a dense network of nerve endings. This look provides an edgy silhouette that is only visible from specific side angles. If you prefer high visibility on the front of your hand, a knuckle frame might be ideal.
4. Knuckle Crest Arc Serpent
This design curves the body of a snake in a horizontal arc directly above the primary row of knuckles, framing your fist perfectly. The artist uses a combination of solid linework and light stippling to give the serpent a textured look without overwhelming the small area. Best placed resting just below the finger joints across the middle, ring, and pinky fingers.
The ideal size keeps the snake body under half an inch thick while stretching roughly three inches wide across the hand. Skin over the knuckles is prone to wrinkling, so the healing time takes about fourteen days of keeping your hand in a relaxed, open position. Ask your artist to apply the stencil while your hand is resting naturally so the design does not warp when you close your fist. Pain presents a very strong, vibrating ache as the machine runs directly over the bone joints. This layout works excellently for collectors who want their ink to interact dynamically with their finger movements. Let us look at a style that occupies the widest space on the hand.
5. Thumb Webbing Anatomical Wrap
This layout utilizes the wide, flat skin between the thumb and index finger to nestle a heavily coiled snake. The artist uses a fluid composition principle, allowing the snake’s head to rest on the back of the hand while its tail wraps around the base of the thumb. Best placed deep within the thumb webbing for maximum movement contrast.
The ideal size is roughly two inches square, allowing the coils to expand and contract as you open and close your hand. The skin here is highly elastic and holds ink well, usually completing its initial healing phase in about ten days. Request a freehand marker layout during your booking session so the artist can custom fit the snake to your specific hand webbing. Pain is relatively low compared to the knuckles, feeling more like a hot, pinching scratch. This configuration solves the desire for a larger, fluid tattoo while keeping it tucked away when your hand is closed. Let us move into a design that extends upward from the arm.
6. Wrist-to-Hand Sleeve Extension
This large-scale design features a massive snake that originates halfway up the forearm, wraps around the wrist joint, and strikes down across the back of the hand. The artist employs heavy Japanese traditional or modern blackwork shading to create a seamless transition between the arm and hand. Best placed spiraling down from the outer wrist bone onto the main hand tissue.
The ideal scale is substantial, with the hand portion covering a three-by-three-inch zone connected to the larger sleeve. The wrist joint bends constantly, meaning the healing time will require a solid two to three weeks of dedicated care to prevent ink cracking. Bring reference images showing how the snake body transitions across the wrist break smoothly. Pain is a mixed bag, jumping from a dull ache on the forearm to a sharp, burning sting at the crease of the wrist. This layout is perfect for experienced collectors looking to extend an existing arm sleeve onto their hand. If you want something self-contained and highly modern, a geometric fusion is next.
7. Geometric Frame and Serpent
This modern composition places a hyper-realistic snake winding through a series of crisp, fine-line diamonds or circles. The artist combines two distinct techniques: heavy blackwork for the organic snake body and precise single-needle linework for the sharp geometric background shapes. Best placed squarely in the center of the back of the hand.
The ideal size is a three-inch square block, keeping the outer geometric lines away from the moving skin of the wrist and knuckles. Clear, unblemished skin texture allows the geometric elements to stay perfectly straight without distortion. Surface healing finishes up around twelve days. Actionable tip: ask your artist to use a technical stencil machine for the shapes so the lines are mathematically perfect before the needle touches you. Pain is moderate, offering a predictable sting over the flat metacarpal bones. This style provides a highly artistic look that appeals to fans of contemporary graphic design. Now let us try a look that splits across multiple digits.
8. Multi-Finger Segment Splitter
Instead of keeping the snake on the main hand, this design splits a single continuous snake across the lower segments of all four fingers. When your fingers are pressed tight together, the full body of the serpent appears; when spread wide, the design breaks into abstract black shapes. The artist uses bold linework to ensure the puzzle pieces connect correctly.
The ideal size keeps the snake body about a quarter-inch wide, spanning a total width of three inches across the digits. Finger skin sheds cells incredibly fast, so the healing time takes a full fourteen days of keeping your hands out of harsh cleaning chemicals. Tell your artist you want a custom booking specifically for a split-finger layout so they can budget extra time for alignment checks. Pain is very sharp and intense on the inner gaps between the fingers. This highly unique layout solves the desire for a clever, interactive tattoo that surprises people. Let us look at an option focused on deep darkness.
9. Heavy Blackwork Silhouette Snake
This style ditches scale details entirely, opting for a solid, jet-black silhouette of a striking cobra or viper. The artist uses pure black ink saturation with zero gray wash, relying completely on the stark contrast against your natural skin tone to create the shape. Best placed centered on the back of the hand with the head pointing toward the middle finger.
The ideal size covers a two-by-three-inch area, ensuring there is a wide border of clean skin around the silhouette to give it visual punch. Healing time takes about two weeks, and you must protect the dense ink from direct sunlight to prevent early fading. Request that your artist use a high-quality solid black ink formulation designed for maximum long-term retention. Pain feels like a heavy, hot burning sensation due to the packer needle grouping used to fill the solid black shapes. This works perfectly for covering up old, small scars or faded flash tattoos on the hand. Let us move to a style that feels organic and light.
10. Stippled Botanical Serpent
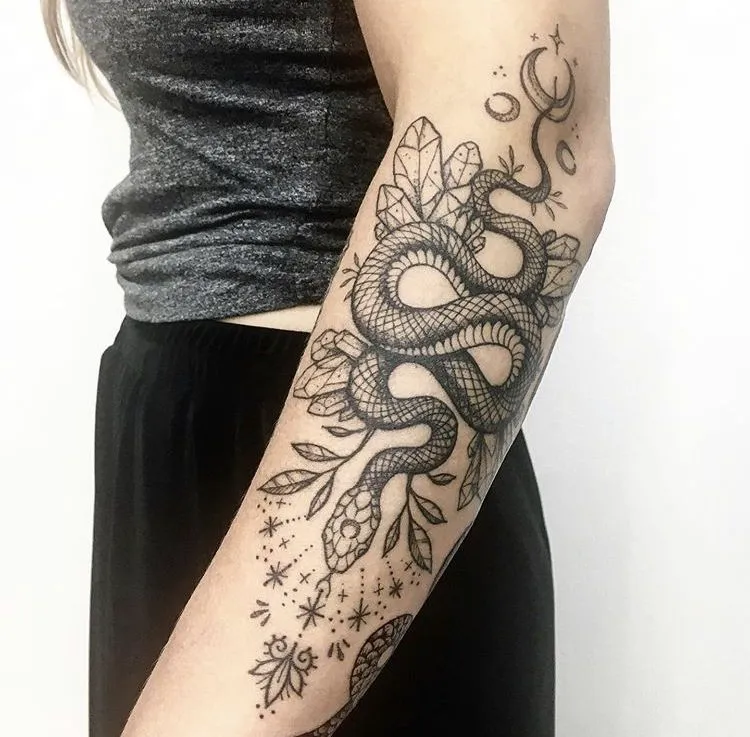
This design combines a slithering garter snake with delicate fern leaves or rose branches, using dotwork shading to create texture. The artist avoids solid black fields, building the entire image out of varying densities of tiny black ink dots. Best placed winding diagonally from the base of the index finger down toward the inner wrist.
The ideal size covers roughly two by three and a half inches, allowing the leaves and snake coils to interlock naturally. Smooth skin texture is ideal for this style so the tiny dot patterns do not get lost in rough skin lines. Expect a standard surface healing time of ten to twelve days. Ask your artist to use a fine three-round liner for the stippling so the dotwork stays distinct over the years. Pain is relatively gentle, presenting as a fast, vibrating prickle rather than a deep scratch. This beautiful option suits anyone looking for a softer, nature-inspired hand piece. Next, let us try an architectural layout that frames the thumb.
11. Thumb Ridge Linear Serpent
This minimalist design places a perfectly straight snake running directly along the bone line of the outer thumb, from the knuckle to the wrist. The artist uses a clean line weight with simple cross-hatching for the belly scales, keeping the profile extremely narrow. Best placed right on the flat ridge of the thumb bone.
The ideal size is three inches long by less than a half-inch wide, maintaining a strictly linear silhouette. The thumb ridge handles daily friction better than the inner sides, leading to a reliable healing time of about ten days. Bring a reference photo showing clean linear placement to your walk-in session to make stenciling quick and easy. Pain is moderate but steady, feeling like a hot pen scratching over the bone. This clean look appeals greatly to individuals who want high personal visibility since you will see the design every time you look down. Now, let us try an asymmetrical cluster.
12. Asymmetrical Knuckle Shadow Snake
This layout clusters a small, tightly coiled snake on just one side of the hand, specifically framing the base of the pinky knuckle. The artist uses deep black shadows and stark negative space to make the snake look like it is hiding in the natural recesses of your fist. Best placed on the outer lower quadrant of the hand.
The ideal size is a compact one-and-a-half-inch circle, keeping it contained to that specific anatomical corner. Because this area rubs against pockets constantly, it requires a strict tattoo aftercare routine to protect the ink during the two-week healing time. Ask your artist for a freehand placement check while you make a relaxed fist before they start the machine. Pain is quite sharp due to the lack of muscle padding near the outer edge of the hand. This works beautifully as a subtle accent that appears and disappears as you turn your wrist. Let us look at a design that frames the wrist crease directly.
13. Palm-Base Transition Serpent

This layout curves a small snake horizontally along the very bottom of the hand, right where the palm transitions into the wrist crease. The single-needle technique places the snake’s body directly in the skin folds, creating a hidden accent. Best placed dead center at the base of the hand, facing upward toward the middle finger.
The ideal size matches the natural curve of your wrist break, keeping the line incredibly thin and elegant. The skin here is highly delicate and prone to sweating, meaning healing time takes up to three weeks and requires absolute cleanliness. Actionable tip: ensure you avoid heavy lifting or gym workouts for the first week so the wrist creases can heal without splitting the ink. Pain is famously intense here, producing a sharp, burning sensation. This design provides a stunning, secretive option for someone who loves hand aesthetics but wants it low-profile. Next, let us try a layout that spreads across the fingers.
14. Dual-Phalange Cross-Over Snake
This style features a snake that weaves between the index and middle fingers, crossing over the top of the knuckles in an infinity shape. The artist uses a progressive line scale, making the lines slightly bolder where they cross the moving joints. Best placed balancing across the middle segments of the first two digits.
The total length can span two and a half inches, creating a powerful binding effect across the fingers. The skin texture on top of the digits is highly active, leading to a standard fourteen-day healing time. Request a custom design consultation to ensure the snake’s coils do not restrict your ability to bend your fingers comfortably. Pain is high, presenting a sharp sting as the needle passes over the bone joints. This solves the desire for an interactive, complex layout while keeping the elements entirely black. Let us look at a matching option.
15. Symmetrical Mirror Image Serpents
This layout splits a single conceptual design across both hands, featuring two identical snakes that face each other when you put your hands together. The artist uses exact geometric mirroring to ensure the stencils match up perfectly in scale and placement. Best placed on the inner thumbs of both hands simultaneously.
The ideal size keeps each snake around two inches long, sitting exactly parallel to one another along the thumb muscle. Healing time takes about two weeks, and you must be careful not to rub your hands together while the skin is raw. Bring a photo demonstrating how the designs should look when your hands are clapped together. Pain is moderate, making a dual-session manageable for most collectors. This is an incredible option for a bold personal symbol of internal balance and symmetry. Our next layout introduces a distinct skeletal variation.
16. Viper Skeleton Line Work

This design strips the snake down to its bare bones, drawing a highly detailed serpentine skeleton winding down the hand. The artist uses ultra-fine linework to capture every tiny rib bone and the structure of the skull. Best placed running down the center tendon of the middle finger onto the hand.
The ideal size spans roughly three inches to allow the individual rib lines room to breathe without blurring together over time. Skin should be kept deeply moisturized for weeks before your session to ensure clean ink retention. Expect standard surface healing to wrap up in twelve days. To brief your artist, request a single-needle skeletal anatomical piece with clean negative space between the ribs. The pain is moderate to high, yielding a hot, rhythmic stinging sensation directly over the bone. This layout functions beautifully as a gothic or scientific take on the classic theme. Moving onward, let us check out an offset tail variation.
17. Finger-Tip Tail Wrap

This layout positions the head of the snake on the back of the hand while its tail extends all the way up the index finger, wrapping around the tip like a ring. The artist uses technical stippling to maintain clean geometric spacing as the tail turns around the nail bed. Best placed on the dominant index finger for movement impact.
The ideal size spans across three full phalange segments to give the tail rotation room to resolve properly. Because it crosses multiple joints and the sensitive nail area, the healing time takes a full three weeks of gentle hand usage. Tell your artist you want a fine-line custom design that keeps the tail width uniform as it nears the nail. The pain level spikes sharply as the needle crosses the sensitive skin near the fingertip. This layout provides a fluid look that shifts appearance with every gesture you make. Let us pivot to a configuration that hugs the palm margin.
18. Side-Palm Minimalist Slider
This design arranges a tiny snake into a perfectly straight line running along the inner side of the hand, facing the torso when your arms are resting. The artist uses a single-needle configuration to keep the profile thin, forming a clean hidden surprise. Best placed right along the edge of the palm pad below the pinky.
The ideal size takes up less than three inches of space, keeping the path tight and intentional. Skin texture in this zone is prone to fast shedding, making regular touch-ups down the line highly likely. Healing time lasts about fourteen days. Ask your artist to keep the ink depth shallow to avoid blowouts in the soft side-palm tissue. Pain is quite high, feeling like a sharp, hot pinch. This works wonderfully for individuals seeking an edgy look that remains hidden during standard professional handshakes. Let us explore an alignment that mimics old school flash.
19. Bold Traditional Peeking Snake
This design arranges a classic snake head peeking out from under a sleeve line, with the body coiling around the thumb joint. The technique mimics vintage American traditional flash sheets, using thick lines and heavy black shading gradients. Best placed on the upper wrist and lower thumb padding.
The total design length spans about three inches, keeping the colors highly saturated to resist fading. Thick skin like this works best for bold traditional needles, holding the pigment well over the years. Healing time takes about two weeks of routine aftercare. Ask your artist to use a bold seven-round liner to guarantee the classic vintage feel remains intact. Pain is moderate, delivering a fast, vibrating sting. This bold look solves the desire for a high-impact, old-school style. Up next is a pattern that curves around the center of the hand.
20. Ouroboros Infinity Circle
This layout shapes the snake into the classic Ouroboros symbol—a serpent eating its own tail—forming a perfect circle in the center of your hand. The artist uses a dense blackwork style for the scales that contrasts sharply with the circular open skin in the center. Best placed dead center on the back of the hand.
The ideal diameter of the circle is kept around two inches to prevent the design from stretching into the wrist creases. The skin in the center of the hand is highly stable, meaning healing time takes ten to twelve days. Instruct your artist to keep the outer scales perfectly uniform to maintain the symmetry of the circle. The pain level is moderate, presenting as a steady ache over the flat bones. This design works exceptionally well as a timeless symbol of eternity and renewal. Let us transition to a multi-headed choice.
21. Polycephaly Two-Headed Viper
This layout positions a rare two-headed snake splitting across the upper hand, with one head aiming toward the index finger and the other toward the middle finger. The dotwork spacing uses a traditional blackwork layout, using solid black fills for the split necks and detailed shading for the skulls. Best placed on the upper half of the hand.
The ideal size keeps the piece around two by three inches, ensuring the heads sit comfortably behind the knuckle joints. Smooth skin texture is necessary to ensure the distinct details of the two separate heads stay sharp over time. Expect surface healing to wrap up in twelve days. Bring a reference photo emphasizing a mythological polycephaly snake rather than a standard real serpent. Pain is moderate, offering a manageable, hot scratch over the bone. This serves as a strong, striking option for those seeking complex, symbolic imagery. Up next is a fluid, wave-like alternative.
22. Coiled Coil Concentric Serpent
This design arranges the snake into a tight, spiral coil that looks like a coiled spring ready to strike from your hand. The artist uses negative space lines to let the concentric rings of the body stay distinct, creating a hypnotic sense of depth. Best placed on the thick muscle pad below the thumb.
The ideal size spans approximately two inches, allowing for three full rings to form along the muscle contour. Because the spiral sits on a dense muscle group, it heals smoothly, usually wrapping up within ten days. Ask your artist to map the spiral concentric rings carefully with a stencil to ensure the spacing remains mathematically even. Pain is relatively low, making it a great option for a first hand piece. This style perfectly satisfies the desire for a bold, geometric layout. Let us look at a style focused on the finger sides.
23. Inner Finger Webbing Lurker
This design places a small, hidden snake slithering entirely within the inner webbing between your middle and ring fingers. The technique demands absolute precision with a fine-line machine to keep the snake small enough to hide when your fingers are closed. Best placed deep within the finger fork.
The total size is less than an inch long, keeping it hidden from direct view. The skin here is highly elastic and rubs constantly against the neighboring digit, meaning healing time takes three full weeks and color loss is very common. Bring a clean minimalist graphic to your custom booking session to ensure the lines are as simple as possible. Pain is notoriously high because the webbing contains massive amounts of sensitive nerve endings. This clean look appeals greatly to fans of hidden, secret body art. Let us look at a layout focused on a single finger.
24. Full Finger Spiral Wrap
This final layout frames an entire finger, wrapping the snake’s body four times around the digit from the base all the way to the fingernail cuticle. The single-needle technique places each coil in alignment with your finger segments, creating a permanent armor effect. Best placed on the middle finger for balanced symmetry.
The ideal size wraps completely around the chosen digit, adjusting the scale of the scales as the finger tapers toward the nail. The skin here is highly active, meaning healing time takes a full three weeks and requires absolute care during daily tasks. Ensure your hands are free of dry skin before your session begins. Pain is famously sharp and intense across all three joints of the finger. This style provides a striking, high-commitment visual accent for anyone wanting a bold statement piece.
Technical Comparison of Tattoo Styles
| Tattoo Style | Typical Needle Configuration | Shading Approach | Long-Term Longevity |
|---|---|---|---|
| Blackwork | Bold round liners & shaders | Solid black fill, zero gradients | Excellent: Strong contrast resists fading best on high-friction skin. |
| American Traditional | Thick 7-9 round liners | Heavy black gradients, bold primary colors | Excellent: Simple shapes and thick walls hold up incredibly well over decades. |
| Fine-Line / Single Needle | Single 1RL technical cartridges | Very light stippling, minimal ink | Fair to Poor: Requires frequent touch-ups as the micro dots shift under the skin. |
| Dotwork / Stippling | Medium 3-5 round liners | Built entirely out of individual points | Good: Open negative space prevents the design from blurring into a blob. |
Best Placement Ideas
Choosing exactly where to place your snake tattoo involves real tradeoffs between immediate appearance, pain, and how fast the ink will disappear.
- Flat Back of the Hand: The most durable option for long-term longevity. The skin experiences less friction than the sides, and the flat surface allows for complex designs. Pain is moderate, feeling like a steady scratch over bone.
- Thumb Webbing pad: Offers the best organic movement. The ink stretches beautifully and holds color well. Pain is surprisingly manageable, presenting as a hot pinch rather than a sharp sting.
- Finger Joints & Sides: High visibility and high visual appeal, but very poor longevity. The constant friction from pockets and washing causes fast fading. Pain is notoriously sharp and intense due to the lack of padding.
- Wrist Crease Transition: Creates an incredible frame for your sleeve work, but requires massive patience during healing. The constant bending can cause ink cracking if not moisturized properly.
Tips for Success Before You Book
Hand tattoos require an entirely different level of planning than an arm or leg piece. You cannot simply walk into any studio and expect a perfect result on your hand.
Choosing a Qualified Specialist
Look through portfolios specifically for healed hand work. Fresh hand tattoos always look stunning in photos, but a true professional will proudly show pictures of their work six months or a year down the line. Look for clean edges and distinct lines rather than blurry gray clouds.
What to Bring to Your Consultation
Bring clear photos of the exact style you want—whether that is bold blackwork or clean traditional lines. Draw a few simple paths on your own hand with a marker at home to test how movement changes the shape, take photos of what you like, and show them to your artist. Make sure to confirm that the studio uses single-use disposable cartridges and holds an active health department license.
Common Mistakes and How to Avoid Them
- Sizing the Scales Too Small: If you pack hundreds of tiny scales into a two-inch hand snake, the natural spreading of ink over time will turn the serpent into a solid dark shape. Give the design room to breathe.
- Choosing Too Shallow a Depth: Hand skin varies in thickness rapidly. An inexperienced artist might go too shallow to avoid pain, causing the design to wipe away completely during the initial shedding cycle.
- Submerging Your Hands Too Early: Washing dishes, using harsh hand sanitizers, or soaking in a hot bath during the first week will ruin your new ink. Use mild, fragrance-free soaps and pat the skin completely dry with a clean paper towel.
- Copying an Artist’s Custom Sheet Exactly: Do not just grab a random snake photo off the internet. Adjust the curves, the head angle, and the tail path to fit the unique bone structures and creases of your own hand.
Similar Variations to Explore
If you love the look of serpentine movement but want to scale the project up or down, the options are endless. You can reduce the layout to a simple, two-dot snake eye pattern on your knuckle, which takes less than ten minutes in the chair.
Alternatively, you can expand the snake into a massive dragon hand piece that incorporates wind bars and clouds, converting the minimalist concept into a full Japanese traditional statement. You can also swap standard black ink for pure red pigment to create an aggressive, high-contrast look that stands out sharply against your natural skin tone.
Aftercare Basics
Caring for fresh hand ink takes real discipline because you use your hands for absolutely everything. Wash the area gently using only your clean fingertips, lukewarm water, and a mild, fragrance-free cleanser. Avoid applying heavy coats of petroleum jelly, which can trap heat and suffocate the skin pores; instead, use a very thin layer of a recommended daily lotion.
Keep your hands out of direct sunlight, dirt, and chemical cleaners until the skin has completely closed. Always follow the specific, step-by-step instruction sheet provided by your chosen studio rather than relying on generic internet advice.
Important Factual Disclaimer: Pain tolerance, skin shedding speeds, and overall healing capabilities vary drastically from person to person based on genetics and daily routines. If you observe spreading red streaks, persistent swelling, or excessive oozing fluid around your new tattoo, consult a licensed dermatologist or a professional healthcare provider immediately.
Quick FAQ
How much does a snake hand tattoo typically cost?
Most professional studios charge a flat shop minimum to cover the cost of sterilizing the station and opening new needle cartridges, which usually runs between $80 and $150. For a custom back-of-the-hand snake that takes two to three hours, you can generally expect to pay between $250 and $500 depending on the artist’s experience level.
Why do hand tattoos fade so much faster than other spots?
The skin on your hands is constantly shedding cells to recover from the daily friction of holding objects, washing hands, and exposure to the sun’s UV rays. This rapid cell turnover, combined with the thinness of the skin over the knuckles, causes the ink to migrate and shed much faster than it would on a flat surface like your forearm.
How bad does getting a hand tattoo actually hurt?
Because your hands are packed with thousands of sensory nerve endings used to navigate the physical world, the pain is sharp, hot, and intense. The bones and tendons act as an amplifier for the machine’s vibrations, making the session feel like a heavy, burning scratch, though smaller designs are usually finished within an hour.
Final Thoughts
Finding the right snake hand tattoo really comes down to matching the style—whether that is a bold blackwork layout or a classic traditional method—to the exact shape and movement of your body. None of these configurations are a one-size-fits-all solution, and that is the beauty of body art; the best version is the one that accounts for your daily routine, your workplace needs, and how your skin moves.
Take your time finding a specialist whose portfolio proves they understand the delicate depth limits of hand skin, ask the tough questions about long-term healing, and trust that a little extra restraint during the stenciling phase is exactly what turns a simple pattern into a clean statement piece. A thoughtful approach now ensures you walk out with a stunning, permanent snake hand tattoo.