20 Koi Fish Thigh Tattoo Ideas: Design, Placement, and Pain Guide
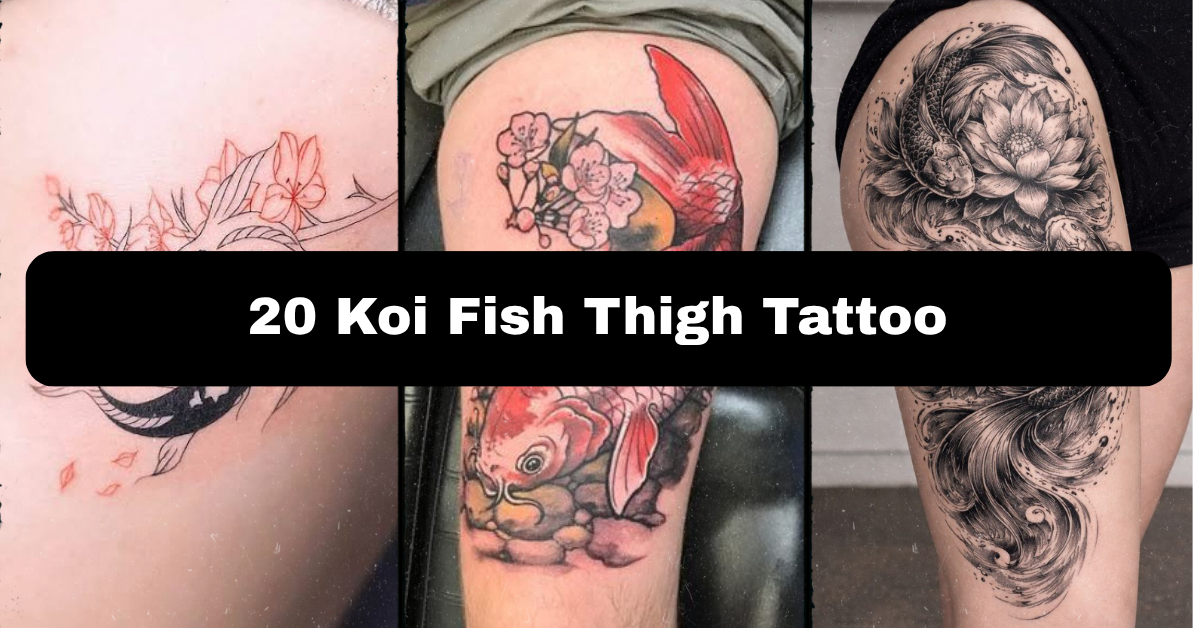
Koi fish thigh tattoo ideas come with more design freedom than almost any other placement on the body, and this guide comes from real time spent around studios watching these exact consultations happen, not from a stock photo roundup. Every idea below comes with the technical detail that actually decides whether a koi piece looks sharp in year one and still looks sharp in year ten.
So what makes a great koi fish thigh tattoo? Bold traditional linework and solid color saturation hold up best over the thigh’s large, curved surface, while fine line and dotwork work better for smaller koi tucked closer to the hip or knee. The thigh’s size also means you can combine koi with waves, lotus flowers, or cherry blossoms without cramming the composition.
Keep reading for placement-specific pain notes, a realistic healing timeline, rough cost ranges, and exactly what to bring to your consultation so the finished stencil matches what’s in your head.
Why the Thigh Works So Well for Koi Fish Designs
Koi carry a lot of visual information, scales, fins, flowing tails, sometimes an entire wave or water current around them, and that detail needs room to actually read clearly. The thigh offers one of the largest flat-to-curved canvases on the body, second only to the back, which is exactly why traditional Japanese tattoo artists have used the leg for koi and dragon pieces for generations. It also allows for real flexibility in visibility. A koi placed high on the outer thigh disappears under most clothing, while one wrapping toward the front stays visible in shorts or swimwear. Below are 20 ways to use that space, ranging from small and simple to full thigh-wrap pieces.
Traditional Japanese Koi Thigh Tattoo
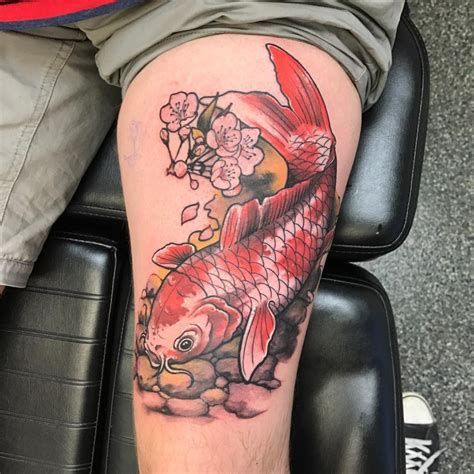
Traditional, sometimes called Irezumi-influenced or “bold traditional,” style uses thick black outlines, solid color fill, and minimal negative space to create a koi that reads clearly from across a room. Scales are usually rendered as overlapping half-circles with a consistent line weight, and shading relies on solid color blocks rather than soft gradients. This style needs real space to hold its detail, so the outer thigh or full thigh panel works best at 6 inches or larger. Bring reference images of full traditional koi pieces, not isolated fish clipart, so your artist understands the scale and wave patterns you want included. Because of the solid fill, expect a longer cumulative session with steady, moderate discomfort rather than sharp pain. This design suits someone ready for a serious, long-term commitment piece rather than a first tattoo, and it ages remarkably well since bold lines and solid black hold shape for decades.
Blackwork Koi Silhouette on the Outer Thigh
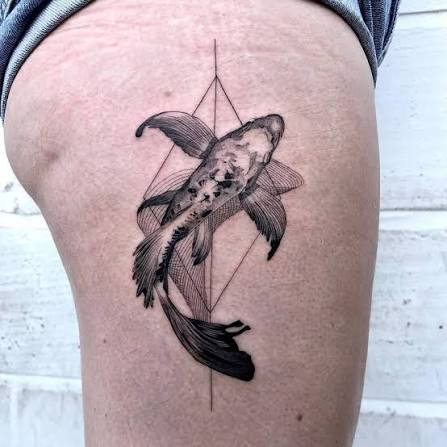
A blackwork koi drops color entirely, using solid black ink to render the fish as a striking silhouette against bare skin. Detail comes from negative space cut into the black fill, thin untouched lines that suggest fins, scales, or water movement without a single drop of added color. The outer thigh gives a flat, visible surface at 4 to 6 inches, letting the silhouette read cleanly without competing with muscle contours. Ask your artist about their freehand technique for the negative-space detailing specifically, since a shaky line here ruins the whole effect. Solid black fill takes a while to complete, so expect building discomfort as the session goes on, though the outer thigh has decent muscle padding overall. This style is workplace-friendly since it’s easy to cover, and it holds up better over time than any colored version since black ink resists fading longest.
Watercolor Koi Fish on the Upper Thigh
Watercolor tattooing skips hard outlines in favor of soft, blended color that mimics paint bleeding across paper. A koi done this way often uses orange, white, and black blended with soft blue or green suggesting water movement around the fish, with no defined border holding the color in place. This needs generous space to look intentional rather than smudged, so the upper thigh at 4 to 5 inches works well. Because there’s no solid outline anchoring the pigment, watercolor pieces fade and blur more noticeably over 5 to 10 years than outlined styles, so ask upfront about touch-up intervals. The upper thigh has more fat padding, keeping discomfort on the milder end for this placement. This is a strong pick if you want something that reads as painterly and artistic rather than a traditional tattoo shape, and it pairs well with abstract splashes of color nearby.
Fine-Line Koi Fish on the Inner Thigh
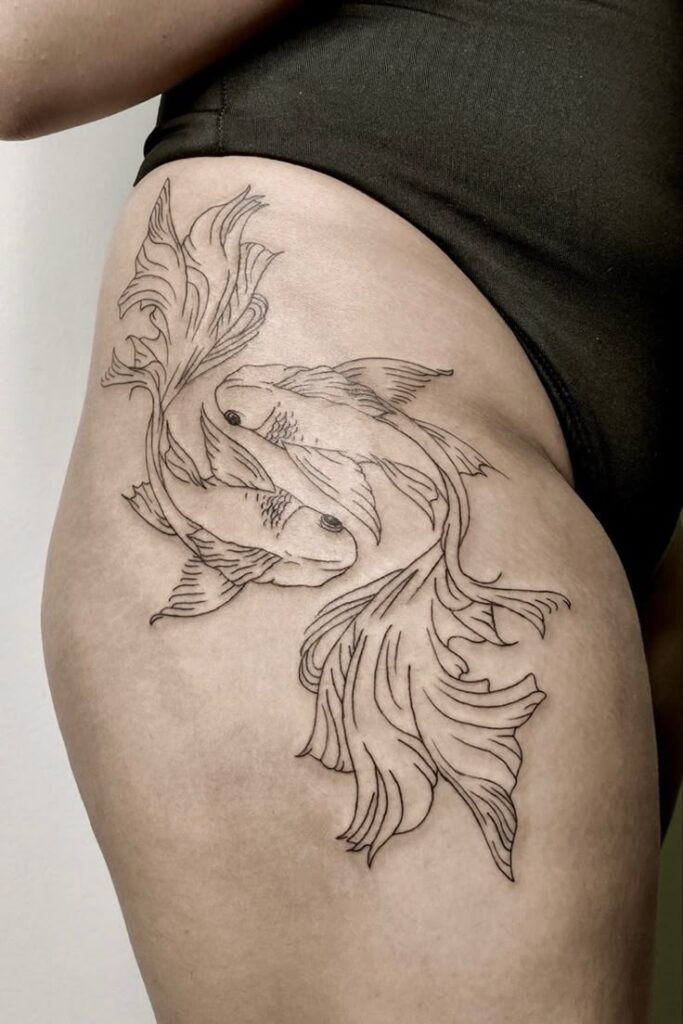
Fine line uses a single thin needle to build delicate, low-opacity lines instead of thick, saturated outlines, giving a koi a soft, almost sketched look rather than a bold traditional one. On the inner thigh, keep the design to 2 to 3 inches, since fine detail crowds and blurs at larger sizes on softer, more mobile skin. The inner thigh is one of the more sensitive placements on the body due to thin skin and friction, so expect a sharper, more concentrated sensation, and plan for a slightly longer healing window given the area’s constant movement and clothing contact. Ask your artist to keep line weight consistent throughout the fish’s body rather than letting it thin out near the tail, since inconsistent fine lines fade unevenly. This placement is easy to keep private, making it a popular choice for a first tattoo or a meaningful design you don’t need visible day to day.
Dotwork Koi with Stippled Scale Shading
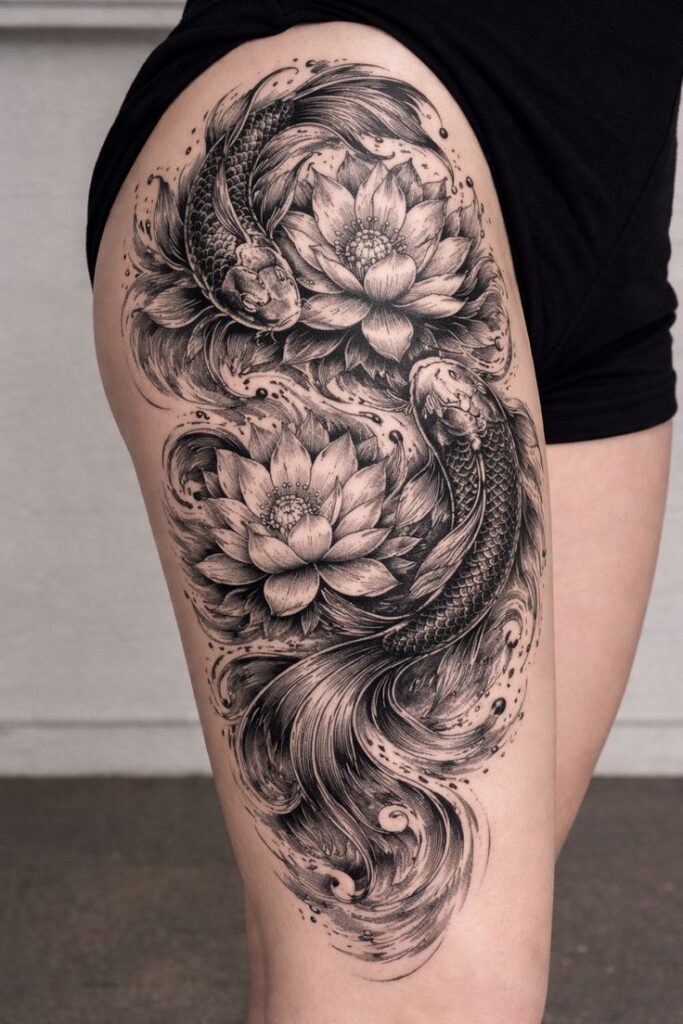
Dotwork builds shading and texture from clusters of tiny dots instead of solid lines or color blocks, and it’s particularly effective for koi scales, since stippling naturally mimics the layered, textured look of real fish scales. Denser dot clusters near the fish’s back create depth, while sparser dotting toward the belly lightens the gradient. This technique rewards a patient, steady hand, so check a portfolio specifically for dotwork on larger pieces, not just small accent dots. The front or side of the thigh, around 4 inches, gives enough flat space for even dot placement across the whole body of the fish. Pain is generally steady and moderate rather than sharp, since the needle keeps a consistent rhythm throughout. Healing takes close to two weeks, and scabbing can look textured and uneven at first, which is normal and not a sign of an uneven tattoo.
Single-Needle Minimalist Koi Fish
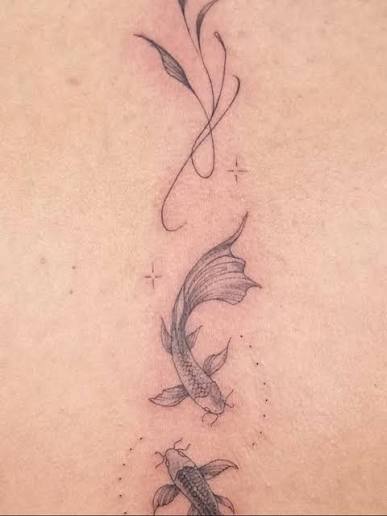
Single needle is the most pared-down end of fine line, using one needle point to create thread-thin lines with almost no shading. A minimalist koi at this scale, usually under 2 inches, works well near the knee or on the lower thigh, close to where the leg narrows. Detail has to be simplified here, skip the full scale pattern and stick to a clean body outline with one or two interior lines suggesting fins. This is a lower-pain option relative to other thigh spots since the lower thigh has decent padding, and the tattoo itself is quick to complete. Healing runs about a week given the smaller ink deposit overall. This is a popular choice for a first koi tattoo or a matching design with a sibling or friend, since it stays simple, low commitment, and easy to build on later with a second, larger piece.
Realistic Koi Fish Thigh Piece
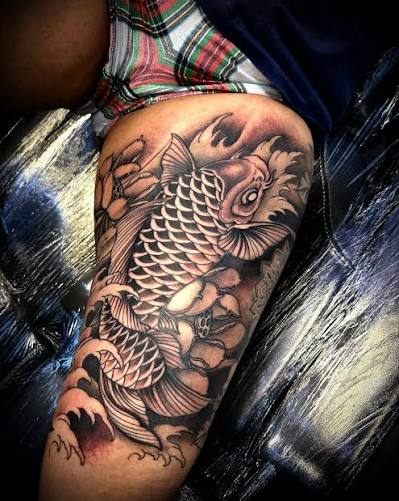
Realistic color work aims to replicate an actual koi’s mottled orange, white, and black patterning using layered shading and color blending rather than flat, stylized color fill. This is one of the more technically demanding designs on this list and needs an artist experienced specifically in color realism, not simply traditional Japanese style. The front thigh gives a flat, visible canvas at 5 to 7 inches, large enough to capture the mottled pattern without cramming it. Because realistic color needs multiple passes to build proper saturation, sessions run longer and discomfort builds cumulatively rather than staying constant throughout. Ask to see healed photos of prior realism work specifically, not just fresh shots, since color realism is notorious for looking noticeably different a year out than on day one. This design suits someone ready for a statement piece and multiple sessions rather than a quick single sitting.
Koi and Cherry Blossom Combo
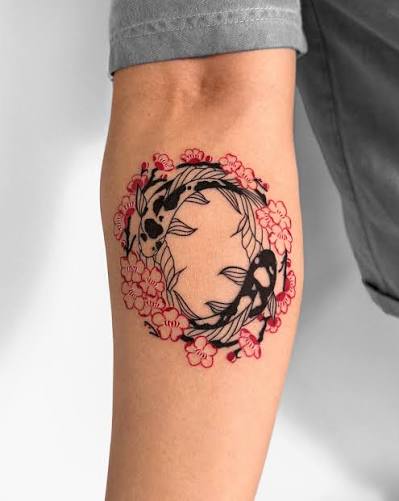
Pairing a koi with cherry blossom branches trailing above or beside it adds visual softness and a seasonal, symbolic layer that a koi alone doesn’t carry. The blossoms are usually done in lighter linework with soft pink or white shading, while the koi itself carries the bolder color and linework as the focal point. The thigh’s length works well for this kind of layered composition, letting the blossom branch trail from hip toward knee alongside the fish. Bring specific reference photos of both the koi style and the blossom branch shape you want, since a generic “flowers” request gives an artist too much room to guess. Pain stays consistent with whatever base thigh placement you choose. This combo suits a second or third tattoo rather than a first, given the added planning and session time two elements require.
Koi and Wave Composition
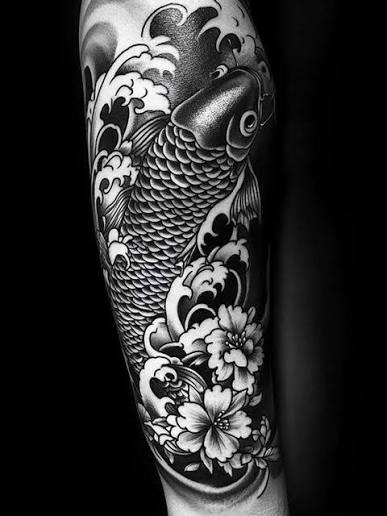
A koi swimming through a traditional wave pattern is one of the most requested compositions in Japanese-style tattooing, and it works because the wave adds motion and context rather than leaving the fish floating on bare skin. Waves are typically rendered in bold blue or black with defined crest lines, echoing traditional woodblock print style. This composition needs real length to look balanced, so the outer or front thigh at 6 inches or more gives the waves room to curl naturally around the fish’s body. Ask your artist specifically about wave direction and flow before finalizing the stencil, since a poorly angled wave can make the whole piece look static instead of dynamic. Expect a longer session given the added detail, with moderate, steady discomfort typical of larger thigh work. This design suits someone building toward a bigger leg piece over time.
Yin-Yang Koi Pair
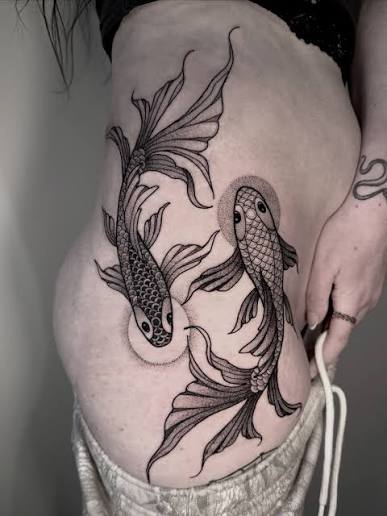
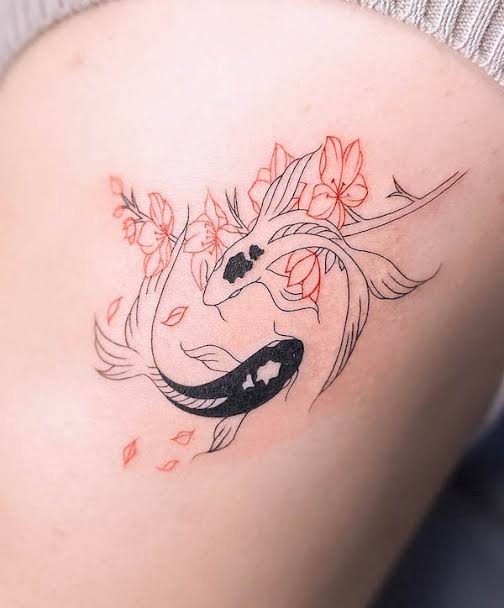
Two koi swimming in a circular formation, one usually darker and one lighter, is a classic composition symbolizing balance and duality. The circular layout needs a rounder space to sit correctly, making the front or side of the upper thigh a strong choice at 4 to 5 inches in diameter. Line weight should stay consistent between both fish so neither one visually dominates the pairing. Ask your artist to sketch the circular guide directly on your skin before tattooing, since a slightly uneven circle throws off the whole balance of the design. Pain and healing follow standard thigh guidelines for a piece of this size. This design works well as a meaningful solo piece or as a matching concept between two people, each getting one fish from the pair.
Koi Fish with Lotus Flower
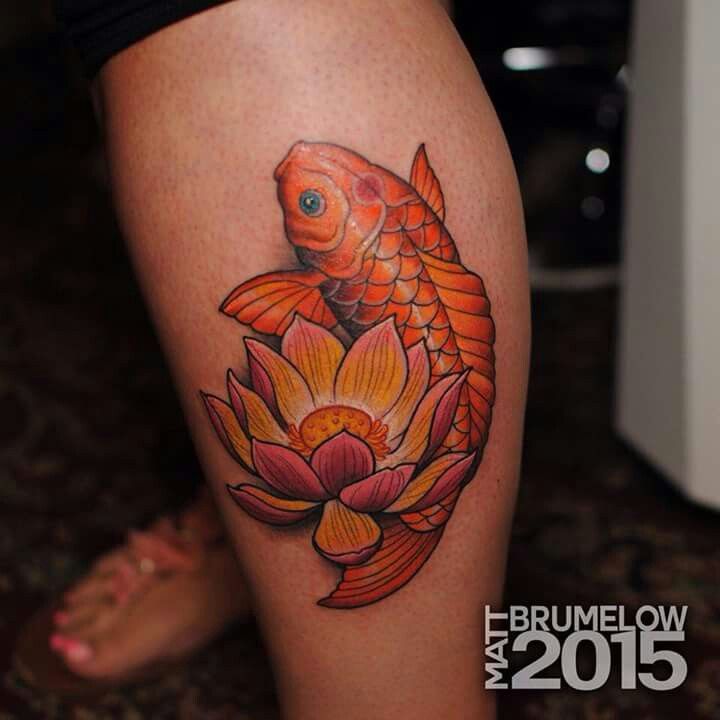
A lotus paired with a koi adds another layer of symbolism, often representing growth or resilience, and visually it gives the composition a grounded anchor point beneath or beside the fish. The lotus is usually shaded with soft gradients while the koi carries bolder, more saturated color or blackwork. This pairing works well vertically along the thigh, letting the lotus sit near the knee with the koi swimming upward toward the hip. Bring a specific lotus reference, since lotus flowers vary widely in petal count and layering, and a vague request leads to a generic stencil. Pain depends on the exact thigh zone chosen. This combination suits someone who wants personal meaning built into the piece rather than a purely decorative koi, and it transitions naturally into adding more botanical elements around it later.
Negative-Space Koi Fish Design
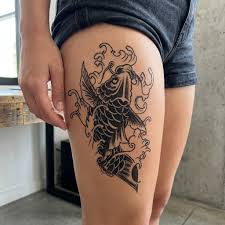
Negative space tattooing uses untouched skin as part of the image itself, so parts of the koi’s body are defined by what’s left blank rather than what’s inked. A common approach shades the water or background solid while leaving the koi’s body as bare skin outlined in thin linework, or reverses it with a solid koi against negative-space water ripples. This only works well on evenly toned, unblemished skin, since any scarring or discoloration inside the blank area will show clearly. The front thigh gives a flat enough canvas for the contrast to read properly at 4 to 5 inches. Ask your artist to sketch the piece directly on your skin before tattooing so you can preview how the negative space sits against your actual tone. Healing and pain follow standard guidelines for shaded work of this size on the thigh.
Geometric Koi Fish with Line Accents
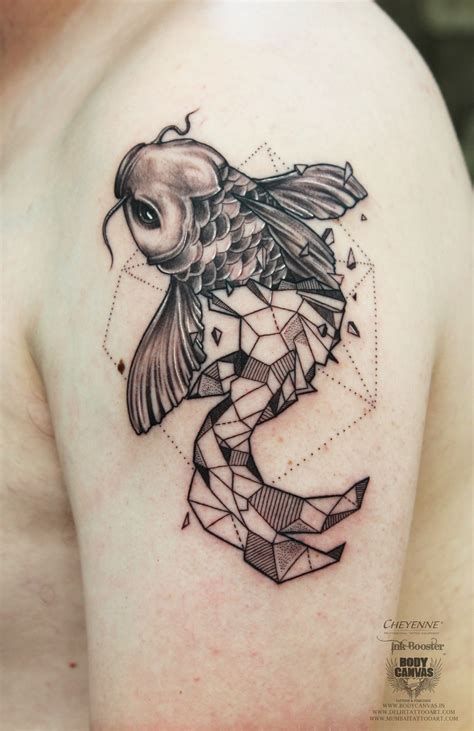
Geometric tattoo design overlays a koi’s natural, flowing shape with straight lines, triangles, or dot-connected patterns, giving it a more structured, modern look than a purely traditional koi. Blue or black geometric shapes often frame the fish rather than replacing its natural form entirely, appearing as a triangle behind the tail or a dotted current line trailing from the fins. This design needs precise symmetry, so confirm your artist uses stencil software or has a steady freehand geometric portfolio before booking. The outer thigh gives enough flat space for the geometric elements to sit evenly around the fish. This style tends to age well since geometric linework holds crisp edges longer than soft shading, making it a good pick if you want a modern twist on the traditional koi concept.
Koi Fish Sleeve-Style Thigh Wrap
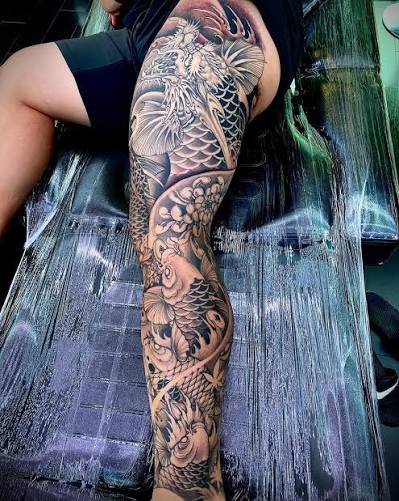
A thigh wrap treats the leg like a sleeve, with the koi’s body curving around the thigh’s natural shape rather than sitting flat on one side. This composition uses the thigh’s full circumference, letting the fish’s tail disappear toward the back of the leg while the head faces forward. It requires careful planning during the consultation, since the design has to look correct from every angle, not just straight on. Expect multiple session hours given the wraparound size, generally 6 inches or more in length. Pain builds cumulatively across a longer sitting, with the inner and back portions of the wrap typically more sensitive than the front and outer sections. This is a serious commitment piece best suited to someone with prior tattoo experience, since adjustments become difficult once the wraparound stencil is placed.
Small Koi Fish Accent on the Hip-Thigh Crease
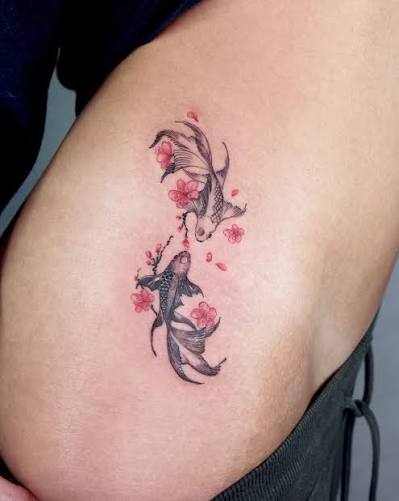
A small koi tucked right at the crease where the hip meets the thigh offers a private, easy-to-hide placement for a first tattoo or a personal design you don’t need visible. Keep the design under 2 inches, fine line or single needle work best given the limited, curved space available. This area has thinner skin and more nerve density than the outer thigh, so expect a sharper sensation, and plan for careful movement during healing since the crease folds with normal activity. Healing generally takes 10 to 14 days, with clothing friction as the main irritation to manage. Ask your artist about placing the stencil while you’re standing, not lying down, so the design doesn’t distort once you’re upright. This placement suits anyone prioritizing privacy over visibility.
Colored Koi with Gold and Orange Gradient
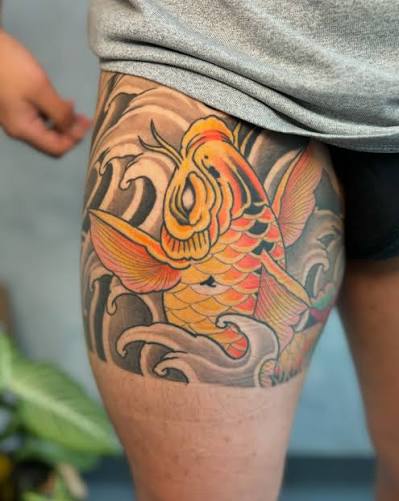
A colored koi built around warm gold and orange gradients leans into the fish’s most iconic natural coloring, using layered shading to build saturation from a deep orange spine down to a lighter belly. This needs a color-experienced artist, since gradient blending in warm tones is trickier to keep even than flat color fill. The front or outer thigh at 4 to 6 inches gives enough room for the gradient to build smoothly without looking blotchy. Ask specifically how many passes the gradient will need and whether a follow-up session is standard for full saturation. Healing for color work runs slightly longer than for straight blackwork, given the additional ink layered into the skin. This design suits someone wanting a vibrant, eye-catching piece rather than a subdued or monochrome one.
Black and Grey Koi Fish
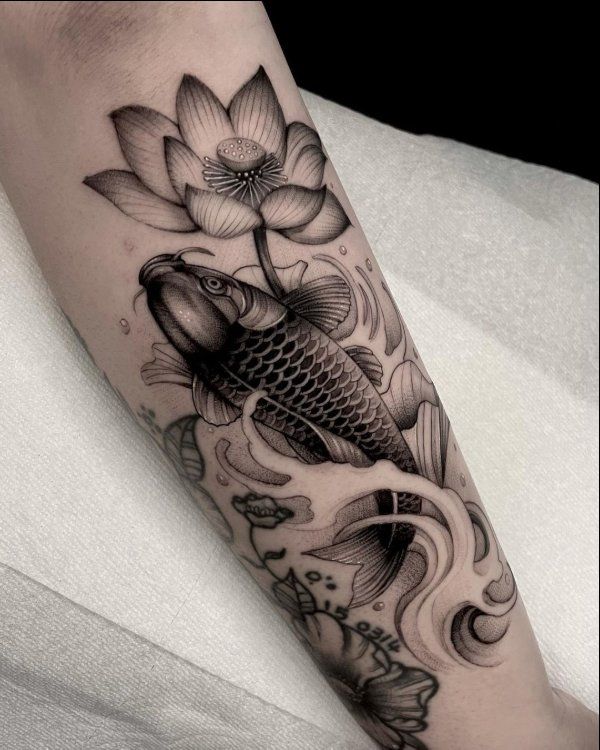
Black and grey work uses diluted black ink to build soft grey shading alongside solid black linework, giving a koi depth and dimension without introducing any additional color. This is often a lower-maintenance long-term option than full color, since black and grey pieces tend to hold their contrast longer with less noticeable fading. The outer or front thigh at 4 to 6 inches works well, giving the shading room to transition smoothly across the fish’s body. Ask to see the artist’s grey-wash technique specifically, since uneven dilution can leave a patchy, inconsistent gradient. Pain and healing follow standard shaded-work guidelines for the thigh. This option suits someone who wants the visual depth of a realistic or traditional koi without committing to full color saturation or its longer-term touch-up needs.
Koi Fish with Script or Symbol Combination
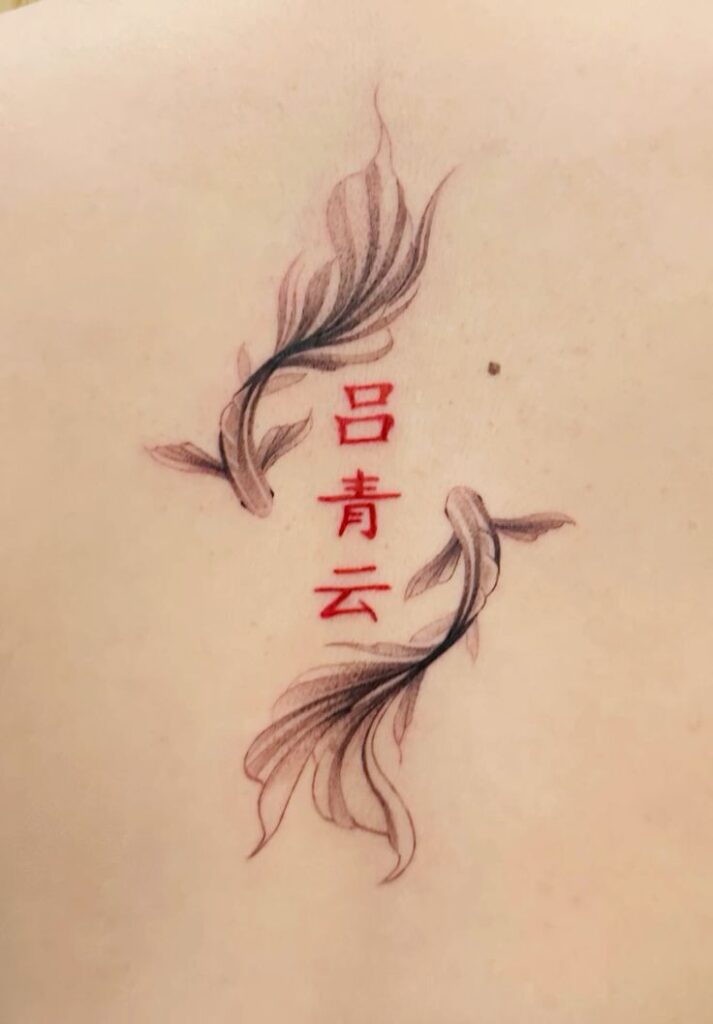
Adding a short word, date, or symbol alongside a koi gives the piece personal meaning beyond the visual design alone. Keep the script in fine line to match a more delicate koi, heavy block lettering next to soft linework creates a visual mismatch. Common placement puts the script along the thigh’s length above or below the fish, giving both elements room without crowding. Test your chosen font and wording size on paper first, since small script can blur together at tattoo scale within a few years. Pain depends entirely on the base thigh placement chosen for the combo. This pairing works well for meaningful pieces since the personal element carries weight even when the koi design itself stays relatively simple, and there’s room to add more symbols around it later.
Matching Koi Fish Tattoos for Couples or Friends
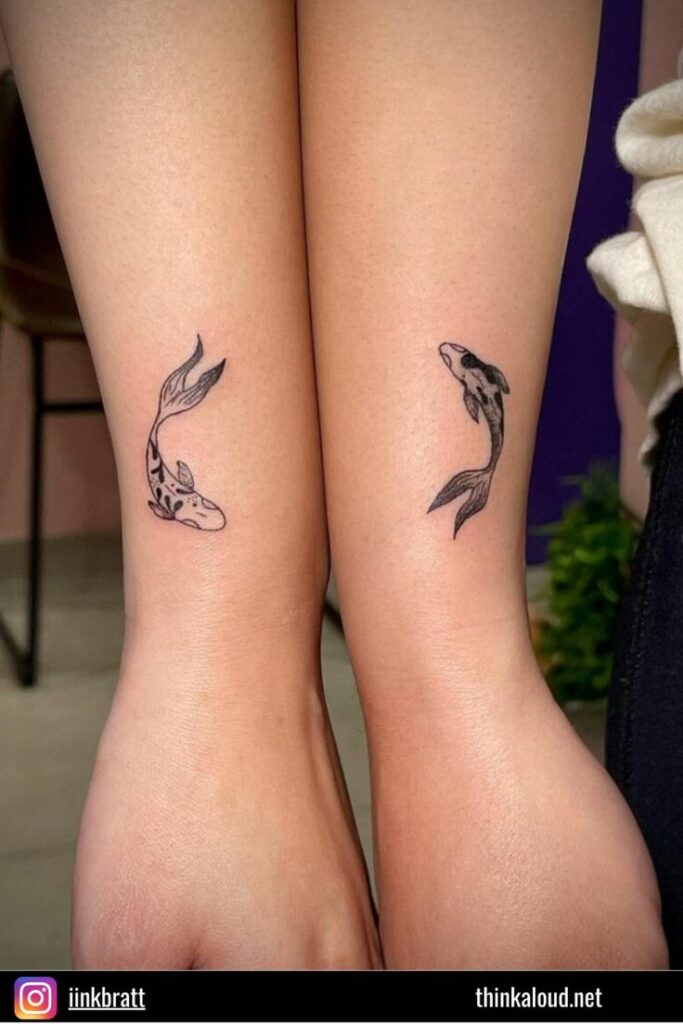
Matching koi designs work best when each person’s fish carries a personal variation rather than an identical copy, different color palettes, mirrored swimming directions, or one fish larger than the other to suggest a pair. Discuss placement separately, since pain tolerance and preferred visibility differ between people, one person might want it hidden on the inner thigh while the other prefers the visible outer thigh. Book appointments back to back with the same artist when possible, so linework style and color saturation stay consistent across both pieces even though the compositions differ slightly. This concept works for a first tattoo for both people, since the designs can stay simple, and it carries the added meaning of a shared symbol between two people.
Large Koi Fish Thigh-to-Calf Piece
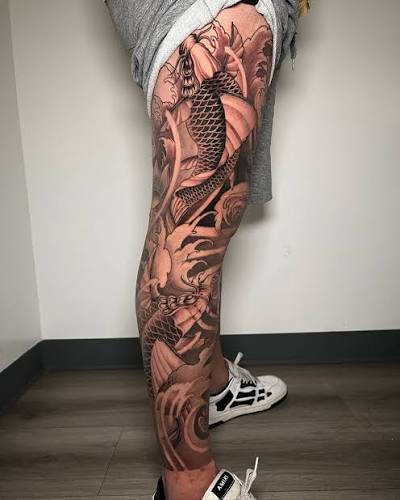
For those ready for a serious leg piece, extending a koi from the thigh down toward the calf creates a dramatic, continuous composition that traditional Japanese tattooing has used for generations to depict the fish mid-swim. This spans 10 inches or more and typically requires several separate sessions rather than one sitting. Expect a noticeably higher total cost given the scale and time involved, and discuss a full sketch or stencil preview across the whole leg before the first session begins, since adjustments become far harder once a piece this size is underway. Pain varies by exact zone, with the knee area generally more sensitive than the thigh or calf muscle itself. This is a serious, long-term commitment best suited to someone with prior tattoo experience who understands the time, cost, and multi-session planning involved.
Bold Traditional vs. Fine Line: Knowing the Difference
Bold traditional — Uses thick, consistent outlines and solid color fill with minimal negative space. Best for large, high-visibility koi pieces meant to hold up clearly from a distance and age well over decades.
Fine line — Uses a single thin needle to create delicate, low-opacity lines with little to no shading. Best for smaller, subtler koi designs that prioritize detail over boldness.
Dotwork — Builds shading and scale texture from clusters of small dots rather than solid fill or continuous lines. Best for soft gradients and realistic scale texture without full color saturation.
Black and grey — Uses diluted black ink to build grey shading alongside solid black linework, skipping color entirely. Best for depth and dimension with lower long-term maintenance than full color.
Best Placement Ideas
- Inner thigh — private and easy to hide, more sensitive due to thin skin and friction, best for smaller fine-line pieces
- Outer thigh — moderate pain, good muscle padding, ideal for larger traditional or blackwork koi
- Upper thigh near hip — flexible visibility depending on clothing, works well for watercolor or gradient color pieces
- Front thigh — highly visible in shorts or swimwear, best for detailed or realistic color work needing a flat canvas
- Hip-thigh crease — very private, more sensitive, best kept to small, simple designs
- Thigh-to-calf wrap — least pain per square inch relative to size, but requires multiple sessions and a bigger budget
Tips for Success
Look for an artist whose portfolio shows real examples in the specific technique you want, traditional Japanese, blackwork, dotwork, and color realism are different skill sets, and a strong traditional portfolio doesn’t guarantee strong watercolor work. Check healed photos, not just fresh out-of-the-chair shots, since that’s the only honest preview of how color and shading actually settle into skin months later. Bring at least two or three reference images and be specific about scale detail, wave direction, or color saturation rather than handing over a single generic koi image and hoping for the best. During your consultation, ask directly about their experience with large-scale thigh work, how many sessions a piece your size typically needs, and their approach to color or shading blending. A good consultation should feel like a real conversation about your specific design, not a rushed sales pitch.
Common Mistakes and How to Avoid Them
Sizing a detailed traditional koi too small is one of the most common regrets, scale detail and wave patterns that look crisp on a stencil often blur into a muddy shape within a few years if the piece is under 3 inches. Choosing a placement that fights the fish’s natural swimming direction, like cramming a horizontally-oriented koi into a narrow vertical space, is another frequent issue. Skipping the artist’s specific aftercare instructions in favor of generic internet advice can affect how color settles and heals. Copying a reference image exactly without adjusting proportions to fit your leg’s actual shape often looks noticeably different once inked than it did as a flat photo. Rushing the artist search and booking the first available appointment instead of checking portfolio consistency is a mistake that’s difficult to undo once ink is under the skin.
Similar Variations
Any of the koi designs above can shift with a few adjustments. Swap a warm gold and orange gradient for cooler blue and silver tones for a different mood. Resize a larger thigh-wrap composition down into a simplified single-fish accent near the hip. Add a second, smaller koi swimming opposite the first to create a paired composition rather than a solo piece. Recolor a blackwork silhouette with soft grey shading instead of solid black for a gentler finish. Combine any of the smaller designs with a wave, lotus, or script element for added personal meaning down the line.
Aftercare Basics
General aftercare guidance includes keeping the tattoo clean and moisturized, avoiding direct sun exposure and swimming while it heals, and not picking at scabbing or peeling skin. Loose, breathable clothing over the thigh reduces friction during the first one to two weeks, which matters more here than on most placements given how much the thigh moves during normal activity. Every studio provides a specific aftercare sheet tailored to their preferred products and your particular piece, and that sheet should always take priority over generic advice found online. If you notice unusual redness, swelling, or discharge beyond normal healing, check with a licensed dermatologist rather than waiting it out. Pain tolerance and healing speed vary by individual, so the timelines here are general estimates rather than guarantees.
Quick FAQ
How much does a koi fish thigh tattoo cost? Smaller fine-line or single-needle koi often start in the $100 to $250 range depending on your area, while larger traditional, realistic, or thigh-wrap pieces can run several hundred to over a thousand dollars, especially across multiple sessions. Always get a direct quote from your chosen artist rather than relying on general estimates.
Does a koi fish thigh tattoo hurt more than other placements? The thigh overall is considered a moderate-pain placement thanks to decent muscle padding, though the inner thigh and hip crease are noticeably more sensitive than the outer or front thigh. Bony areas elsewhere on the body, like the ribs or ankle, tend to be more painful than most of the thigh.
How long does a koi fish thigh tattoo take to heal? Most designs heal on the surface within 10 to 14 days, though full healing beneath the skin can take up to a month. Larger, more detailed, or multi-session pieces may take longer given the amount of ink involved.
Will a koi fish tattoo fade faster than a black design? Colored koi pieces, especially gradients and watercolor styles, can shift or soften more noticeably over the years than solid black or black and grey work, particularly with sun exposure, though individual results vary by skin type and aftercare. Following your artist’s aftercare guidance and using sunscreen over healed tattoos helps maintain saturation longer.
Koi fish thigh tattoo ideas cover a wide enough range that there’s a fitting option for nearly any comfort level, from a small single-needle fish tucked at the hip crease to a full thigh-to-calf traditional piece. The right choice comes down to matching the technique to your desired size, your pain tolerance, and the time and budget you’re realistically ready to invest. Take the placement and pain notes above into your consultation, ask the questions that matter, and let a licensed professional help turn the idea into a koi fish thigh tattoo that still looks right on your skin years from now.