20 Memento Mori Tattoo Ideas: A Practical Guide to Meaning, Placement, and Pain
Nervous about picking a memento mori tattoo you’ll second-guess in five years? You’re not alone, and honestly, that hesitation is a good sign — it means you’re thinking about this the right way, not just scrolling Pinterest at 1 a.m. and booking the first thing that looks cool.
So what are the best memento mori tattoo ideas? Fine-line skulls, blackwork hourglasses, dotwork florals paired with bone imagery, and minimalist script all work well because they carry the “remember you will die” symbolism without needing heavy detail to read clearly on skin, even as the piece ages over the years.
Stick around, because I’m also going to walk you through pain levels by placement, realistic healing timelines, what this style of tattoo actually costs, and how to brief your artist so you don’t end up with a muddy skull instead of a clean, meaningful piece.
Why Memento Mori Designs Work as Tattoos
Memento mori is Latin for “remember you must die,” and it’s been showing up in art for centuries — think 17th-century Dutch paintings with skulls next to fruit bowls, or old gravestones carved with hourglasses. As a tattoo category, it works because the imagery is symbolic rather than literal. A skull doesn’t have to look gruesome; it can be rendered with soft fine lines, given a rose growing out of an eye socket, or reduced to a simple outline. The whole point isn’t shock value, it’s a quiet reminder to live intentionally. That flexibility is exactly why this category translates so well across styles, from delicate single-needle work to heavier blackwork pieces.
1. Fine-Line Skull with Rose Overlay

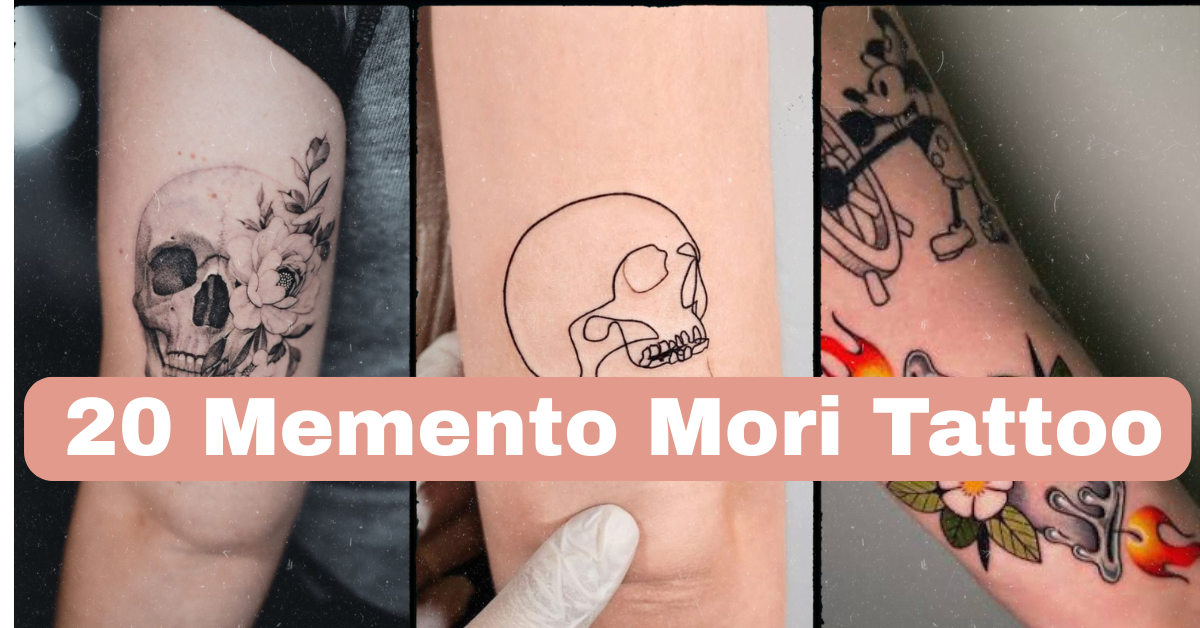
This design layers a softly shaded skull with a single-line rose growing through the eye or jaw, using thin, consistent linework (usually done with a single needle) instead of heavy shading. The contrast between the rigid bone structure and the organic curve of the flower petals is what makes it visually interesting rather than just another skull tattoo. This works best sized at 3 to 5 inches on the forearm, upper arm, or shoulder blade, where there’s enough flat space for the linework to stay clean. Smaller versions under 2 inches tend to blur together after a few years, so don’t go too tiny if detail matters to you. Pain is moderate on fleshier areas like the upper arm, more noticeable on the forearm near the wrist. Bring a reference photo showing line weight, not just the finished tattoo, so your artist knows exactly how delicate you want the shading. This one’s a solid first-tattoo option since it heals cleanly and reads well at a distance too.
2. Blackwork Hourglass with Wings

Blackwork uses solid, saturated black ink filled in completely, rather than the thin outlines of fine-line work, which gives this hourglass a heavier, more graphic presence on skin. Adding wings on either side (a nod to time flying) creates a symmetrical composition that looks intentional rather than cluttered. This piece suits the upper arm, calf, or upper back, ideally at 4 to 6 inches so the wing feathers don’t merge into one dark blob. Solid black holds up remarkably well over time compared to gray shading, which is worth mentioning to your artist if longevity matters to you. Expect more discomfort here since blackwork involves repeated passes over the same skin to build up saturation — the ribs and inner arm are especially sensitive spots for this style. It’s a strong choice for someone who already has one or two tattoos and wants something bolder than a first piece.
3. Dotwork Skull Portrait
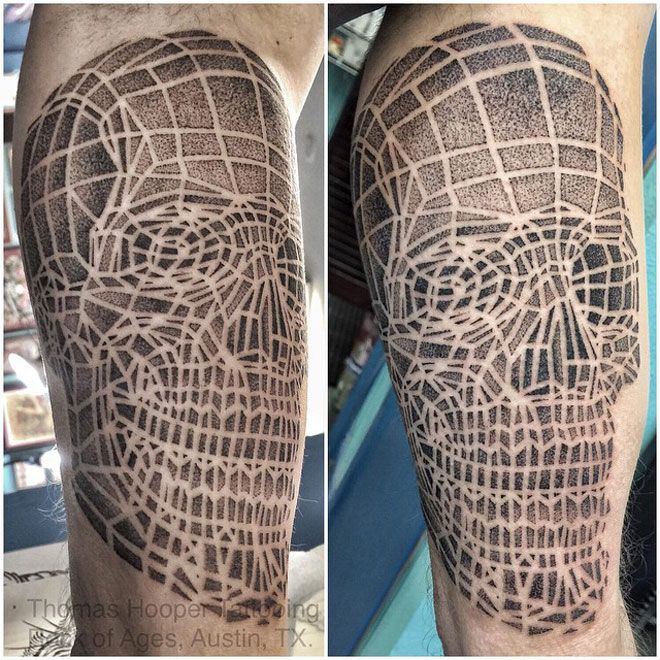
Dotwork builds shading and texture using thousands of tiny individual dots instead of solid fills or smooth gradients, giving the skull a stippled, almost sculptural look under certain lighting. This technique takes noticeably longer to tattoo than blackwork or fine-line work, so expect a longer session and a higher price for the same size piece. A dotwork skull looks best around 4 to 7 inches on the shoulder, thigh, or ribs, where there’s room for the dot density to create real depth. Skin tone matters more here than with bold blackwork — dotwork shows up more subtly on deeper skin tones, so ask your artist to show you healed examples on skin similar to yours before committing. Pain tends to run moderate to high simply because of the repetitive needle contact over a longer sitting. This isn’t the best pick for a first tattoo, but it ages beautifully if it’s done by someone with real dotwork experience.
4. Minimalist Skull Outline
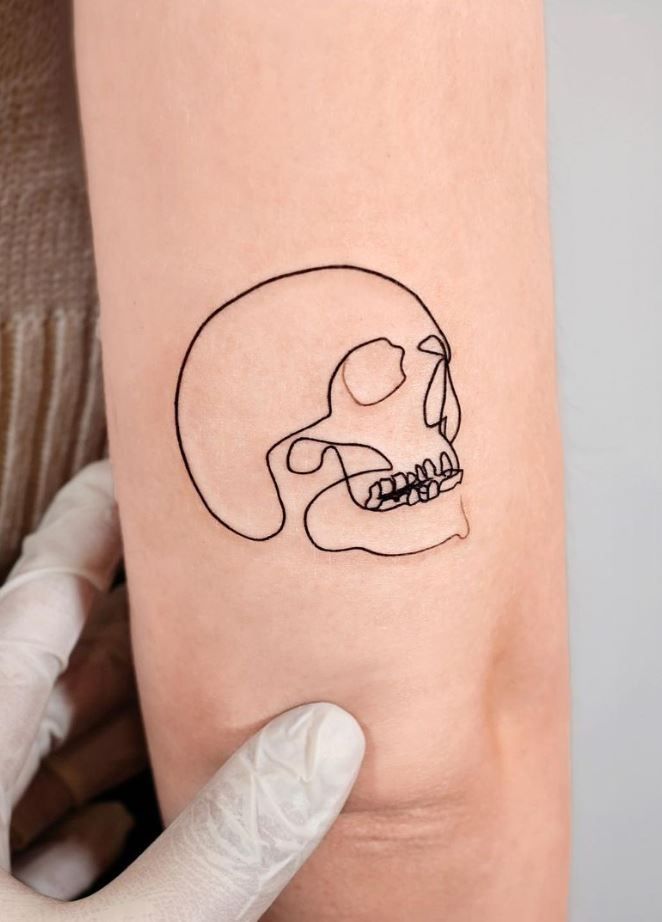
Strip the skull down to its simplest form: clean, unshaded lines defining just the outer skull shape, eye sockets, and nose cavity, done in single-needle work. No shading, no cross-hatching, just outline. This is the most forgiving option on this list for people worried about a design looking dated later, since there’s nothing to fade unevenly. It works at almost any size, from a 1-inch version behind the ear to a 4-inch piece on the forearm. Thin lines like these are more prone to gradual softening over ten-plus years, so ask your artist about line thickness — slightly bolder lines (a 5 or 7 needle grouping rather than a 3) hold up better long term. Pain is generally lower here since sessions are quick. This is a genuinely good first-tattoo pick and works well as a subtle, workplace-friendly design.
5. Memento Mori Script Tattoo
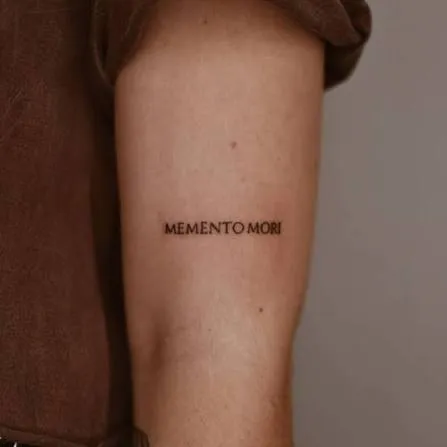
Instead of imagery, this design uses the Latin phrase itself in a clean serif or simple script font, usually placed as a straight line or gentle arc. The technique is fine-line lettering, which requires a steady, experienced hand since uneven spacing or shaky letters are much more noticeable in text than in illustrative work. Ribs, forearm, collarbone, and the side of the calf are common placements — anywhere with a relatively flat surface for the letters to sit evenly. Keep lettering at least half an inch tall; anything smaller risks blurring into an unreadable smudge within a few years. Ask to see the artist’s lettering portfolio specifically, not just their illustrative work, since these are genuinely different skill sets. Rib and collarbone placements rank higher on the pain scale due to thin skin over bone. This suits people who want the meaning without the imagery.
6. Skull and Clock Composition

Pairing a skull with a clock face (sometimes with cracked glass or bent hands) is a classic way to represent time running out, typically rendered in traditional bold linework with moderate black-and-gray shading. The thicker outlines here are intentional — bold traditional style uses heavier lines specifically so the design stays legible even as skin ages and ink softens slightly over decades. This composition needs real space, so the outer forearm, thigh, or upper back at 5 to 8 inches works best. Smaller attempts tend to lose the clock numerals entirely within the first few years. Discuss saturation levels with your artist, since black-and-gray shading fades faster than solid black if the artist doesn’t pack enough ink during the session. Expect moderate to high discomfort on bonier placements. This one works well as a centerpiece in a larger sleeve project.
7. Wilting Flower and Skull Fine-Line

This pairs a skull with a flower that’s clearly past full bloom, petals drooping or slightly detached, done in delicate fine-line work with minimal shading. The wilting flower is the visual metaphor doing the heavy lifting here — it’s a softer, more romantic take on mortality than a straightforward skull alone. Best placed on the forearm, ribcage, or thigh at 3 to 5 inches, giving enough room for individual petal lines to stay distinct instead of merging. Ask your artist about negative space, meaning the untattooed skin left intentionally blank between petals, since this is what keeps the design from looking like a solid dark mass. Pain is moderate; ribcage placement is more tender than the forearm. This design ages gracefully and works for people who want a first tattoo with more emotional nuance than a stark skull image.
8. Candle Burning Down
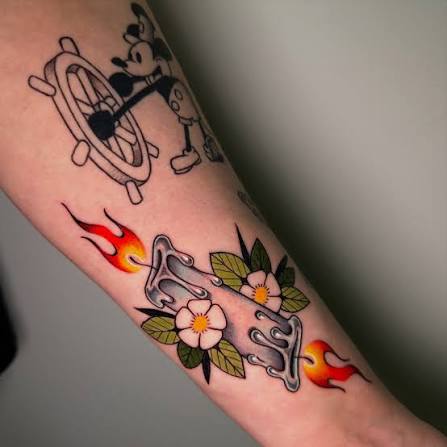
A candle with a shortened wick and dripping wax is a quieter memento mori symbol — it represents time passing without needing bones or skulls at all. This is typically done in fine-line or light blackwork, often with a small flame rendered using tiny negative-space gaps to suggest light without solid yellow ink (color fades faster and less predictably than black). A 2 to 4 inch version suits the wrist, ankle, or upper arm. Because the flame detail is small, ask your artist to slightly oversize the wick and flame area so it doesn’t collapse into a blur after healing. Wrist and ankle placements tend to be more sensitive due to thinner skin and less padding. This is a genuinely good subtle option for a first tattoo or for someone building a small collection of symbolic pieces.
9. Skeletal Hand Holding a Flower
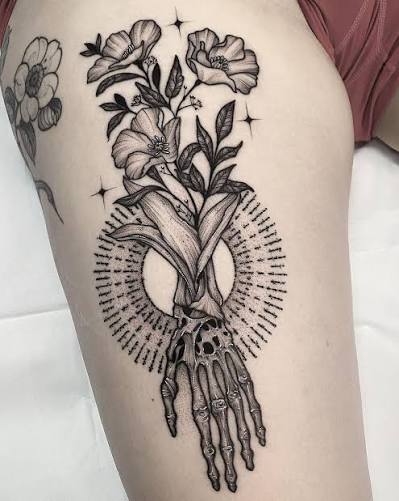
A bony hand gently holding or offering a flower is one of the more visually striking memento mori images, usually done in bold blackwork for the hand structure with finer linework for the petals. This contrast in line weight is what makes the piece pop rather than reading as one flat shape. It needs real real estate — 5 to 8 inches on the thigh, upper arm, or upper back — since finger bones and flower detail both need breathing room. Smaller versions lose the finger joint definition almost immediately. Bring reference images showing hand anatomy you like, since skeletal hands are surprisingly easy to get wrong proportionally. Pain runs moderate to high depending on placement. This design suits someone past their first tattoo who wants a bold, conversation-starting piece.
10. Moth with a Skull-Shaped Thorax

Certain moths naturally have skull-like markings, and this design leans into that by exaggerating the pattern into a clear skull shape on the moth’s body, framed by detailed wing linework. This is usually blackwork with fine-line wing veining layered on top, giving it real visual texture. It looks best at 4 to 6 inches on the shoulder, upper back, or forearm, where the wingspan has room to fully extend. Ask your artist about symmetry guides (a stencil centerline) since lopsided wings are one of the most common complaints with this design. Moderate pain overall, higher on the upper back near the spine. This one works well solo or as part of a larger nature-and-mortality themed piece, and it reads as less “dark” to casual observers than a straightforward skull.
11. Coffin and Rose in Negative Space
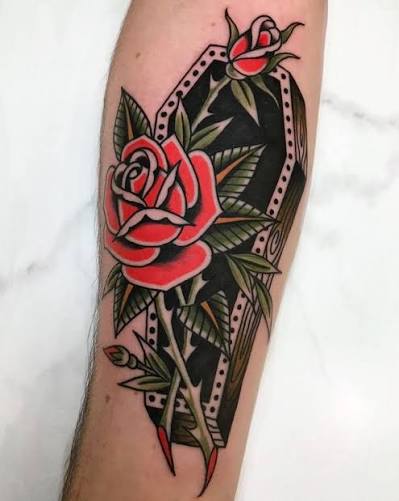
Negative space tattooing uses the untattooed skin itself as part of the image, so instead of a fully inked coffin outline, the coffin shape is implied by the black ink around it. Paired with a solid or fine-line rose, this creates a striking light-against-dark effect. This technique demands a genuinely skilled artist, since negative space only works if the surrounding linework is precise. Best at 3 to 5 inches on the forearm or calf, on skin without a lot of scarring or heavy tan, since negative space relies on clean contrast. Ask to see healed (not fresh) examples of the artist’s negative space work specifically — it can look great fresh and blotchy a year later if not done well. Pain is moderate. This isn’t the top pick for a first tattoo given the skill ceiling required.
12. Small Skull Behind the Ear

A tiny, single-needle skull tucked behind the ear is about as subtle as memento mori tattoos get. No shading, minimal detail, just a clean 1 to 1.5 inch outline. This placement is genuinely one of the more painful spots on this list — thin skin, close to bone, and a lot of nerve endings — so go in expecting a sharper sensation than a similarly sized piece on the arm. Healing takes a bit more attention here since hair and hats can rub against fresh ink. Ask your artist about appropriate needle grouping for small-scale detail; too fine a line can fade into an unreadable smudge within a decade on this particular spot due to constant friction. This is a low-commitment, easily hidden option, popular for people who want meaning without visibility at work.
13. Sundial with a Latin Phrase
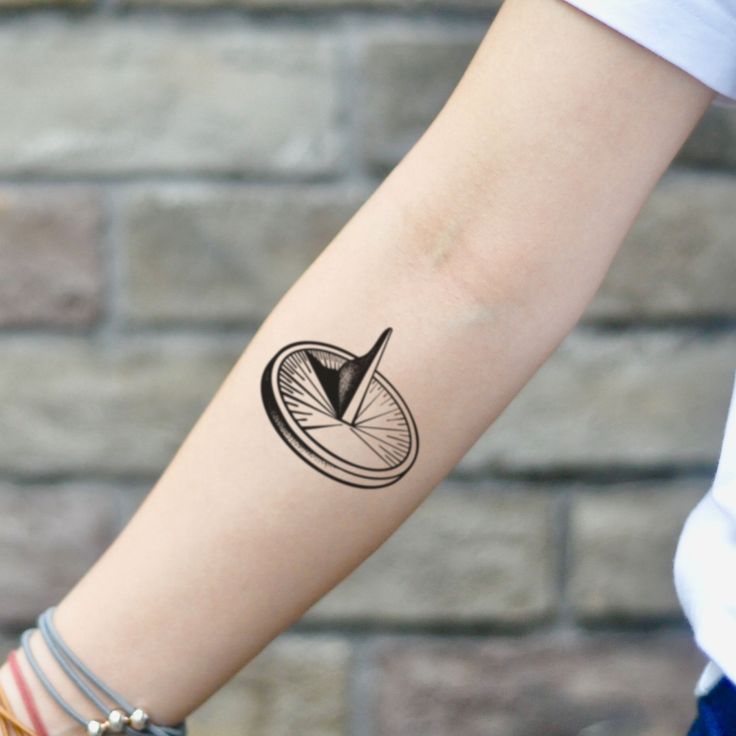
A sundial paired with a short phrase (often “tempus fugit,” time flies, or the memento mori phrase itself) combines symbolic imagery with lettering in one composition, usually in fine-line or light black-and-gray shading. The circular sundial shape naturally suits curved placements like the upper arm or calf, where the design can wrap slightly with the body’s contour. Aim for at least 3.5 inches across so both the sundial lines and the lettering stay legible over time. Ask your artist to mock up a stencil on your actual skin before the session so you can see how the curve affects the lettering spacing. Pain is moderate on the calf, lower on the upper arm’s fleshier section. This design suits people who like historical or academic aesthetics layered into their symbolism.
14. Skull with Hourglass Eye Sockets
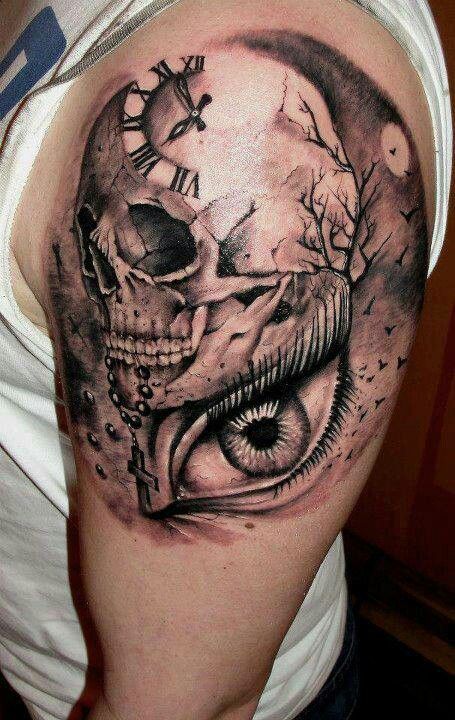
Instead of hollow eye sockets, this design places tiny hourglass shapes inside them, a compact way to combine two memento mori symbols into one image. It requires fine-line precision since the hourglasses are small relative to the overall skull. Best kept at 3 to 4 inches minimum on the forearm, shoulder, or ankle so the hourglass detail doesn’t disappear into a dark smudge. This is a good example of a design where going too small backfires — ask your artist directly whether your desired size can actually support the level of detail you’re picturing before you commit to a stencil. Moderate pain on fleshy placements, sharper on the ankle. Because it’s visually distinct from a standard skull, it photographs and ages well, staying recognizable even a decade out.
15. Anatomical Heart with Skull Details
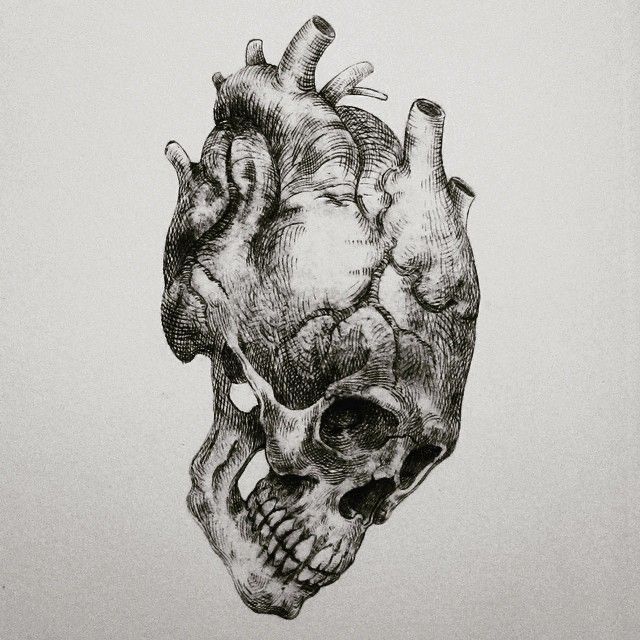
This design merges an anatomically-styled heart with skull elements worked into the surrounding linework, usually done in fine-line or moderate blackwork with some cross-hatch shading for depth. It’s a busier composition than a plain skull, so it needs more space than you’d think — 4 to 6 inches on the upper arm, thigh, or ribcage. Cross-hatching (thin overlapping lines used to build shadow) is a good term to bring up with your artist directly, since some artists prefer solid gray-wash shading instead, and the two look noticeably different once healed. Pain runs higher on ribs, moderate on the thigh or arm. This piece suits someone with at least one prior tattoo, since the detail level benefits from an artist who already knows how you heal.
16. Raven Perched on a Skull
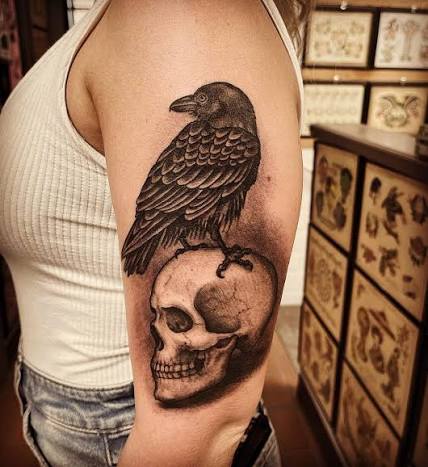
Ravens are a long-standing symbol of mortality in folklore, and pairing one perched on or beside a skull creates a strong narrative image, typically done in blackwork for the raven’s feathers with finer linework for the skull beneath. Feather texture is where artist skill really shows, so ask to see close-up healed photos of feather work specifically in their portfolio, not just the overall composition. This design needs 5 to 7 inches to keep both elements clear, working well on the upper back, thigh, or forearm. Solid black feather sections hold saturation well over time compared to lightly shaded gray feathers, which is worth discussing if you want this to look sharp a decade from now. Pain is moderate to high depending on placement. A strong statement piece for someone comfortable with bolder, darker imagery.
17. Withered Rose Bouquet with Skull
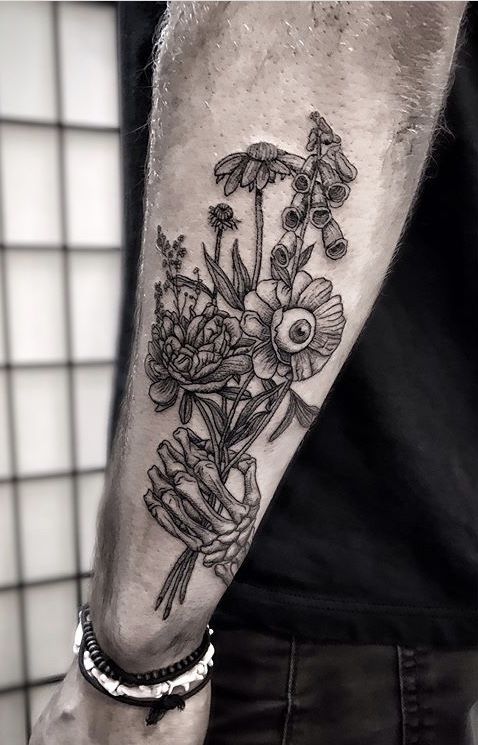
A small bouquet of roses in various stages of wilting, arranged around or behind a skull, done in fine-line work with light shading to differentiate healthy versus dying petals. This is a more feminine, softer take on the theme, relying on composition rather than dark saturation to communicate the message. It suits the thigh, ribcage, or upper arm at 4 to 6 inches, giving enough room for multiple rose stages to stay visually distinct from one another. Bring reference images showing petal shading you like specifically, since “wilting” can be interpreted very differently between artists. Pain is moderate, higher on ribs. This design works nicely as a larger, more detailed piece for someone who already has a smaller memento mori tattoo and wants to build on the theme.
18. Skull and Snake Coiled Together
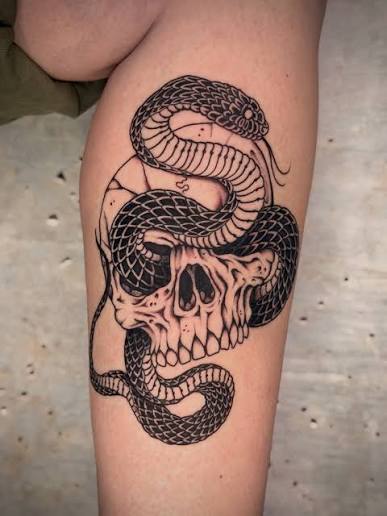
A snake coiling around or through a skull’s eye sockets is a classic dark-academia-adjacent design, usually done in dotwork or fine blackwork to render the scale texture along the snake’s body. Scale texture is genuinely time-consuming to tattoo well, so expect a longer session than a plain skull of the same size. This works best at 4 to 6 inches on the forearm, calf, or upper arm, where the coiling shape has room to move naturally with the limb. Ask your artist how they render scales — some use tiny consistent dots, others use short curved line strokes, and the visual result differs quite a bit. Pain is moderate to high given the detail density. This suits someone drawn to symbolic layering (snakes often represent transformation) rather than mortality alone.
19. Cracked Clock Face
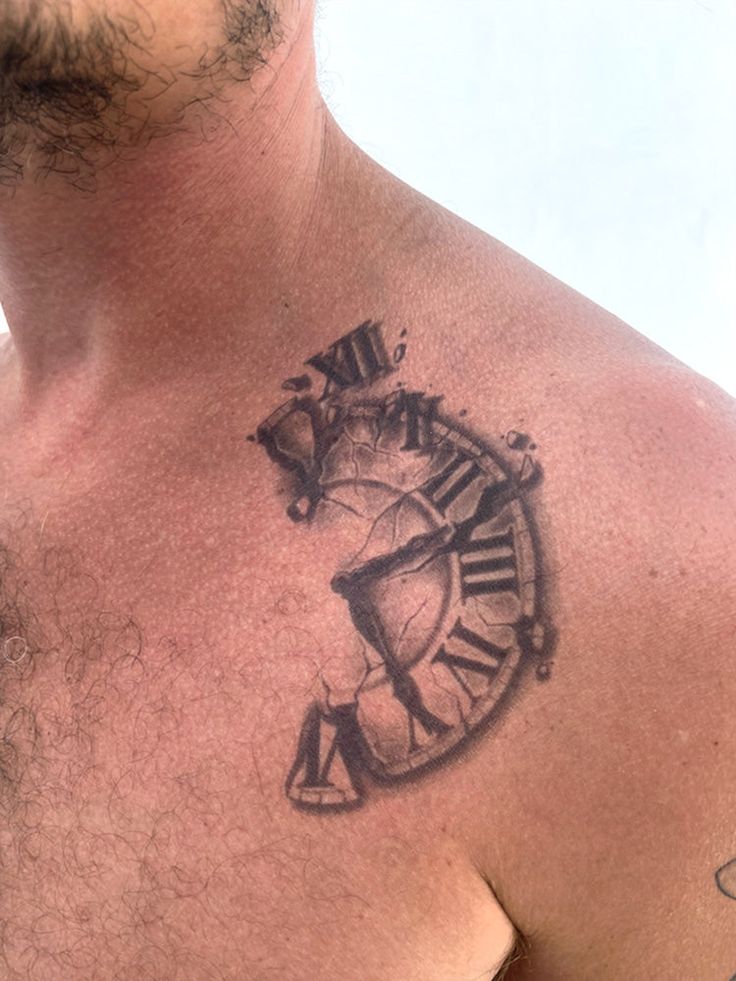
A clock face with visible cracks running through the glass, hands frozen at a specific time, represents time stopping rather than simply passing — a subtly different message than a standard hourglass. Typically done in black-and-gray with fine-line crack detailing layered over bolder numeral outlines. Best at 4 to 6 inches on the forearm or upper arm, where the round shape reads clearly. Ask your artist whether they’ll use solid black or gray wash for the shadowed portions of the clock — gray wash fades faster and needs more attentive aftercare in the first few weeks to heal evenly. Moderate pain overall. This design pairs well with a specific meaningful date worked subtly into the clock hands, which is a nice way to personalize what could otherwise be a fairly common design choice.
20. Minimalist Rib Cage Outline
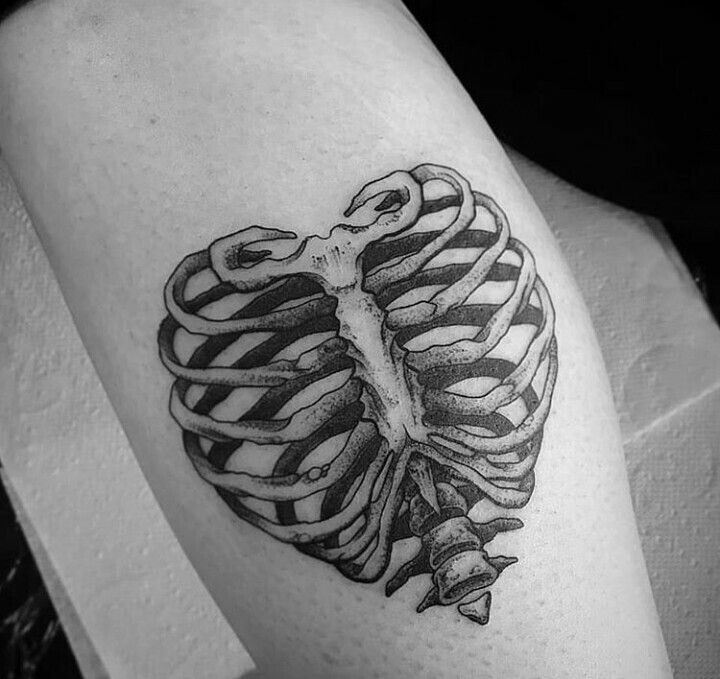
A simple outline of a rib cage, done in clean single-needle linework with zero shading, is about as understated as memento mori imagery gets while still being immediately recognizable. This suits the side ribcage itself (fittingly), the forearm, or the upper back, sized between 3 and 6 inches depending on placement. Because there’s no shading to hide imperfect linework, ask your artist directly about their experience with anatomical outlines specifically — bone proportion mistakes are obvious in a design this stripped-down. Ribcage placement on ribs is one of the more painful spots on this entire list due to thin skin directly over bone. This is a striking choice for someone who wants the mortality symbolism without any imagery that reads as overtly “dark” from a distance.
Understanding the Techniques: A Quick Reference
Memento mori designs get grouped under a few different tattooing techniques, and knowing the difference helps you brief your artist accurately.
Fine-line / single needle: Thin, delicate lines made with a small needle grouping, minimal to no shading, best for detailed but subtle designs. Ages by softening gradually over many years.
Blackwork: Solid, heavily saturated black ink filling large areas of the design, creating bold contrast and strong visual weight. Holds saturation longer than gray shading.
Dotwork: Shading and texture built from repeated small dots rather than solid fill or smooth gradient, producing a stippled, textured look. Takes longer to tattoo and typically costs more per hour.
Black-and-gray traditional: Bold outlines with gradient gray shading for depth and dimension, a middle ground between stark blackwork and delicate fine-line work.
Negative space: Uses untattooed skin as a visual element within the design itself, requiring precise surrounding linework to read correctly.
Best Placement Ideas
- Forearm — highly visible, moderate pain, easy to show off or cover with a sleeve for work
- Upper arm / shoulder — lower pain due to more muscle and fat padding, easy to conceal
- Ribs — higher pain due to thin skin over bone, harder to keep visible in professional settings, longer healing due to clothing friction
- Behind the ear — sharp, localized pain, very easy to hide, small-scale designs only
- Calf / ankle — moderate to high pain depending on exact spot, good for wrap-around compositions
- Thigh — lower pain, large flat canvas ideal for detailed pieces, easy to conceal
- Collarbone — higher pain over bone, high visibility, good for lettering pieces
Tips for Success
Look through an artist’s portfolio for healed photos, not just fresh ink — fresh tattoos look sharp on everyone, but healed results show you their actual linework quality and how their shading settles. Ask specifically about their experience with the technique you want (dotwork, fine-line, blackwork) since these are genuinely different skill sets, not just style preferences. Bring two or three reference images that show line weight and composition rather than one single “copy this exactly” photo, and be upfront that you want it personalized. If you’re torn between walk-in flash designs (pre-drawn, ready to tattoo that day) and a fully custom piece, know that custom work takes longer to book and usually costs more, but fits your body and vision more precisely.
Common Mistakes and How to Avoid Them
- Going too small for the detail level — dotwork and cross-hatched shading need real space to stay legible; ask your artist honestly whether your size idea supports your design idea
- Choosing a painful, high-maintenance placement for a first tattoo — ribs and behind-the-ear look great in photos but heal less predictably for beginners
- Skipping aftercare instructions — uneven healing affects how sharp linework and shading look long-term
- Copying a design exactly from a photo without personalizing it — a good artist can adjust proportions, add small personal details, or shift the composition slightly so it’s not identical to something already tattooed on someone else
- Not asking about touch-ups — fine lines and gray wash shading often need a touch-up appointment several weeks after initial healing, and not every studio includes this for free
Similar Variations
Nearly every design above can be resized down for a discreet placement or scaled up into a larger back or thigh piece. Solid blackwork skulls can be converted to dotwork for a softer, textured look, or stripped to a minimal outline for something more subtle. Florals and skulls pair well together across almost any combination on this list, and lettering can be added beneath most imagery to personalize a fairly common symbol into something specific to you — a name, date, or short phrase in your own handwriting style, digitized by the artist.
Aftercare Basics
Follow the specific aftercare sheet your artist gives you, since studios vary slightly in their recommended products and timeline. Generally, keep the area clean, avoid direct sun exposure and swimming while it’s healing, and don’t pick at any peeling skin. Healing typically runs somewhere between two and four weeks depending on placement and design size, though full settling of the ink can take a couple of months. If you notice anything that seems unusual during healing, check with your artist or a licensed dermatologist rather than guessing based on internet advice.
Quick FAQ
How much does a memento mori tattoo cost?
Smaller single-needle or minimalist pieces often run a few hundred dollars, while larger blackwork or dotwork compositions with more detail can run into the thousand-dollar range or higher, depending on your artist’s hourly rate and your region.
How painful is a memento mori tattoo?
Pain varies by individual and by placement — bony, thin-skin areas like ribs, ankles, and behind the ear tend to be more sensitive than fleshier spots like the upper arm or thigh. General pain tolerance differs from person to person, so talk to your artist about what to expect for your specific design.
How long does healing take?
Most designs heal on the surface within two to four weeks, though full ink settling can take six to eight weeks. Larger, more detailed pieces may take slightly longer to fully heal.
Will a memento mori tattoo fade or need a touch-up?
All tattoos fade gradually over years due to sun exposure and skin aging, and gray wash or fine-line work tends to soften faster than solid blackwork. Many artists recommend a touch-up appointment a few weeks after the initial session, and some designs benefit from a refresh after five to ten years.
Final Thoughts
Picking a memento mori tattoo isn’t really about finding the darkest, most dramatic skull design you can find — it’s about choosing an image and a technique that fits your pain tolerance, your lifestyle, and how you want the piece to look years down the road, not just on day one. Whether you land on a tiny single-needle skull behind your ear or a full blackwork hourglass across your shoulder, take the time to find an artist whose portfolio actually matches the technique you want, ask direct questions about size and placement, and treat the aftercare seriously. Do that, and your memento mori tattoo will hold its meaning — and its linework — for a very long time.