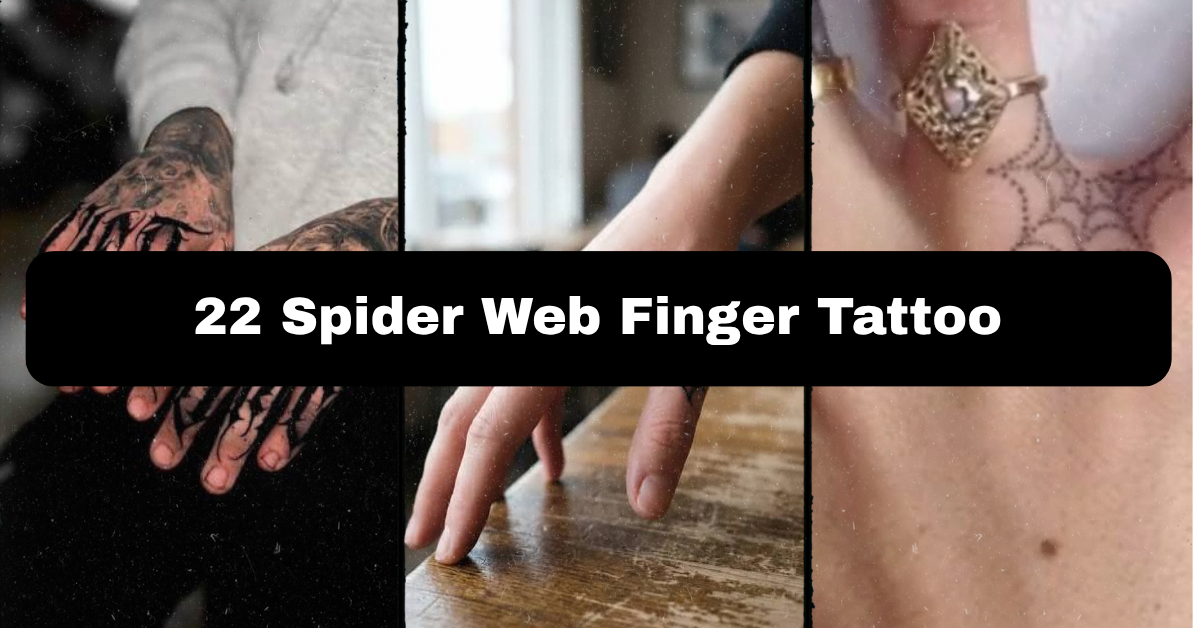
22 Spider Web Finger Tattoo Ideas: Placement, Pain, and What to Know Before You Book
Nervous about picking a spider web finger tattoo that ends up blurry or faded way sooner than you expected? That’s a smart thing to think through first, since fingers are one of the trickiest spots on the body for ink to hold long term.
So what makes a good spider web finger tattoo? Simple, bold linework with wide spacing between the web strands works best, since fingers see constant friction and washing, and overly fine detail tends to blur or fade faster here than almost anywhere else on the body. Placement between the thumb and index finger or across the knuckle also affects both how visible the design stays and how well it holds its shape.
Stick around, because we’ll cover placement tradeoffs, realistic pain levels, healing time, how to brief an artist on finger-specific technique, and the mistakes that lead to premature fading or blurring on this particular spot.
Why Finger Placement Needs Its Own Approach
Fingers are unlike almost any other tattoo placement, and it’s worth understanding why before you commit to a design. The skin here is thinner, there’s less fatty tissue underneath to cushion the ink, and your hands go through constant washing, friction, and sun exposure in a way most other body parts don’t. That combination means finger tattoos, spider webs included, often fade or blur faster than pieces placed on the forearm or thigh, and many people need a touch-up appointment within the first year or two just to keep the design crisp. None of that means you shouldn’t get one, it just means the technique and design choice matter even more here than usual. Bolder linework with intentional spacing tends to hold up better than delicate, tightly packed detail, which is exactly why the classic web look actually works in this spot better than a lot of other fine designs would.
1. Classic Bold Web Between Thumb and Index Finger
This is the most recognizable version, a symmetrical web spanning the webbing between the thumb and index finger, done in bold, consistent linework rather than fine detail. Thicker lines hold up significantly better here than delicate ones, since this exact spot gets constant stretching and friction from everyday hand movement. Best kept to a size that fits naturally within the webbing without stretching onto the palm or back of the hand. Pain in this area tends to run moderate to higher, since there’s very little padding between skin and bone here. Ask your artist about line thickness specifically for this placement, they may recommend going bolder than you’d initially picture to account for how fast fine detail fades here. This is the most classic and widely recognized version of this design. Knuckle web wraps take the concept in a different direction.
2. Web Wrapping Across the Knuckles
This spreads a simplified web pattern across the back of two or more knuckles, using the natural creases of the hand as part of the design’s structure. Line weight needs to stay bold and the pattern relatively simple, since knuckles see even more constant movement and friction than most other finger spots. Best kept minimal, three or four connecting strands rather than a dense, layered web. Pain here runs on the higher end given the bony structure and thin skin over the joints. Ask your artist how they plan to account for the skin folding when your hand is closed into a fist, since a web that looks even with your hand flat can distort when your fingers bend. This suits people wanting a bold, highly visible statement piece. Small web accent on a single finger simplifies things.
3. Small Web Accent on a Single Finger Segment
Rather than spanning the whole hand, this places a small, simplified web on just one segment of a single finger, between the first and second knuckle for example. Fine line technique can work here in a limited way, though even small finger tattoos benefit from slightly bolder strokes than you’d use elsewhere on the body. Keep the design under half an inch to fit the available skin without crowding. Pain is generally moderate given the bony, low-padding area. This is a lower commitment option than a full hand web, and easier to keep subtle. Ask your artist about realistic touch-up timelines for this exact placement, small finger tattoos often need a refresh sooner than larger pieces elsewhere. Dotwork web textures bring a different visual approach.
4. Dotwork Web with Textured Strands
Dotwork means the shading and texture effect is built from tiny individual dots rather than solid lines, which can add subtle depth to a web design’s strand texture. This technique is more demanding on fingers specifically, since dots need to be spaced widely enough to avoid blurring together as the skin here ages and moves constantly. Best used sparingly, as accents along a few strands rather than the entire web, given how finger skin handles fine detail over time. Pain is moderate to higher. Ask your artist directly whether they recommend dotwork for finger placement specifically, some artists prefer to reserve this technique for areas with more stable, padded skin. This suits people wanting a bit more texture than flat linework, understanding the trade-off in longevity. Blackwork solid web sections offer a bolder alternative.
5. Bold Blackwork Web with Solid Fill Sections
Blackwork means solid, heavily saturated black fill rather than fine outlines, and applying it to select sections of a web design, like the corners or the center point, adds visual weight and contrast against the thinner strand lines. This combination tends to hold up well on fingers precisely because the solid sections resist fading better than delicate linework does. Best on the thumb webbing or back of the hand where there’s enough space for the solid sections to read clearly. Pain runs moderate to higher given the denser saturation. Ask your artist about their solid fill technique specifically for this placement, uneven saturation is more noticeable on fingers given the smaller overall design size. This suits people wanting a bolder, longer-lasting take on the classic web look. Wraparound finger web bands take a different structural approach.
6. Wraparound Web Band Around a Finger

This wraps a simplified web pattern fully around one finger, like a ring, rather than sitting flat on one side. This requires careful planning since the design needs to connect seamlessly where it meets itself around the finger’s circumference. Best kept simple, a basic radiating pattern rather than a dense, layered web, given the limited surface area available. Pain runs moderate to higher given the bony, low-padding placement. Ask your artist how they’ll handle the seam where the pattern connects, a poorly planned connection point is one of the more common issues with wraparound finger designs. This is a bold, highly visible choice best suited to people comfortable with a design that’s difficult to easily hide. Minimalist single-line webs simplify the concept dramatically.
7. Minimalist Single-Line Web

This strips the web down to just a few simple connecting lines radiating from a center point, without the layered concentric rings of a traditional web design. The appeal is in the restraint, a design that suggests the full web shape without dense detail that’s likely to blur on this placement anyway. Best kept small, under an inch, on the thumb webbing or a single finger segment. Pain is generally moderate given the placement, though the design itself is quick to complete. This is a smart choice specifically for finger placement, since simpler designs age better here than intricate ones. Ask your artist to keep the lines evenly spaced and bold enough to stay legible for years. Web with a small spider accent adds a classic pairing.
8. Web with Small Spider Accent

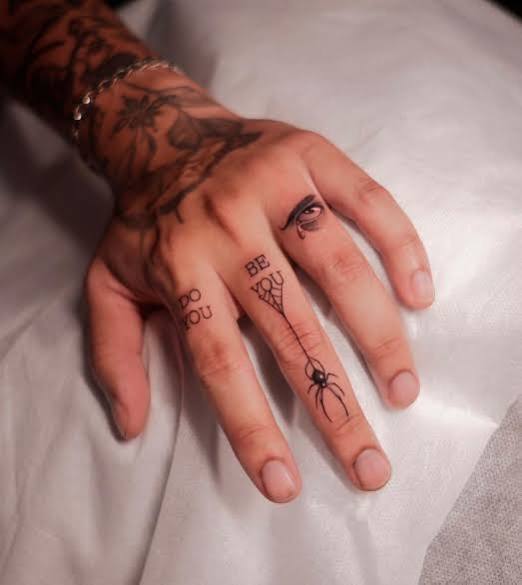
This pairs the web pattern with a tiny spider positioned at the center or along one edge, done in simple, bold linework to match the web’s own style. Keep the spider small and simplified, an overly detailed spider at this scale is one of the fastest designs to blur on finger placement. Best on the thumb webbing or back of the hand with enough space for both elements. Pain is moderate to higher given the placement. Ask your artist to keep the spider’s legs slightly thicker than you might initially want, thin spider legs are especially prone to fading on this part of the body. This is the most literal, complete version of the classic spider web tattoo concept. Half web designs simplify the coverage area.
9. Half Web Design Along the Finger Edge
Instead of a full radiating web, this uses just a partial section, following one edge of the finger or the side of the hand near the thumb, rather than wrapping or centering the pattern. This composition works well for people who want the web’s visual language without covering the whole available space. Line weight should stay bold given the placement. Best sized to follow the natural available skin without forcing the design into an awkward shape. Pain is moderate to higher. Bring your artist a reference of the full web pattern you like, then ask them to sketch how it looks as a partial section, since not every web design splits cleanly. This suits people wanting something less visually dominant than a full hand or finger web. Web centered on the palm side brings a different texture consideration.
10. Web Centered on the Inner Palm Edge
This places the web along the outer edge of the palm near the pinky or thumb, rather than the back of the hand, a spot that sees even more friction from gripping and daily use. Bold, simple linework is essentially required here, since this is one of the most demanding placements on the entire body for ink retention. Keep the design small and the strand count low. Pain runs high given the dense nerve endings in this area. Ask your artist directly about realistic longevity expectations here, palm-adjacent tattoos often need touch-ups more frequently than almost any other spot. This is a bold, less common choice best suited to people who understand and accept the higher maintenance involved. Two-finger connecting web designs link adjacent fingers.
11. Web Connecting Two Adjacent Fingers
This spans a simplified web pattern across the gap between two fingers when they’re held together, appearing as one connected design rather than separate pieces. This requires the artist to plan carefully for how the design reads with fingers both together and spread apart, since the visual connection only fully appears in one position. Best kept simple and bold given the challenging placement. Pain is moderate to higher. Ask your artist to show you a mock-up with your fingers in both positions before finalizing the design, this helps set realistic expectations for how it will actually look day to day. This is a more unusual, conversation-starting take on the classic web concept. Web with fine gradient shading adds subtle depth.
12. Web with Light Gradient Shading
This adds subtle grey shading along the web strands, lighter near the outer edges and slightly darker toward the center, for a bit more dimension than flat linework alone. This technique is more demanding on finger placement specifically, since gradient shading tends to fade unevenly faster than solid linework in high-friction spots. Best used sparingly and combined with bolder base linework as a foundation. Pain is moderate to higher. Ask your artist directly whether they recommend this technique for your specific placement, some experienced artists will advise against gradient shading on fingers precisely because of how quickly it can look patchy. This suits people wanting more visual depth while understanding the added maintenance this choice involves. Matching web tattoos for friends bring a shared design into the mix.
13. Matching Small Web Tattoos for Friends
Two friends each get a small, simplified web on the same finger placement, done in identical bold linework so the designs read as a matched pair. Keep the design small and simple given the finger placement’s demands, this isn’t the spot for intricate detail even in a matching design. Best on the thumb webbing or a single finger segment for both people. Pain is moderate to higher given the shared placement. Ask your artist to use the same reference file for both appointments, even if they’re scheduled separately, to keep the two designs visually consistent. This suits close friends wanting a bold, easily visible matching choice. Web with subtle color accent brings a less common variation.
14. Web with a Single Color Accent
This keeps the majority of the web in solid black or dark grey but adds one small pop of color, often a tiny bead or dot at the center point. Color pigment tends to fade faster than black ink under normal circumstances, and finger placement accelerates that further, so this accent should be understood as something that will likely need refreshing sooner than the rest of the design. Best on the thumb webbing where there’s enough space for the small color detail. Pain is moderate to higher. Ask your artist directly about color retention expectations for this specific placement, this combination requires more realistic planning than most other spots on the body. This suits people wanting a small design detail that stands out. Larger back of hand web designs expand the coverage.
15. Larger Web Spanning the Back of the Hand
This extends a bolder, more elaborate web pattern across the majority of the back of the hand rather than staying confined to the fingers or thumb webbing. This gives the design more visual presence and allows for a slightly more detailed pattern than the tighter finger placements would support. Best planned with enough spacing between strands to avoid the design reading as one solid dark mass once healed. Pain is moderate to higher given the bony structure of the hand. Ask your artist for a stencil preview with your hand in a relaxed, slightly closed position, since hand tattoos shift in appearance more than most other placements depending on hand posture. This is a bold, highly visible choice for people ready for a serious commitment. Micro web accents scale things down significantly.
16. Micro Web Accent on the Side of a Finger
This shrinks the concept down to a tiny scale, a few short connecting lines on the side of a single finger rather than a full radiating pattern. This is the most subtle option on this list, generally under half an inch. Pain is moderate given the bony placement despite the small size. This is a strong low-commitment option for people curious about finger tattoos but not ready for a larger, bolder piece. Ask your artist about realistic expectations at this scale specifically, extremely small finger tattoos are often the first to need a touch-up given how little ink is actually deposited. This suits people wanting the idea of the design without a large visual commitment. Web with negative space detailing adds an artistic technique.
17. Web Using Negative Space Detailing
Negative space tattooing uses untouched skin as part of the actual design, so instead of every strand being solid black, some sections are defined by what’s left unshaded around black fill. This creates a more dimensional, layered look for a web design specifically. This requires an experienced hand, and it’s worth noting that negative space detail is one of the more demanding techniques to keep crisp on finger placement long term. Best kept small and simple given the added complexity. Pain is moderate to higher. Ask specifically to see portfolio pieces showing this technique on finger or hand placement, not just larger body areas, since the skill required differs by placement. Web paired with a small moon or star accent brings in additional symbolism.
18. Web Paired with a Small Moon or Star Accent
This adds a tiny moon or star shape near one edge of the web, giving the design a bit more personal symbolism beyond the classic pattern alone. Keep the additional element small and simple, matching the bold linework of the web itself so neither piece looks like an afterthought. Best on the thumb webbing or back of the hand with enough space for both elements. Pain is moderate to higher given the placement. Ask your artist to plan the full composition together from the start rather than adding the accent as a separate step, spacing matters for the pieces to read as one cohesive design. This suits people wanting a bit more personal meaning attached to the classic web concept. Symmetrical double web design covers more of the hand.
19. Symmetrical Double Web Across Two Fingers
This places a matching, mirrored web pattern on two separate fingers of the same hand, designed so they read as a coordinated pair rather than two unrelated tattoos. This requires more planning than a single web, since proportions and spacing need to stay consistent across both placements. Best kept simple and bold given the demands of finger placement generally. Pain is moderate to higher across both spots. Ask your artist to sketch both designs together as one composition first, this keeps the mirrored pattern actually symmetrical rather than approximated separately. This suits people wanting a bolder, more elaborate take on the classic single web design. Web combined with simple linework jewelry brings a decorative element.
20. Web Combined with Simple Ring-Style Linework

This pairs a small web accent with a thin, simple line design elsewhere on the same finger, mimicking the look of a ring or band alongside the web itself. Both elements should use consistent, bold linework given the shared placement demands. Best kept minimal, since combining two design elements on such a small area requires careful spacing to avoid crowding. Pain is moderate to higher given the finger placement. Ask your artist to finalize the spacing between the two elements first, before finalizing either design individually, so they sit proportionally together on the available skin. This suits people wanting a bit more decorative detail alongside the classic web shape. Larger elbow to hand web trail expands the concept dramatically.
21. Extended Web Trail from Wrist to Finger
This extends a web-inspired pattern starting on the wrist and trailing down to connect with a smaller web accent on a finger, creating one connected composition rather than an isolated hand piece. This is a bigger undertaking requiring careful planning around how the design flows across the wrist joint and onto the hand. Best planned entirely with your artist before the first session given the complexity. Pain varies significantly across this area, with the wrist and finger sections both running toward the more sensitive end. Ask your artist for a complete stencil preview across the whole intended path before any linework begins. This suits people ready for a bold, highly visible, and higher maintenance design. Our final idea brings the classic concept back to its simplest form.
22. Traditional Full Web on the Thumb Webbing

This closes out the list with the most enduring version, a complete, symmetrical web filling the thumb and index finger webbing, done in bold, simple linework designed specifically to hold up against this placement’s unique demands. Keep the strand count moderate, six to eight connecting lines rather than an overly dense pattern, since simplicity is what helps this design age well here specifically. Pain runs moderate to higher given the low padding in this exact spot. Ask your artist for their honest recommendation on strand spacing based on your specific hand size, since what works on a larger hand may look cramped on a smaller one. That wraps our full list of twenty-two spider web finger tattoo ideas.
Best Placement Ideas
- Thumb and index finger webbing: the classic spot, good visibility, moderate to higher pain given low padding
- Knuckles: bold and visible, but sees the most friction and movement, requiring simpler linework
- Single finger segment: lower commitment, easier to keep subtle, still moderate pain given bone proximity
- Back of the hand: more surface area for larger designs, still bony and moderately sensitive
- Palm edge or inner hand: highest maintenance placement on this list, best understood as a higher upkeep choice from the start
Tips for Success
Choosing the right artist matters more than usual for finger tattoos specifically, since not every artist has extensive experience with how ink behaves on this particular part of the body. Look through an artist’s portfolio for other hand or finger placement work, not just their general portfolio, and ask directly how those pieces have held up over time if you can find any healed photos. Bring a clear reference image to your consultation, and be upfront about wanting an honest recommendation on line weight and spacing rather than exactly what’s in the picture, since finger placement often needs adjustments from a typical reference. Ask about their realistic expectations for touch-ups on this placement specifically, a good artist will be upfront that finger tattoos often need more maintenance than pieces elsewhere on the body. Confirm licensing and sterilization practices as well.
Common Mistakes and How to Avoid Them
- Choosing overly fine or densely packed linework: finger skin doesn’t hold delicate detail as well as other placements, bolder and simpler tends to age better
- Skipping proper aftercare: hands are hard to keep still and clean during healing, but consistent care matters even more here given how demanding this placement already is
- Not asking about touch-up expectations upfront: finger tattoos frequently need a refresh sooner than pieces elsewhere, and knowing this ahead of time avoids disappointment
- Copying a reference design exactly without adjusting for placement: a web design that works beautifully on the forearm may need to be simplified and bolded to hold up on a finger
- Ignoring workplace or professional visibility considerations: hand and finger tattoos are some of the hardest to conceal, so it’s worth thinking through this in advance
Similar Variations
Most of these designs can be simplified further for even lower maintenance, or expanded onto the back of the hand for a bolder statement if you decide you want more coverage later. A dotwork or shaded version can be simplified into pure bold linework for better longevity, and a small single finger accent can be extended into a full thumb webbing design down the line if you want to start small and build up. Matching versions for friends can also start as a small shared design and expand individually later without losing the original connection.
Aftercare Basics
General aftercare typically involves keeping the area clean, avoiding direct sun exposure, and avoiding soaking the tattoo in water such as pools or baths during the initial healing window. Hands are especially hard to keep protected simply because you use them constantly throughout the day, so extra care around washing dishes, exercising, or other repetitive hand tasks is worth planning for during the first couple of weeks. Avoid picking at any peeling skin, since this can affect how the ink settles. Every studio provides its own specific aftercare sheet, and you should always follow your individual artist’s instructions over generic advice. If you notice unusual redness, swelling, or irritation beyond normal healing, consult a licensed dermatologist or your artist promptly. Pain tolerance and healing experiences vary significantly by individual, and this article isn’t a substitute for professional medical guidance.
Quick FAQ
How much does a spider web finger tattoo typically cost? Cost varies by size and detail, but small single finger or thumb webbing designs often start in the low hundreds. Given how quickly finger tattoos can need touch-ups, it’s worth factoring in that additional cost down the line rather than just the initial session price.
Is a spider web finger tattoo more painful than other placements? Yes, generally. Fingers have thin skin, little padding, and sit close to bone, which makes this one of the more sensitive placements on the body compared to fleshier areas like the forearm or thigh.
How long does a spider web finger tattoo take to heal? Surface healing typically takes around two to three weeks, though hands are harder to keep protected during that window given how much you use them daily. Full settling can take a few weeks beyond that, and this placement often needs a touch-up sooner than other spots to stay crisp.
Will a spider web finger tattoo fade faster than other tattoos? Generally, yes. Finger skin sees more friction, washing, and sun exposure than most other placements, and thinner skin here holds ink less permanently than fleshier areas. Many people plan for an occasional touch-up as part of choosing this placement rather than as a sign anything went wrong.
Final Thoughts
Finding the right spider web finger tattoo really comes down to accepting the trade-offs this placement involves and choosing a design, bold linework, simple strand count, realistic size, that’s actually built to hold up here rather than fighting against what fingers can reasonably support. None of these twenty-two ideas are one-size-fits-all, and that’s really the point, the best version of this design is the one that balances the classic look you want with the practical realities of getting tattooed on your hand.
Take your time finding an artist with real, demonstrated experience in hand and finger placement specifically, ask the questions we covered, and trust that going in with realistic expectations about touch-ups and upkeep is what keeps a spider web finger tattoo looking good for years to come.