19 Men’s Full Sleeve Tattoo Ideas: Themes, Placement, and Planning Guide
Men’s full sleeve tattoo ideas involve a lot more planning than a single design, and this guide comes from real time spent around studios watching those exact planning conversations happen, not from a stock photo roundup. Every theme below comes with the technical detail that actually decides whether a sleeve looks cohesive in year one and still looks cohesive a decade later.
So what makes a great men’s full sleeve tattoo? A strong sleeve needs one consistent technique, whether that’s black and grey realism, bold traditional, or blackwork, plus a clear focal point and background filler that ties everything together instead of a scattered collection of unrelated designs. Planning the whole arm before the first session also keeps the flow and spacing consistent from shoulder to wrist.
Keep reading for zone-by-zone pain notes, a realistic session and healing timeline, rough cost ranges, and exactly what to bring to your first consultation so the finished sleeve matches the vision in your head instead of a patchwork of separate ideas.
Why a Full Sleeve Needs More Planning Than a Single Tattoo
A full sleeve covers the entire arm from shoulder to wrist, and that scale changes everything about how you approach it. A single tattoo just needs to look good on its own, but a sleeve needs every piece to work together, consistent line weight, a shared color palette or shading style, and a layout that flows naturally around the arm’s curves and joints. Competitor lists often show a gallery of unrelated arm tattoos and call it a sleeve, but a real sleeve is planned as one composition from the start, usually with a focal point (the main image that draws the eye) and background filler (clouds, water, smoke, or geometric patterns that connect everything else). Below are 19 sleeve themes and approaches, each with the planning details that matter before you book your first session.
Japanese Traditional Irezumi-Style Sleeve
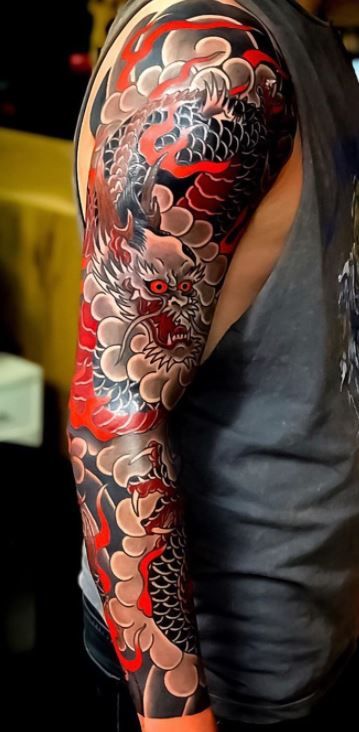
This style uses bold, thick outlines, solid color fill, and minimal negative space, following conventions that have shaped Japanese tattooing for generations. A koi, dragon, or tiger typically serves as the focal point, wrapping around the upper arm or forearm, while wind bars, clouds, or waves fill the background to tie the whole composition together. This style needs a full arm’s worth of space to include its traditional background elements properly, so expect the whole sleeve to take shape over 4 to 8 sessions depending on detail level. Ask your artist specifically about their experience with this style’s conventions, since background flow and color saturation matter as much as the focal image itself. Pain builds steadily across each session, with the inner elbow and armpit area consistently ranking as the most sensitive zones. This theme suits someone ready for a serious, long-term commitment rather than a first tattoo.
Black and Grey Realism Portrait Sleeve
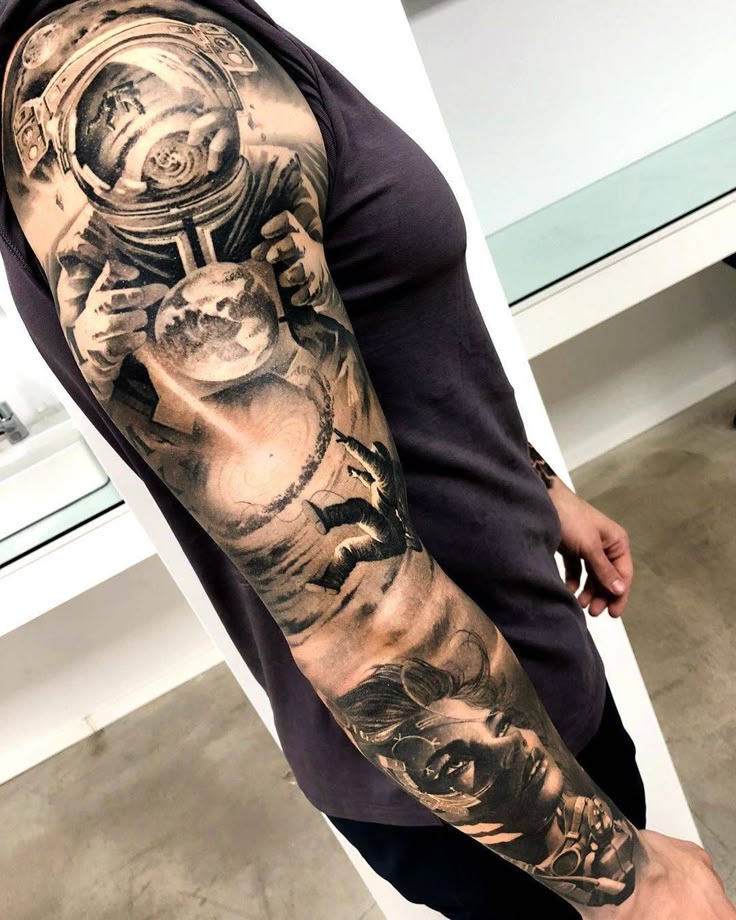
Black and grey realism uses diluted black ink to build soft, photographic-looking shading and depth, often centered on a portrait, a person, an animal, or a symbolic figure, rendered with real dimension rather than flat linework. This is one of the more technically demanding sleeve styles and needs an artist experienced specifically in realism, not just traditional or blackwork tattooing. The upper arm and forearm both work well as focal zones, with transitional shading connecting them across the elbow. Ask to see healed photos of prior realism work specifically, since shaded portraits can look noticeably different a year out than fresh off the needle. Sessions here tend to run long given the detail and blending involved, with cumulative discomfort building through each sitting. This theme suits someone with a clear, specific image in mind and the patience for multiple long sessions to get the shading right.
Biomechanical Sleeve
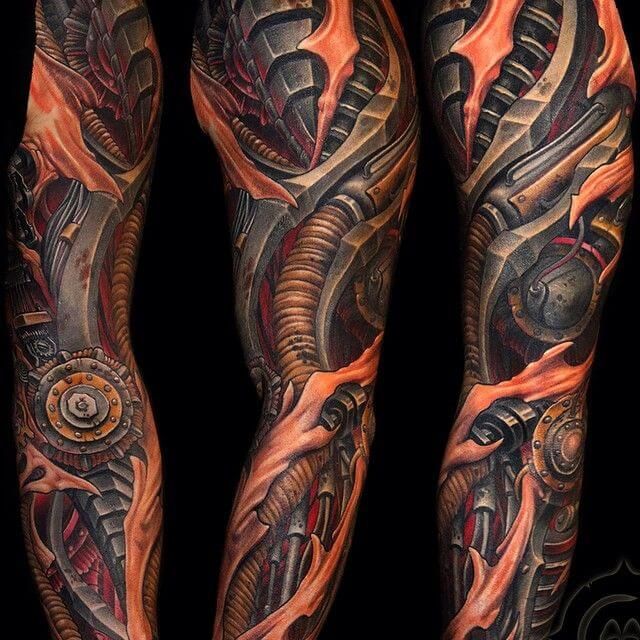
Biomechanical designs blend mechanical or robotic elements, gears, pistons, exposed wiring, with organic shapes that look like they’re bursting through the skin itself, creating a striking illusion of machinery beneath the surface. This style relies heavily on shading and depth to sell the 3D effect, so it typically pairs black and grey realism techniques with sharp, precise linework for the mechanical parts. The forearm and upper arm both work well, since the design can follow the arm’s natural muscle contours to enhance the illusion. Ask your artist to sketch the composition directly on your arm before finalizing, so the mechanical flow lines up with your specific muscle shape. Sessions run long given the shading complexity, and this theme suits someone wanting a distinctive, less common sleeve concept rather than a first tattoo.
Blackwork Tribal Sleeve
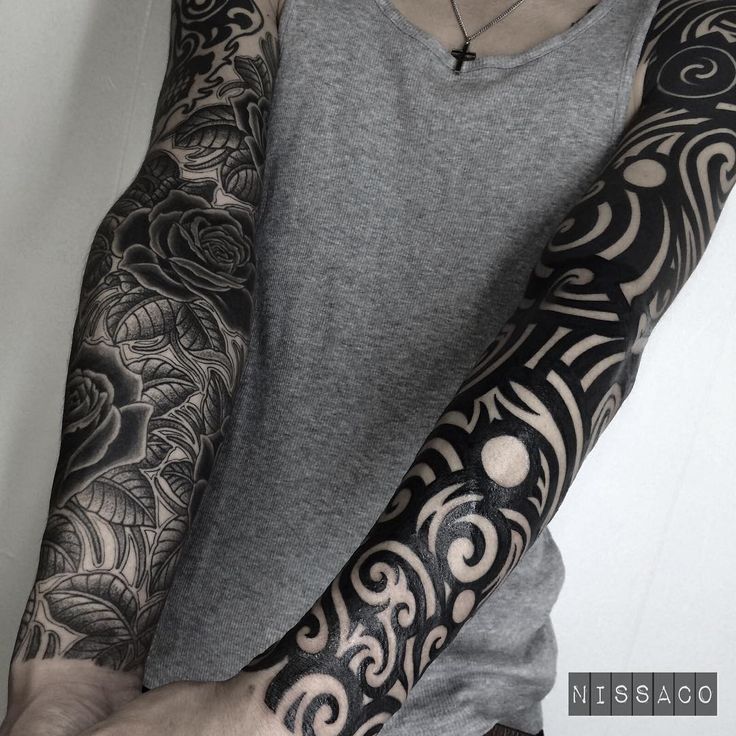
A tribal-style sleeve uses bold, solid black linework in interlocking geometric or organic shapes, a style that’s remained a classic sleeve choice because the high contrast reads clearly even from a distance. Unlike more detailed styles, this one relies on shape and negative space rather than shading or color, which actually makes the healing process a bit more predictable since there’s less to fade unevenly. Keep the pattern’s flow consistent from shoulder to wrist, since a break in the visual rhythm is one of the more common mistakes with this style. Ask your artist about their approach to negative space specifically, since the untouched skin between shapes matters as much as the black fill itself. Sessions tend to run shorter than realism work, though solid fill still means steady, moderate discomfort throughout. This theme suits someone wanting a bold, high-contrast sleeve that ages well over decades.
Neo-Traditional Color Sleeve
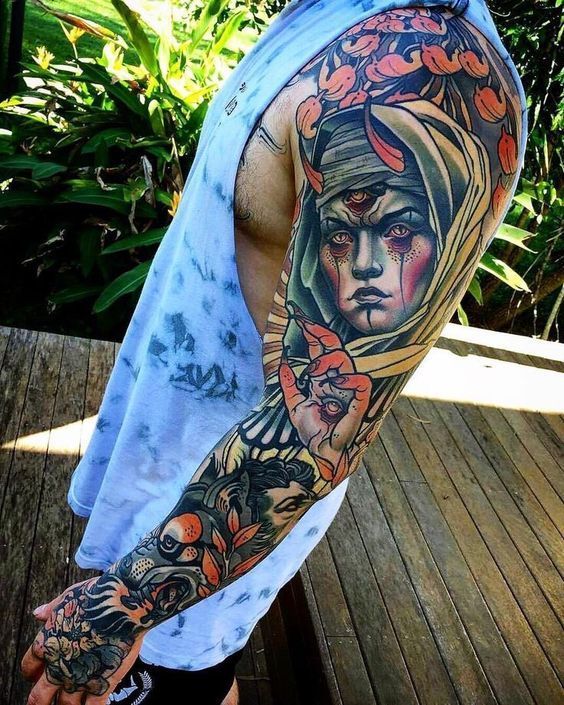
Neo-traditional style takes the bold outlines and clean shapes of classic American tattooing and adds more detailed shading and a wider color palette, often featuring animals, florals, or symbolic figures with a slightly illustrative, almost storybook quality. This style needs a color-experienced artist, since managing saturation and gradient blending across multiple color sections is trickier than working in black and grey alone. The upper arm and forearm both suit this style well, with a focal image on each and connecting color-filled background elements bridging the elbow. Ask specifically about color fading expectations and touch-up intervals, since color work generally needs more long-term maintenance than solid black. Sessions run moderate to long depending on color complexity. This theme suits someone wanting a vibrant, illustrative sleeve rather than a monochrome one.
American Traditional Flash Sleeve
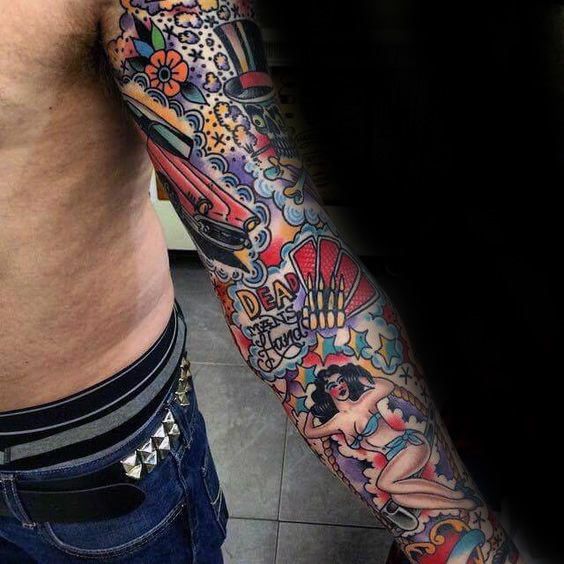
American traditional uses bold, thick outlines, a limited color palette (often just red, green, yellow, and black), and classic imagery like anchors, swallows, roses, and daggers, a style with deep roots in tattoo history that’s built specifically to age well. This style relies on simplicity and bold contrast rather than fine detail, so it holds its shape and color longer than more delicate or highly detailed styles. Multiple smaller flash-style images typically combine across the sleeve rather than one large focal piece, connected by banners, stars, or simple background linework. Ask your artist about classic flash placement conventions, since spacing and flow matter more than they might in a more freeform composition. Sessions run shorter individually but add up across the whole sleeve. This theme suits someone wanting a classic, time-tested look that’s proven to age well.
Skull and Reaper Dark Theme Sleeve
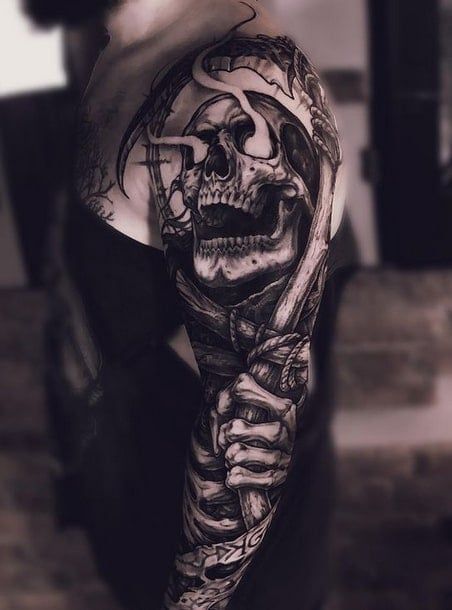
This theme centers on darker, moodier imagery like skulls, hooded figures, or gothic symbols, usually rendered in bold blackwork or black and grey shading rather than color, to keep the tone consistent and avoid anything overly graphic. A single large focal skull or figure typically anchors the upper arm, with smaller supporting elements like roses, smoke, or chains filling out the forearm and connecting sections. Ask your artist to keep imagery stylized rather than hyper-realistic, which tends to read better across a full sleeve and ages more predictably over time. Sessions run long given the shading and detail involved, with steady, building discomfort typical of larger black and grey work. This theme suits someone wanting a bold, dark aesthetic rather than a bright or colorful sleeve, and it’s a serious, long-term project rather than a first tattoo.
Religious and Spiritual Sleeve
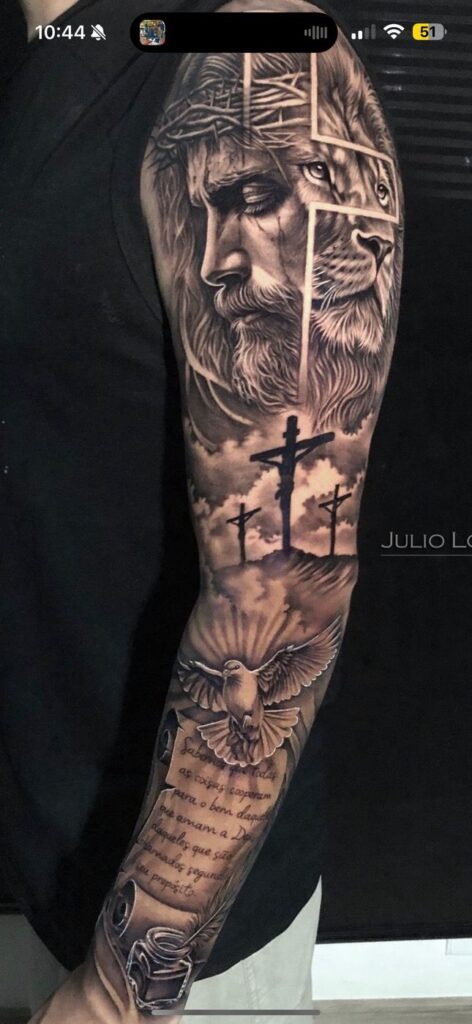
This theme incorporates religious or spiritual imagery, a saint, a cross, praying hands, rendered in either black and grey realism or bold traditional style depending on the desired tone. A central figure usually anchors the upper arm as the focal point, with rays of light, clouds, or scripture-style lettering filling the background to connect the composition. Ask your artist about lettering placement specifically if you’re including a verse or phrase, since script needs to stay legible at actual arm scale rather than looking cramped. Sessions run long given the detail typical of figure work, with the inner elbow ranking among the more sensitive zones regardless of the specific imagery chosen. This theme suits someone with deep personal or spiritual meaning behind the design, and it works well as a long-term project built out over several sessions.
Watercolor-Accented Sleeve
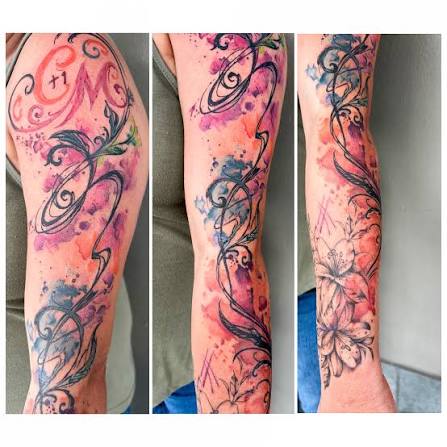
A watercolor-accented sleeve blends soft, blended color washes with a more defined linework focal image, giving the piece an artistic, painterly quality without losing a clear central subject. The linework portion typically anchors the upper arm, while looser watercolor splashes fill the forearm and connecting areas. Because watercolor sections lack a hard outline holding the pigment in place, they tend to fade and soften more noticeably over 5 to 10 years than the linework portions, so discuss touch-up expectations upfront. Ask your artist how they plan to balance the crisp focal image against the looser color work so the whole sleeve doesn’t end up looking mismatched. Sessions vary depending on how much of the sleeve uses watercolor versus solid linework. This theme suits someone wanting a more artistic, less traditional sleeve look.
Space and Cosmic Sleeve
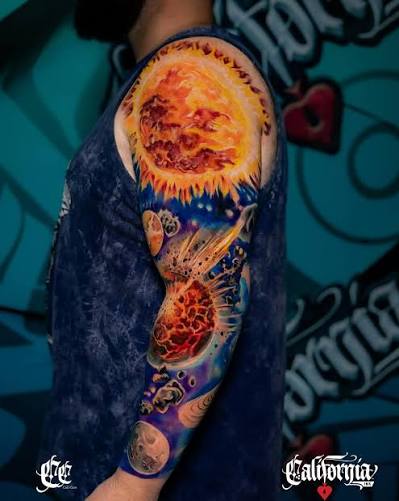
A space-themed sleeve uses planets, galaxies, and starfields, often rendered in a mix of black and grey shading for depth and small dotwork clusters for star detail, to fill the arm with a flowing, cosmic scene. Dotwork’s small dot clusters work especially well here for star fields, since dot density controls brightness without needing actual color. A planet or nebula typically serves as the focal point on the upper arm, with a starfield and dotwork texture filling the rest of the sleeve down to the wrist. Ask your artist about their dotwork experience specifically, since large star-field areas take real patience and a steady hand to look even. Sessions run long given the shading and texture work involved. This theme suits someone wanting a distinctive, atmospheric sleeve concept that stands apart from more traditional themes.
Ocean and Nautical Sleeve
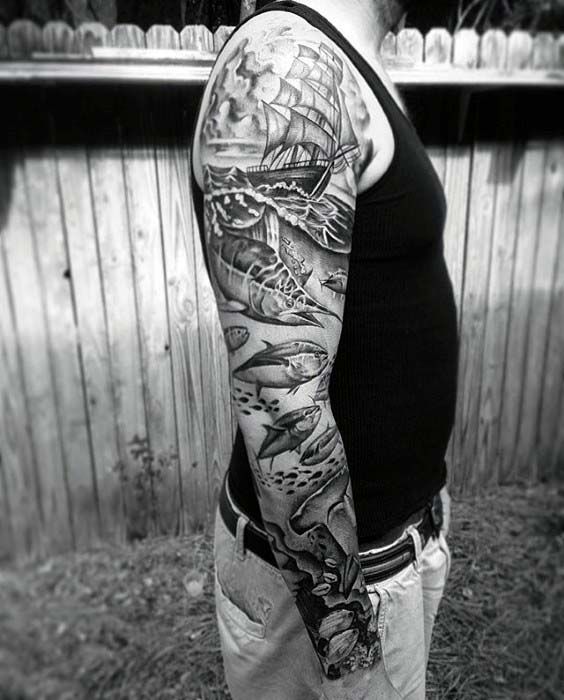
An ocean-themed sleeve combines waves, sea creatures, and nautical symbols like anchors or ships, usually in a mix of bold traditional linework and blue-toned shading to suggest water and depth. Waves typically form the connective background element, flowing from the shoulder down through the forearm, while a focal creature like an octopus or shark anchors the upper arm or elbow area. Ask your artist about wave flow direction specifically, since poorly planned wave lines can make the whole sleeve look static instead of dynamic. Sessions run moderate to long depending on how much shading versus solid color the design uses. This theme suits someone with a personal connection to the ocean or a nautical background, and it works well as a themed sleeve built out gradually with additional sea life added over time.
Family Tribute Portrait Sleeve
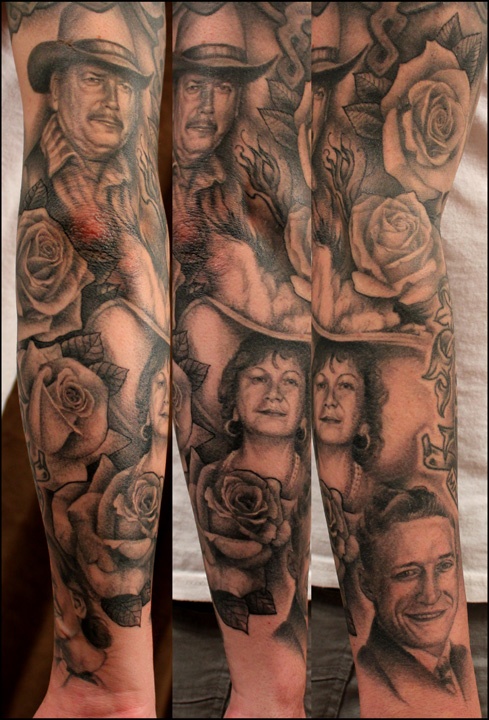
This theme incorporates meaningful personal elements, portraits, names, or symbolic dates, tied together with connecting background elements like florals, clouds, or script, creating a deeply personal rather than purely aesthetic sleeve. Portraits demand an artist experienced specifically in realism, since a poorly executed likeness is one of the most noticeable and hard-to-fix mistakes in tattooing. Keep portrait placement on the flatter, more stable parts of the arm like the upper arm or outer forearm, since curved or highly mobile areas distort facial proportions over time as skin shifts. Ask to see multiple examples of portrait work specifically in your artist’s portfolio, not just their general realism pieces. Sessions run long given the precision required. This theme suits someone wanting the sleeve to carry deep personal meaning rather than a purely decorative theme.
Fine-Line Minimalist Sleeve
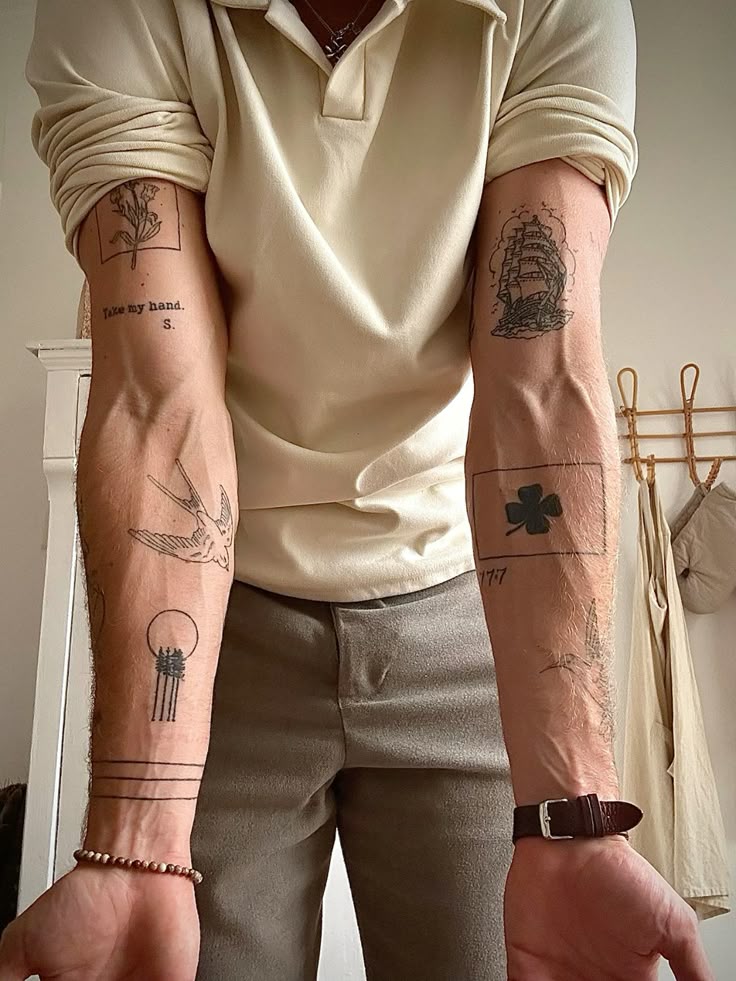
A fine-line sleeve uses thin, delicate needle work throughout, favoring simple linework, small symbols, or botanical elements over bold shading or solid color fill, creating a more subtle, understated version of a full sleeve. This approach needs careful spacing planning, since fine lines have less visual weight individually and can look sparse if the composition isn’t laid out thoughtfully across the whole arm. Ask your artist about overall flow and negative space balance before starting, since minimalist sleeves rely on composition more than any single bold focal piece. Sessions tend to run shorter individually than shaded or colored sleeves, though the cumulative session count for a full arm is similar. This theme suits someone wanting sleeve-level coverage without the bold, heavy look often associated with traditional or realism styles, and it tends to stay more workplace-subtle than bolder alternatives.
Norse and Viking Mythology Sleeve
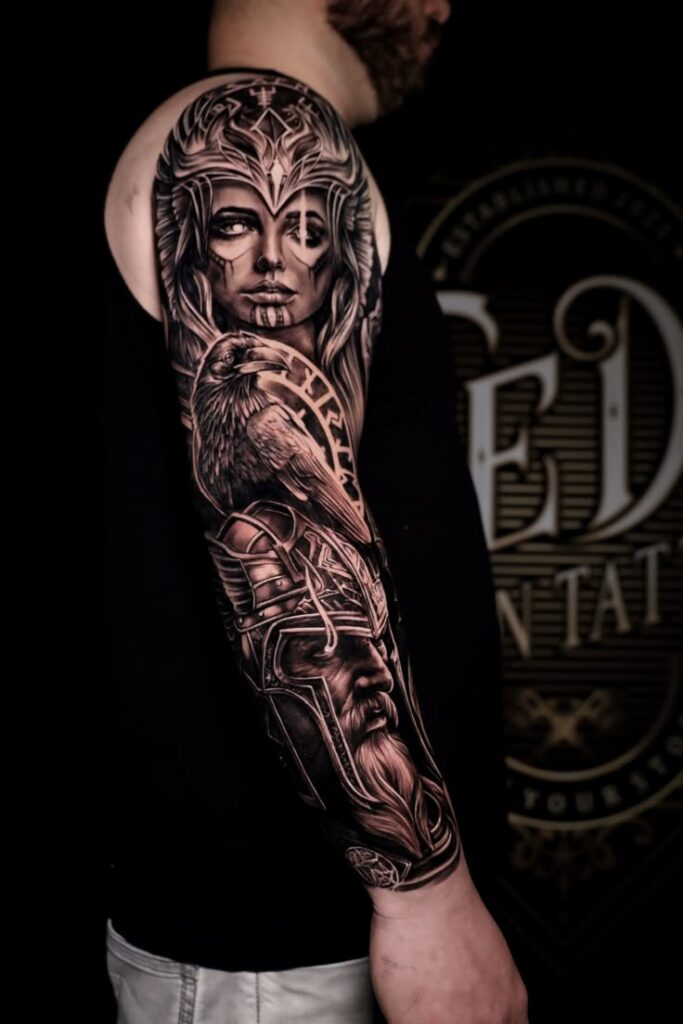
This theme draws on Norse mythology and Viking imagery, wolves, ravens, runes, and knotwork patterns, usually rendered in bold blackwork or black and grey style to match the imagery’s historical weight. A wolf or raven typically anchors the upper arm as the focal image, with knotwork patterns and runic script filling the connecting spaces down toward the wrist. Ask your artist about knotwork accuracy specifically if the patterns carry cultural or symbolic meaning to you, since inconsistent knot patterns are a common and noticeable flaw. Sessions run long given the detail in both the focal imagery and the connective knotwork. This theme suits someone with a specific interest in Norse history or mythology, and it works well as a themed sleeve with real narrative structure built out over several sessions.
Music and Instrument Themed Sleeve
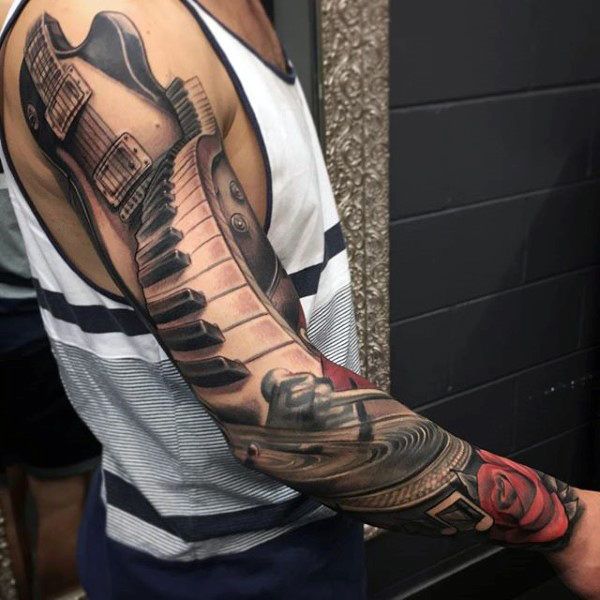
A music-themed sleeve incorporates instruments, sheet music elements, or symbolic imagery tied to a specific genre or personal connection to music, usually blending bold linework with black and grey shading for realistic instrument detail. A guitar, piano keys, or a specific instrument typically anchors the upper arm, with smoke, notes, or abstract sound-wave linework filling the background. Ask your artist to reference the exact instrument model or detail you care about, since generic instrument clipart often looks noticeably different from a specific, personally meaningful reference. Sessions run moderate to long depending on how much realistic shading the instrument itself requires. This theme suits someone with a strong personal connection to music, and it pairs well with additional lyric-inspired script elements layered in over time.
Horror and Occult Sleeve
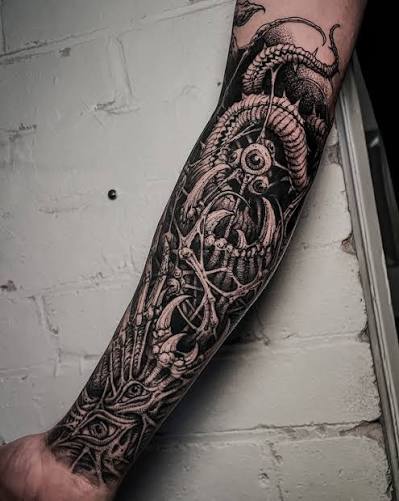
This theme leans into horror and occult imagery, but keeps everything stylized and simplified, silhouettes, symbols, and moody shading, rather than anything explicit or graphic, staying focused on atmosphere over shock value. A single striking focal image, like a stylized creature or occult symbol, anchors the upper arm, with fog, smoke, or darker shading filling the rest of the sleeve. Ask your artist to keep the imagery suggestive rather than literal, which tends to age better and reads as more artistically intentional across a full sleeve. Sessions run long given the shading required to build atmosphere and depth. This theme suits someone wanting a bold, distinctive dark aesthetic, and it’s a serious, long-term project rather than something to start as a first tattoo.
Custom Mixed-Theme Story Sleeve
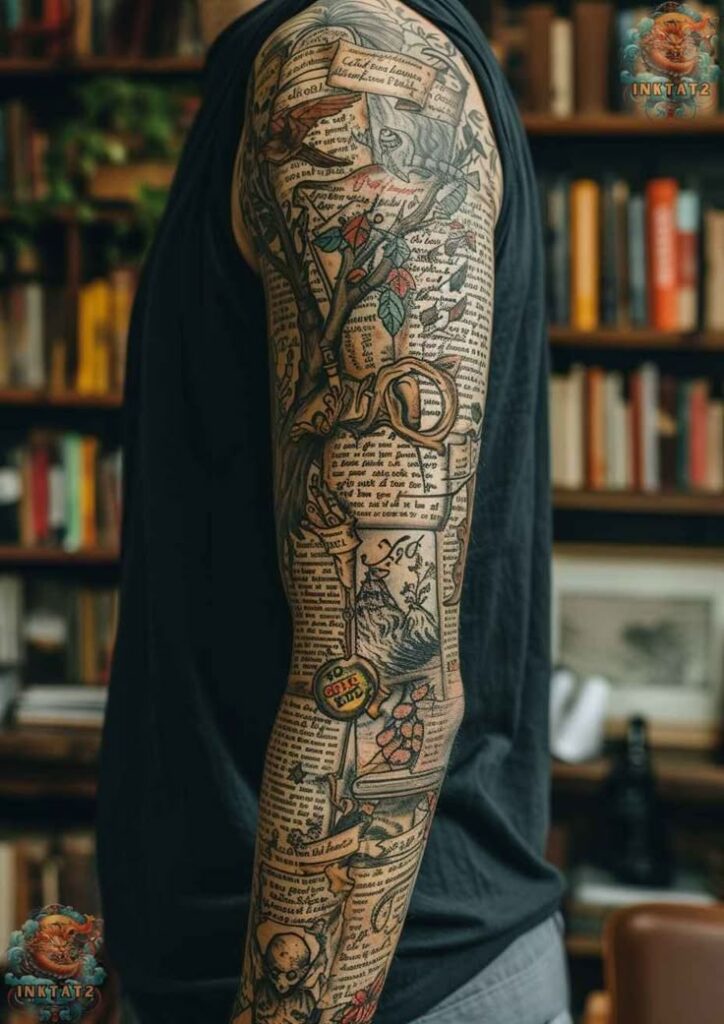
Rather than sticking to one strict theme, a custom story sleeve weaves together several personally meaningful elements, a portrait, a symbol, a landscape, into one flowing narrative connected by consistent shading and background filler. This is the most involved planning process on this list, since every element needs to relate visually and thematically to the next rather than looking like separate tattoos placed side by side. Ask your artist to sketch a full arm layout before the first session even begins, adjustments become much harder once pieces are already tattooed. Sessions run long and numerous given the scope, often the most expensive and time-intensive sleeve option overall. This theme suits someone with a clear personal story to tell and the patience for a genuinely custom, multi-year project rather than a quicker, more templated approach.
Bold Traditional vs. Black and Grey Realism: Knowing the Difference
Bold traditional — Uses thick, consistent outlines and solid color or black fill with minimal shading gradient. Best for sleeves meant to stay high-contrast and hold their shape clearly for decades.
Black and grey realism — Uses diluted black ink to build soft, photographic-style shading and depth. Best for portraits, wildlife, or any design where dimension and detail matter more than bold simplicity.
Blackwork — Uses solid, saturated black ink for geometric or tribal-style patterns with minimal shading. Best for high-contrast, low-maintenance sleeves that rely on shape and negative space.
Neo-traditional — Combines bold traditional outlines with a wider color palette and more illustrative shading. Best for vibrant, storybook-style sleeves that still hold a clean, structured look.
Best Placement Zones Within a Sleeve
- Shoulder cap — highly visible in short sleeves, moderate pain, strong spot for a secondary focal element
- Upper arm or bicep — good muscle padding, moderate pain, the most common spot for a main focal image
- Inner elbow — one of the most sensitive zones in the whole sleeve given thin skin and constant movement, best kept simple
- Forearm — highly visible, moderate pain, ideal for a second focal point or connecting background detail
- Inner forearm — more sensitive than the outer forearm, good for smaller personal elements like script or symbols
- Wrist — highly visible, sharper pain due to thin skin over bone, best for a simple closing element to the sleeve’s composition
Tips for Success
Look for an artist whose portfolio shows full sleeve work specifically, not just isolated pieces, since managing flow, spacing, and consistency across an entire arm is a different skill than executing one strong standalone design. Check healed photos of full sleeves specifically, since that’s the only honest preview of how the whole composition, not just one section, actually settles and ages together. Bring reference images for every major element you want included, along with a rough sense of priority order, since most sleeves get built focal piece first, background filler after. During your consultation, ask directly about session count, total timeline, and whether the artist plans the full sleeve upfront or builds it piece by piece. A good consultation should feel like real collaborative planning, not a rushed booking for a single session.
Common Mistakes and How to Avoid Them
Starting a sleeve with unrelated pieces booked separately over time, rather than a planned composition, is one of the most common regrets, since mismatched styles and inconsistent spacing are difficult and expensive to fix later. Choosing a focal image too large or too small for its zone, like cramming a detailed portrait into the narrow inner forearm, throws off the whole sleeve’s balance. Skipping the artist’s aftercare instructions between sessions can affect how earlier sections heal while later ones are still being added. Copying an entire sleeve concept exactly from a single reference photo without personalizing it to your own body and story often looks disjointed once it’s actually on your specific arm. Rushing into the first session before a full sleeve plan is sketched out is a mistake that’s hard to correct once multiple sessions are already underway.
Similar Variations
Any of the themes above can shift with a few adjustments. Swap a full-color neo-traditional approach for black and grey shading to tone down maintenance and long-term touch-ups. Scale back a full sleeve concept into a half sleeve, stopping at the elbow, if the full commitment feels too large to start. Add a second smaller focal element partway through the project to expand a simpler sleeve into a more layered composition. Recolor a blackwork geometric sleeve with subtle color accents for a more vibrant finish. Combine elements from two themes, like Norse mythology with an ocean motif, into one custom narrative sleeve.
Aftercare Basics
General aftercare guidance includes keeping each newly tattooed section clean and moisturized, avoiding direct sun exposure and swimming while it heals, and not picking at scabbing or peeling skin. Loose, breathable clothing over the arm reduces friction during the first one to two weeks after each session, which matters even more with a sleeve given how many sessions the arm goes through over time. Every studio provides a specific aftercare sheet tailored to their preferred products and your particular piece, and that sheet should always take priority over generic advice found online. If you notice unusual redness, swelling, or discharge beyond normal healing, check with a licensed dermatologist rather than waiting it out. Pain tolerance and healing speed vary by individual, so the timelines here are general estimates rather than guarantees.
Quick FAQ
How much does a full sleeve tattoo cost? A complete sleeve typically runs from around one thousand to several thousand dollars depending on style, detail, and number of sessions, since most sleeves take anywhere from 20 to 60 or more total hours of tattooing. Always get a direct quote and session estimate from your chosen artist rather than relying on general online averages.
How many sessions does a full sleeve take? Most full sleeves take somewhere between 6 and 15 sessions depending on detail level and the artist’s pace, with each session often running 2 to 4 hours. More detailed styles like realism or biomechanical designs generally need more sessions than bold traditional or blackwork.
Does a full sleeve hurt more than smaller tattoos? The pain itself isn’t necessarily worse per square inch, but the cumulative time spent in the chair across multiple long sessions makes a full sleeve a bigger overall endurance test. Certain zones, especially the inner elbow and wrist, consistently rank as more sensitive than the upper arm or outer forearm.
How long does a full sleeve take to fully heal? Each individual session heals on the surface within about 10 to 14 days, though full healing beneath the skin can take up to a month per session. Since sleeves are built over multiple sessions spaced weeks apart, the entire process from first sitting to fully healed final piece often stretches out over several months to a year or more.
Men’s full sleeve tattoo ideas work best when the whole arm is planned as one composition from day one instead of a collection of separate pieces added over time. The right theme comes down to matching a technique you’ll still love a decade from now with an artist who has real experience managing a project this size. Take the placement and session notes above into your first consultation, ask the questions that matter, and let a licensed professional help you build a men’s full sleeve tattoo that reads as one cohesive piece from shoulder to wrist.