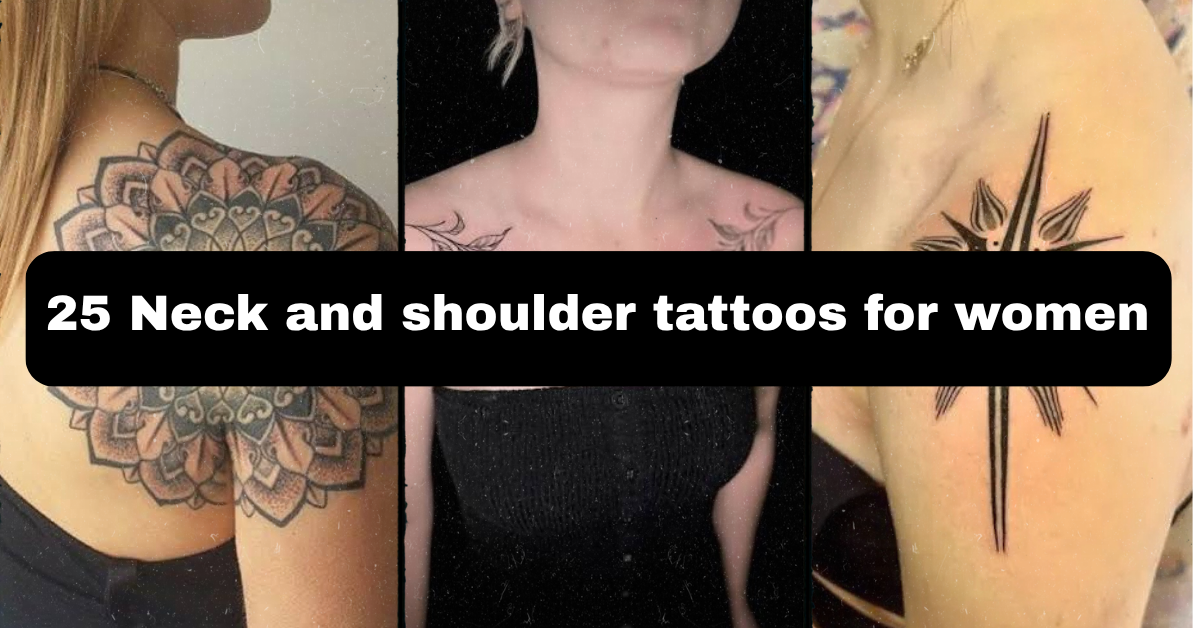
25 Neck and Shoulder Tattoos for Women: A Real Guide to Placement, Pain, and Design
Nervous about picking a design you’ll regret in five years? You’re not alone — neck and shoulder placements are visible, semi-permanent decisions, and it makes sense to research before you sit in the chair. This guide pulls from real studio experience and current tattoo trends, not just a scroll through someone’s saved images.
So what are the best neck and shoulder tattoos for women? Fine-line florals, small symbols behind the ear, script along the collarbone, and blackwork designs wrapping the shoulder cap all work well because these areas have smooth, visible skin that shows off detail and heals predictably when sized and placed correctly.
Stick around, because I’m also breaking down pain levels by exact spot, realistic healing timelines, what these designs actually cost, and how to brief your artist so you don’t end up with a stencil that doesn’t fit your body.
Why the Neck and Shoulder Work So Well for Tattoos
The neck and shoulder region is one of the more forgiving canvases on the body for a simple reason: the skin is relatively flat and stretches less than areas like the ribs or ankle, which means linework holds its shape better over time. Shoulders offer a broad, curved surface great for larger blackwork or watercolor-style pieces, while the neck’s smaller, more delicate zones suit fine-line or single-needle work — a technique using one small needle to create thin, precise lines instead of a grouped needle cluster. Because both areas are easy to see in the mirror and easy to hide with hair or clothing, they give you flexibility that ribs or thighs don’t.
1. Fine-Line Floral Vine Along the Collarbone
A thin vine with small leaves and one or two blossoms traces the collarbone using single-needle technique, keeping line weight under 0.5mm so the design reads as delicate rather than heavy. Shading is minimal or absent — most of the visual interest comes from negative space (the untattooed skin left intentionally blank) between petals. Best placement is directly along the bone, sized 3–5 inches long. Collarbones are bony with thin skin, so expect moderate-to-sharp discomfort. Bring a reference photo of vine curvature you like, not just a flower. Healing runs about two weeks. This works great as a first tattoo since it’s low-commitment and easy to conceal with a collared shirt.
2. Blackwork Sun Motif on the Shoulder Cap
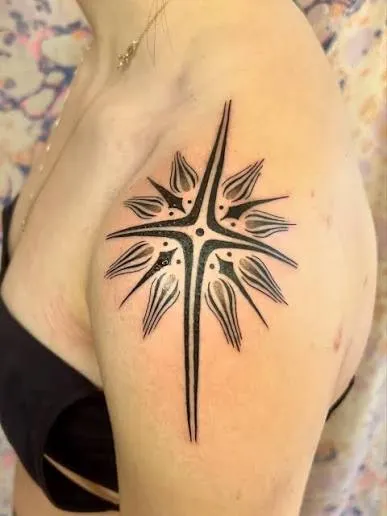
The rounded top of the shoulder is ideal for a bold blackwork sun — solid black fill, thick outer rays, and high contrast against skin tone. Blackwork uses saturated black ink packed densely, unlike fine line’s thin open strokes. Size around 3–4 inches suits the natural curve without distorting on movement. Pain here is moderate; the deltoid muscle cushions the needle better than bone. Ask your artist about “wrap” placement so the design follows your shoulder’s curve rather than sitting flat. This design ages well over decades because solid black holds saturation longer than fine gray shading, which can migrate or blur over 10+ years.
3. Dotwork Mandala Behind the Shoulder
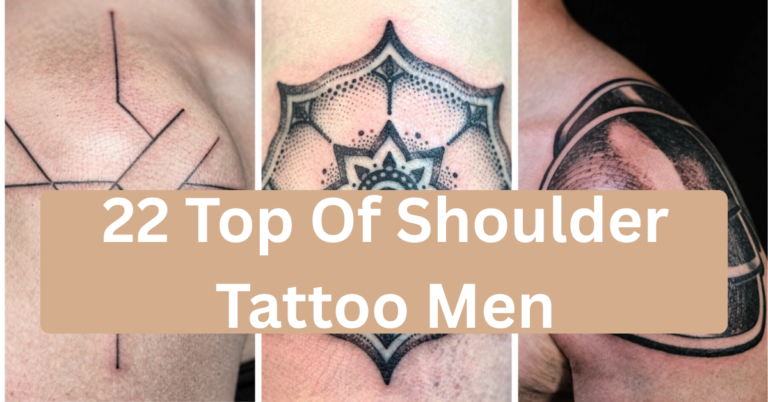
Dotwork builds an image entirely from small dots rather than continuous lines, creating soft gradients and intricate geometric patterns — perfect for a mandala design on the back of the shoulder. This technique takes longer in the chair (often 3+ hours for a 4-inch piece) since every dot is placed individually. Pain is moderate on fleshy shoulder tissue. Because the design is subtle in a low-visibility spot, it’s great for workplaces with tattoo policies. Request a stencil test on paper first — dotwork density is hard to picture from a flash sheet alone. Healing takes about 2–3 weeks due to the ink saturation across a wide area.
4. Minimalist Star Cluster Behind the Ear
Three or four tiny single-needle stars behind the ear create a whisper-quiet design, each star under a centimeter wide with no shading. This spot has thin skin over cartilage-adjacent bone, so it’s one of the more sensitive placements on this list — expect a sharp, quick sting rather than a dull ache. Because it’s easily hidden by hair, it suits anyone easing into their first tattoo or working in a conservative office. Ask for extra-fine needle configuration (a 1RL or single round liner) to keep the stars crisp instead of blotchy. Healing is fast, usually 10–14 days, since the area is small.
5. Bold Traditional Rose on the Upper Shoulder
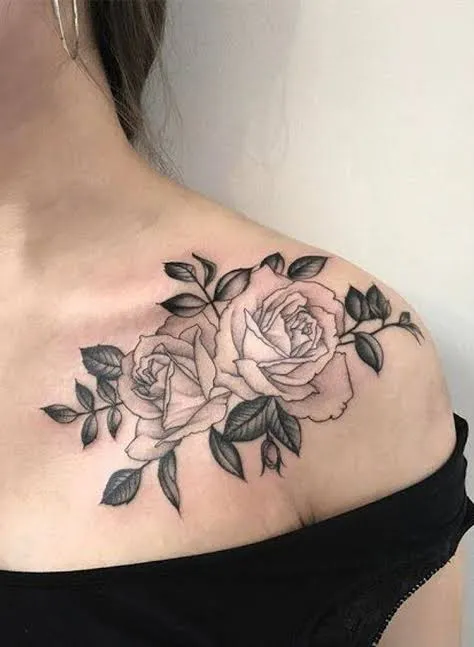
Traditional American-style tattooing uses thick black outlines, limited color palette (often red, yellow, green), and heavy shading for a rose that reads clearly even from a distance. Unlike fine-line florals, this style is built to last — bold lines resist the natural blurring that happens to skin over 15–20 years. Best sized 3–4 inches on the meaty part of the upper shoulder, away from bone. Pain sits at moderate. Bring reference images showing color saturation you want, since traditional work can range from muted vintage tones to vibrant modern palettes. This design suits anyone wanting a statement piece with real staying power.
6. Script Quote Along the Shoulder Blade
Cursive script tattoos rely entirely on clean, consistent line weight — a wobble in the linework is far more noticeable in text than in florals. Placing a quote diagonally along the shoulder blade uses the body’s natural lines to keep lettering readable when standing normally. Keep it under 8 words; longer scripts lose legibility as skin ages and stretches slightly. Pain is mild to moderate over the blade, sharper near the spine. Ask your artist to hand-letter a custom font rather than tracing a generic script flash design — it’ll fit your body better and look less generic.
7. Negative Space Geometric Triangle on the Nape
Negative space design uses the untattooed skin itself as part of the image, often outlining a shape with a solid black border and leaving the interior blank. A geometric triangle at the nape of the neck, right below the hairline, looks sharp and modern. This spot is easily hidden with hair down, making it a solid “workplace-safe” option. Pain here can be sharp since skin is thin over the cervical spine area. Keep the design simple — intricate negative space patterns often blur together at small sizes. Healing takes about two weeks; avoid tight collars during recovery.
8. Watercolor-Style Floral Splash on the Shoulder

Watercolor tattoos mimic paint bleeding across paper using soft color gradients without hard black outlines, which creates a dreamy, artistic look but comes with a tradeoff: color saturation fades faster than blackwork over the years, often needing a touch-up around the 5–7 year mark. A floral splash across the outer shoulder, roughly hand-sized, takes advantage of the flat skin surface for even color application. Pain is moderate. Choose an artist whose portfolio specifically shows watercolor healed photos, not just fresh ones — healed results look different from day-one photos.
9. Single Symbol on the Side of the Neck
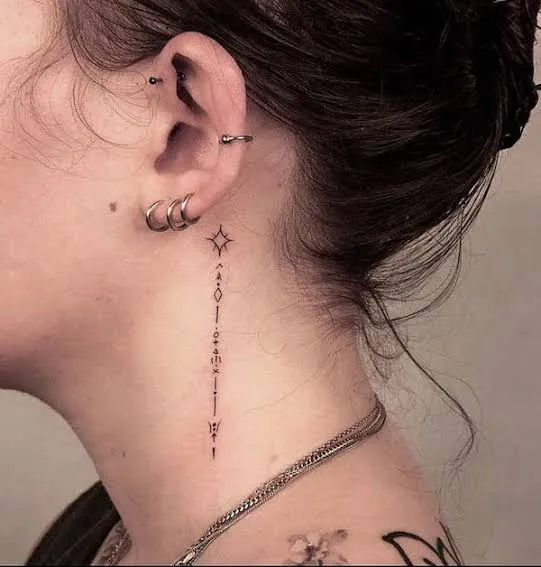
A small symbol — an arrow, a moon phase, an infinity loop — placed on the side of the neck below the ear makes a quiet but visible statement. Single-needle linework keeps it delicate, usually under 2 inches. This is one of the more painful neck spots since skin is thin over muscle and nerve-dense tissue, so be ready for a stronger sensation than shoulder placements. It’s highly visible, so think through workplace and family reactions before booking. Ask for a stencil placement check in a mirror from multiple angles since neck curves distort perception of symbol symmetry.
10. Bold Blackwork Wing Spanning the Shoulder and Collarbone
A single stylized wing done in bold blackwork can stretch from the shoulder cap toward the collarbone, using varying line weight — thicker at the base, tapering fine at the feather tips — to create movement. This is a larger commitment, often 4–6 inches, and typically requires multiple sessions for full saturation. Pain varies across the piece since it crosses bony and fleshy areas. This design ages better than fine detail because the bold structure holds up even as skin naturally loses elasticity. Great for someone wanting a bold, memorable piece rather than something subtle.
11. Fine-Line Constellation Across the Collarbones
Small dots connected by thin single-needle lines mimic a constellation stretched across both collarbones. Keep dot size and line weight consistent for a clean astronomical look rather than a scattered mess. Pain is sharp given the bone proximity, similar to placement #1. This design works beautifully for symbolic tattoos tied to birth charts or meaningful dates. Bring your actual star chart data to the consultation so your artist can plot it accurately instead of guessing at a generic pattern. Healing takes roughly two weeks; avoid underwire bras rubbing the area during recovery.
12. Matching Small Symbols for Friends or Sisters
Neck and shoulder spots work well for matching tattoos since both parties can choose a placement that suits their own visibility comfort — one behind the ear, one on the shoulder, same tiny symbol. Keep the design under an inch with simple single-needle work so it ages consistently for both people. Pain and healing depend on each person’s specific placement choice. This solves the desire for shared meaning without requiring identical exposure or workplace risk. Discuss with your artist about slight customization (initials, dates) so the matching tattoos still feel personal rather than copy-pasted.
13. Bold Traditional Anchor on the Shoulder
A classic anchor with thick black outlines and limited color shading suits the shoulder’s broad surface and holds its crisp look for decades better than fine detail would in the same spot. Size it 3–4 inches for the linework to stay legible long-term. Pain is moderate on fleshy shoulder tissue. This design suits people who want something with a vintage, tried-and-true feel rather than a delicate modern look. Ask about “line confidence” in your artist’s portfolio — bold traditional work lives or dies on clean, unwavering outlines.
14. Dotwork Shading Behind the Collarbone Curve
Instead of a full mandala, some women prefer just a soft dotwork shadow tucked under the collarbone curve — no distinct image, just gradient texture that catches the light. This is a more abstract, artistic choice. Pain is sharp given the bone. It’s a good option if you want texture without a literal image. Ask your artist to test dot density on a small test patch first, since spacing affects how soft or harsh the gradient reads once healed.
15. Fine-Line Butterfly on the Side of the Neck
A small butterfly rendered in thin, uninterrupted lines works well on the side of the neck when kept under 2 inches — bigger sizes start losing wing detail as skin curves away from view. This spot heals visibly for the first two weeks, so plan around events. Pain is sharp to moderate. Fine-line butterflies read as soft and feminine without needing color, which also means less long-term fading risk compared to colored versions.
16. Blackwork Geometric Band Around the Upper Arm and Shoulder Seam
A geometric band tattoo, sometimes called an armband style, wraps where the shoulder meets the upper arm using solid black shapes and clean negative space breaks. This placement takes advantage of natural curvature so the pattern appears continuous when the arm hangs naturally. Pain is moderate. This works well as a bold statement piece that’s easy to cover with short sleeves for work, yet strikes hard in sleeveless outfits.
17. Custom Name or Date in Small Script on the Shoulder
Placing a name, date, or short word in small script on the outer shoulder blends visibility with modesty — visible in tank tops, hidden under sleeves. Keep letters at least a quarter-inch tall; anything smaller often blurs together after several years as ink settles slightly under skin. Pain is mild here compared to bony spots. Bring a written sample of the exact font and spacing you want rather than describing it verbally.
18. Bold Blackwork Crescent Moon and Stars on the Shoulder
A thick crescent moon paired with a few small solid stars gives a clean, bold night-sky look without needing color. The solid black fill contrasts well against most skin tones and holds shape better over time than fine line would at the same size. Pain is moderate. This suits someone who wants symbolism (new beginnings, femininity, night themes) with a design bold enough to still look sharp after a decade.
19. Fine-Line Feather Trailing Down the Neck
A single feather with thin linework trailing from behind the ear down toward the neck’s side creates a graceful, flowing look. Keep shading minimal — heavy shading in this thin-skin zone tends to blur faster than in fleshier areas. Pain is sharp given the proximity to nerve-dense tissue. This design pairs well with long hairstyles that can reveal or conceal it depending on the day.
20. Watercolor Sunset Wash on the Shoulder Cap
A soft gradient of orange, pink, and purple ink blended into the shoulder cap mimics a watercolor sunset. Because color-heavy work fades faster than solid black, expect to schedule a touch-up appointment within several years to keep saturation vibrant, according to general aftercare consensus among colored-ink tattoos. Pain is moderate. This is a strong choice for someone prioritizing color and mood over long-term crispness.
21. Dotwork Snake Wrapping the Shoulder
A snake rendered in dotwork shading, its scales built from varying dot density rather than solid lines, wraps naturally around the curve of the shoulder. This takes real technical skill — ask to see healed (not just fresh) dotwork photos in the artist’s portfolio before booking. Pain is moderate to sharp depending on exact positioning. This design suits those wanting texture and symbolism (transformation, protection) without heavy black saturation.
22. Tiny Negative Space Moon Phases on the Collarbone
A row of small moon phases, each outlined simply with the interior left blank, sits neatly along the collarbone. This is a subtler cousin of the constellation idea (#11), focusing on lunar symbolism instead of stars. Pain is sharp near bone. Keep spacing even — ask your artist to mark placement dots first so the row doesn’t skew as it wraps toward your shoulder.
23. Bold Blackwork Floral Cluster on the Back of the Shoulder
Thick-outlined flowers with solid black fill in the petals, placed on the back of the shoulder, create a graphic, almost stamp-like look distinct from delicate fine-line florals. Size around 3 inches. Pain is moderate on this fleshier back-shoulder zone. This design ages well since bold shapes resist the softening effect fine detail experiences over many years on skin.
24. Fine-Line Bird in Flight Across the Upper Chest to Shoulder

A small bird, wings mid-flap, drawn with thin uninterrupted lines flows naturally from the upper chest toward the shoulder, following the body’s slope. Keep it under 3 inches so wing detail doesn’t get lost. Pain is mild to moderate across this route. This works as a meaningful “freedom” or “moving forward” symbol without demanding a large, bold statement.
25. Custom Blackwork Sleeve Cap Combining Multiple Small Symbols
For someone ready for a bigger piece, combining several smaller symbols (a star, a flower, a line pattern) into one cohesive blackwork “cap” over the shoulder creates a custom, story-driven tattoo rather than a single flash design. This requires real planning — expect a longer consultation and possibly multiple sessions. Pain varies across the piece. This is best for someone who has already tested their pain tolerance with a smaller tattoo first.
Best Placement Ideas
- Behind the ear — high concealment with hair, sharper pain due to thin skin, best for tiny designs under 2 inches
- Collarbone — highly visible in most tops, sharp pain near bone, great for script and delicate linework
- Side of neck — very visible, sharpest pain on this list, best reserved for small symbolic pieces
- Shoulder cap — moderate pain, easy to cover with sleeves, ideal for bold blackwork or larger custom pieces
- Nape of neck — easily hidden with hair down, moderate-to-sharp pain, suited to small geometric or negative space designs
- Shoulder blade — moderate pain, good surface for script or larger flowing designs following body lines
Tips for Success
Look for an artist whose portfolio shows multiple healed photos of the exact style you want, not just fresh ink under wrap. A fine-line specialist and a bold blackwork or traditional artist often have very different skill sets, so match the artist to the technique, not just their overall reputation. Bring reference images, but be upfront that you want a custom design adapted to your body’s curves rather than an exact copy of someone else’s tattoo — a good artist will actually encourage this. Ask directly about needle configuration, expected number of sessions, and their approach to touch-ups within the first year.
Common Mistakes and How to Avoid Them
- Going too small for detail — intricate mandalas or constellations need enough room to hold their linework as skin ages; ask your artist what minimum size keeps the design legible long-term
- Ignoring placement geometry — a straight-line design on a curved shoulder can distort; discuss how the stencil will wrap before the needle starts
- Skipping aftercare instructions — this is one of the most common causes of patchy healing and color loss
- Copying a design exactly — small personal tweaks (spacing, size, added symbol) keep the tattoo meaningful and original
- Booking a walk-in for a highly custom piece — walk-in flash designs are great for simple, pre-drawn work, but custom pieces need a proper consultation
Similar Variations
Nearly every design above can shift dramatically with small changes. A fine-line floral can become bold traditional by thickening the outline and adding color fill. A blackwork symbol can shrink into a dotwork version for softer texture, or scale up into a full shoulder cap piece. Matching tattoos can use the same base symbol but vary placement per person. Watercolor pieces can be redone in solid blackwork later if fading becomes a concern down the line.
Aftercare Basics
General aftercare guidance — always confirm specifics with your artist — typically includes keeping the area clean, avoiding direct sun and swimming during initial healing, not picking at peeling skin, and using a fragrance-free moisturizer as recommended by your artist. Healing timelines above are general estimates; individual healing varies based on skin type, aftercare routine, and design size. Always follow the specific aftercare sheet your artist provides, and consult a dermatologist if you notice unusual redness, swelling, or irritation beyond normal healing.
Quick FAQ
How much do neck and shoulder tattoos cost?
Small single-needle designs often start around $80–150, while larger custom blackwork or multi-session shoulder pieces can run several hundred to over a thousand dollars depending on size, color, and the artist’s hourly rate.
How painful are neck and shoulder tattoos?
Pain varies by individual and exact spot — bony areas like the collarbone and side of the neck tend to feel sharper, while fleshier shoulder areas are generally more tolerable, according to general consensus among tattoo professionals.
How long does healing take?
Small designs typically heal in about 10–14 days, while larger or color-heavy pieces can take closer to three weeks for the surface to fully settle, though full healing under the skin takes longer.
Do these tattoos fade or need touch-ups?
Bold blackwork and solid linework tend to hold saturation longer than fine detail or watercolor styles, which may need a touch-up after several years to stay crisp — this is normal and worth discussing with your artist upfront.
Fine Line vs. Bold Traditional vs. Blackwork vs. Dotwork
- Fine line / single needle — thin, delicate strokes made with one small needle; best for minimalist symbols, script, and detailed small designs
- Bold traditional — thick black outlines with limited color, built for long-term visual durability rather than fine detail
- Blackwork — solid, saturated black fill used for graphic shapes, bands, and high-contrast designs
- Dotwork — images built from individually placed dots, creating soft gradients and texture rather than continuous lines
Choosing between these styles matters more than picking a pretty picture — the technique determines how your tattoo will actually look on your specific skin in ten years, not just tomorrow.
Final Thoughts
Picking from these neck and shoulder tattoos for women isn’t just about finding a cute picture — it’s about matching technique, placement, and size to your skin, your pain tolerance, and how visible you actually want this piece to be at work, at home, and years down the road. Take your time, talk honestly with a licensed professional about what’s realistic for your specific idea, and remember that a good tattoo is a collaboration, not a copy-paste job. Whatever direction you land on, the right neck and shoulder tattoo is the one built specifically around you.